How to install a sink in the kitchen: installation rules for mortise and freestanding models

The type of sink and its location largely determine the convenience of cooking and the comfort of the entire kitchen. This is not only a functional subject, but also part of the design of the room. Therefore, the choice of a kitchen sink must be approached with all responsibility.
We will help you determine the optimal model and tell you where it is better to place it. And also describe how to install a sink in the kitchen without the help of specialists. Installation technology is quite simple, the main thing is to adhere to the rules and requirements outlined in the article.
The content of the article:
Types of sinks for the kitchen
One of the key aspects in the installation is the type of sink, which implies a certain design and mounting device:
- mortise - are installed in a specially prepared connector in the countertop, cut to the size of the sink;
- waybills - inexpensive and easy to install models are superimposed on a freestanding cabinet.
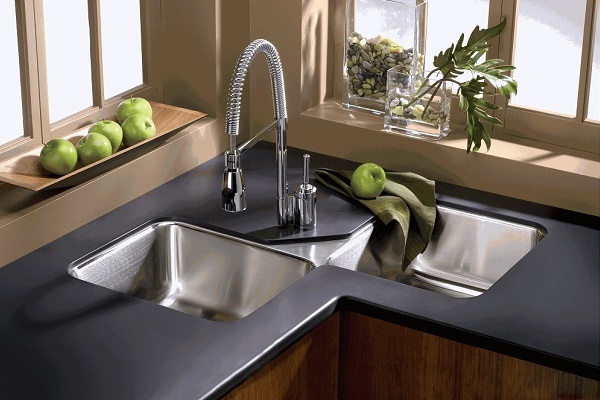
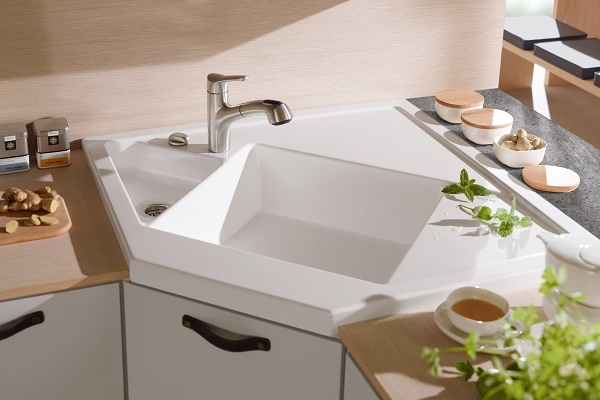
According to the type of arrangement relative to the countertop, kitchen sinks are divided into desktop, table and wall mounted.
The first is mounted below the level of the work surface. The latter are mounted on hinged brackets, rarely used due to low aesthetics.
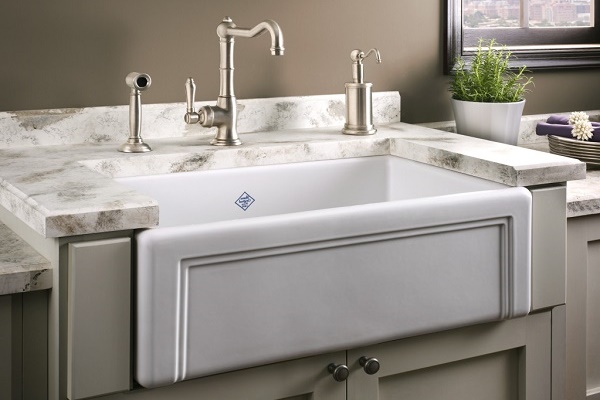
It is also worth paying attention to the material from which a particular model is made. The cost of the product and its appearance depend on this.
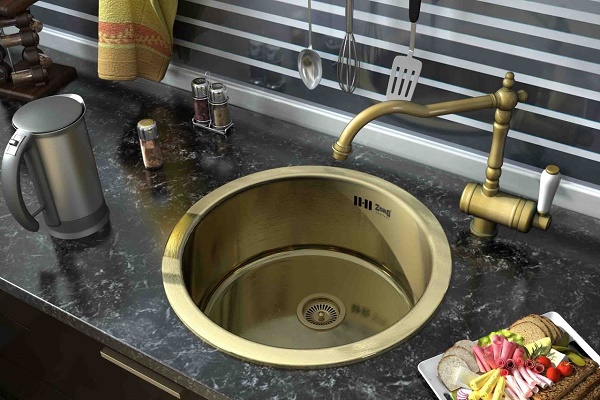
For the kitchen, practical stainless steel options are most often chosen, including chrome or nickel plated models.
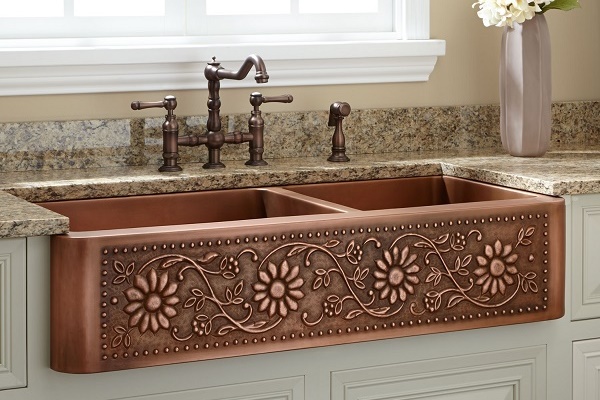
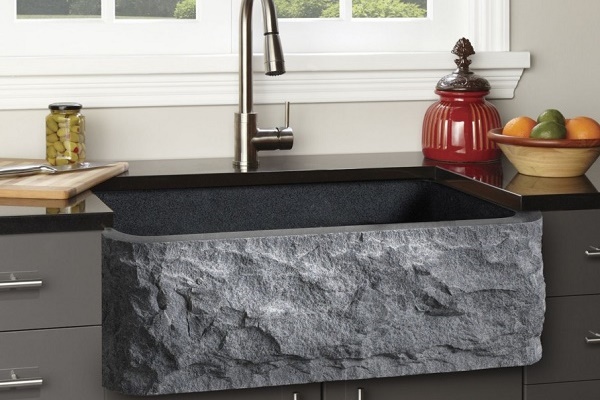
More expensive - ceramic sinks, granite, granite, glass.
Spectacular look have stone models - natural or artificial. The first ones are very massive and it is difficult to install them yourself.
Composite shells have a granular structure that is very similar to polished stone. Such models are quite expensive and they are more fragile. If you drop something heavy in such a sink, a chip may appear.

Criteria for choosing a kitchen sink
It is worth paying attention to the following characteristics of the sinks:
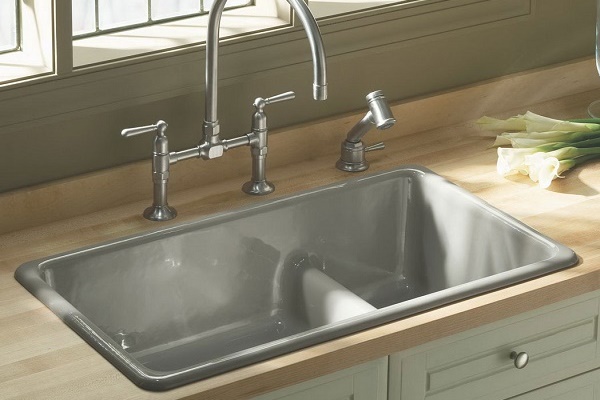
- Functionality. Depends on the nature of the work in the kitchen. The number of bowls and wings for drying - additional compartments allow for several manipulations at the same time, which is very convenient for bulk cooking.
- Spaciousness.Depends on the daily amount of dishes to be washed.
- The combination with the interior. An acrylic white sink does not always fit harmoniously into the design of the kitchen, so it is important to choose a model that is suitable in texture so as not to violate the integrity of the kitchen space.
Modern models can be equipped with automatic valves for adjusting the drain, as well as bends for connecting dishwashers and washing machines.

If you will install the unit filters for washing, then you can pay attention to the model with an additional hole for the second crane. Of course, it can also be done with a drill by drilling a through hole in the countertop.
Where better to install the sink
Before performing installation, you need to take into account a few simple rules that will make the operation process more ergonomic. It is customary to arrange the kitchen interior in a certain order to facilitate the work process: refrigerator, sink, dishwasher, stove and work surfaces located between them.
For convenience, the minimum distance between objects should be as follows:
- 40 cm between the stove and the refrigerator;
- 40 cm between the sink and the fridge / stove.
Do not install the sink near the hob. Water spray can extinguish a flame and cause a gas leak. Near the sink there must be a working area where you can cut, cut and clean products.
If you will carry the same vegetables and fruits through several tables, then soon everything around will be splashed with drops of flowing water.

With the help of a sink, the kitchen can be divided into two zones, for example, for dirty work and serving.
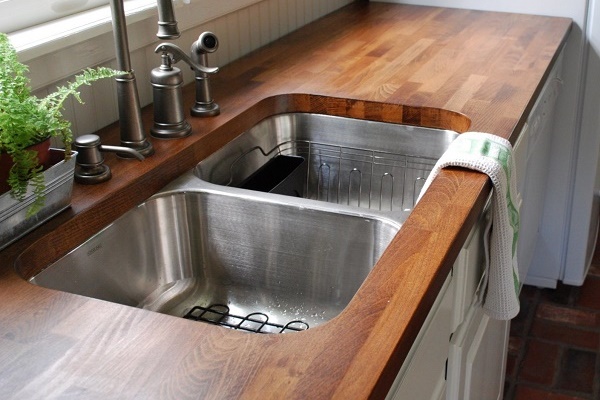
Installation of mortise sinks
The most important part of this installation method is not even the cut-out and its cut, but the quality of the joints between the sink and countertop. Of course, the niche should be as flat as possible and fit the size of the sink.
High-quality work will save you from the hassle in the future caused by the swelling of the countertops from excess moisture.

There is a direct correlation between the complexity of the installation process and the dimensions of the sink. The larger the dimensions of the bowl, work surface and additional departments, the more difficult it is to manipulate the sink during operation. But with a competent approach, using the advice of professionals, you can count on an excellent result.
The installation of a kitchen mortise sink consists of a number of traditional steps:
What will be needed in the process of work
Having chosen the optimal sink for the kitchen interior, you can proceed with installation. First you need to stock up with all the necessary tools.
During the installation you will need:
- sealant - preferably with a spray gun;
- electric drill;
- mounting knife, screwdriver and adjustable wrench;
- jigsaw;
- measuring instruments - pencil, ruler and tape measure.
In addition, you will need several 10-12 drills and a cardboard box.
Marking line
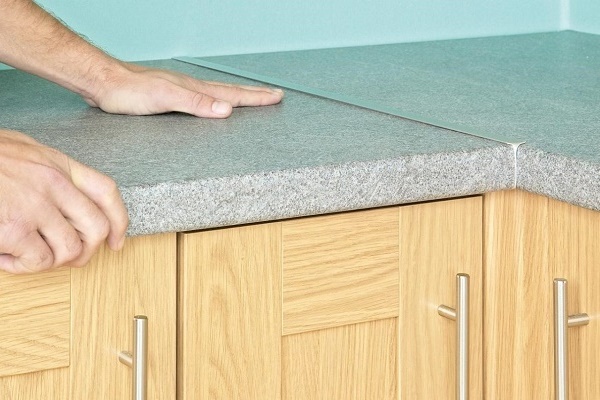
So, before us is a clean wooden tabletop, in which you need to cut a niche for the dimensions of the sink. We start with the markup, determining the center of the sink on the countertop. It is necessary to determine the lines of symmetry in order to expose the sink symmetrically to other pieces of furniture in the kitchen.
After that, we draw the outline of the product on the countertop itself. The circuit should have a perimeter that is comparable to the widest part of the sink, recessed under the countertop.
To create a contour, you can use a cardboard blank, which will serve as a pattern for drawing a contour on the countertop. This is the best option that will give high accuracy.

The cutout should be located at least 5 cm from the front edge of the countertop and 2.5 cm from the back. These recommended values may vary in practice, but it is best to stick with them so that the kitchen does not lose its integrity and strength.
This washing arrangement is convenient and practical, as water splashes do not fly to the floor, and the back does not get tired while washing dishes.
How to carve a niche?
Next, you need to drill 4 through holes using a drill for the size of the jigsaw blade. The holes should be close to the cut line, but not extend beyond the perimeter. Now, along a line strictly marked with a pencil, cut a niche from the front of the countertop.
During the sawing process, several self-tapping screws must be screwed into the resulting slot from different sides as they are cut. This will prevent the inside of the countertop from falling, which can damage the coating and form long nicks.
To enter the jigsaw we use drilled holes. After complete sawing, the cut mass will be held on self-tapping screws. It is necessary to remove the screws in turn, holding the plate from the bottom. The slice must be freed from sawdust by sanding it with fine-grained sandpaper.

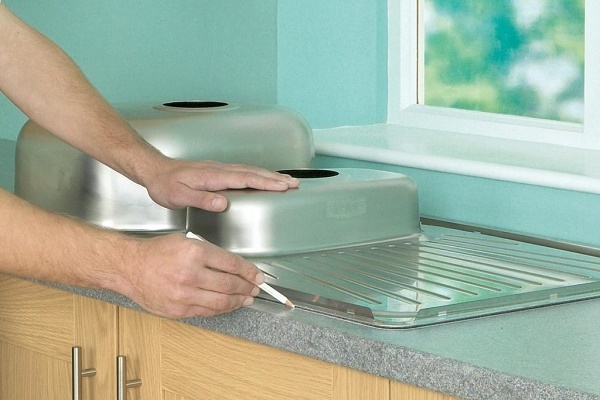
Now you can make a test immersion of the sink in a niche. Please note that the sides of the product should be close enough to the walls of the cut. A slight backlash is allowed, as the sink should fit freely into the cutout.
Places that interfere with complete immersion should be filed with a jigsaw. You should also think in advance about how the connection to the mixer, siphon and the tap itself will be placed.
Phased installation of plumbing
First you need to install the complete mounts, which are used to fix the product. A layer of sealant is applied to the edges of the countertop (to cut), which will protect the wooden surface from moisture and prevent the tree from swelling.
To do this, you can use a rubber spatula or smear the adhesive mass with a finger. Chipped on plastic (tabletop coating) around the saw are also smeared.

A seal made of foamed polyethylene, which is glued on the back of the sides of the sink, often comes with sinks.
If, after fixing, the sealant protrudes slightly beyond the sides, then it must be carefully cut with the sharp end of the mounting knife. If this is not done, then the protruding sealant will not allow the fixtures to press the sink well enough to the base.
After that, you need to degrease the surface of the countertop and sealing polyethylene. Use a rag soaked in acetone or gasoline. A sealant layer is applied with a continuous strip of sealant, but do not get too carried away with the thickness of the strip.
Plumbing manufacturers often put double-sided tape in the kit, which serves as an additional gasket between the two surfaces, increasing tightness. It is glued on the edges of the countertop, and a layer of sealant is applied on top of it.
In practice, they often do without a sealant. As a substitute, a sealant is used, which fills the entire space intended for foamed polyethylene.
Next, install the sink in the countertop, firmly pressing its edges.This will allow the sealant to fill all voids, creating a tight and sealed barrier.

But this method also has its drawbacks: the high consumption of sealant (increases the time of complete drying), as well as the extremely laborious process of dismantling in case of unsuccessful installation or the need to replace the sink in the future.
Leveling and fixing the sink
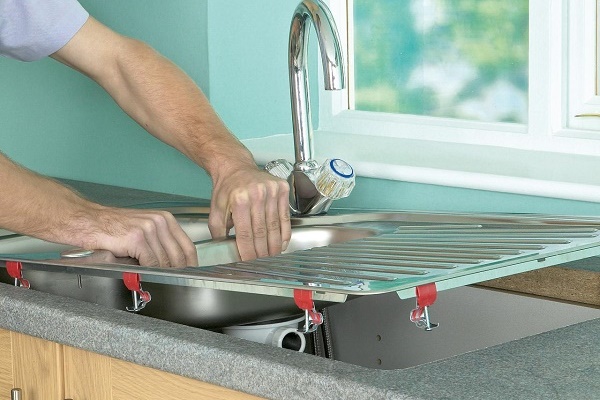
The sink is inserted into a niche and is aligned with the markup. Take a few fasteners (2-4 is enough) and at an equidistant distance from each other we begin to fix the sink, gradually tightening the screws.
In the process, we constantly monitor the position of the shell relative to the markings. Do not use a screwdriver so as not to break the plastic threads on the fasteners. After making sure that the sink has taken the correct position, we tighten the fastenings on the screws diagonally.

So that the metal studs of the fasteners penetrate deeper into the surface of the countertop, you can pre-grind them using a file, and also lightly tap them with a hammer during the final tightening of the screws. As you tighten, the sink is pressed against the countertop.
Relative evidence that the sink is firmly pressed to the base can serve as a protruding sealant. Its excess, as well as residual markings, are removed with a dry cloth.
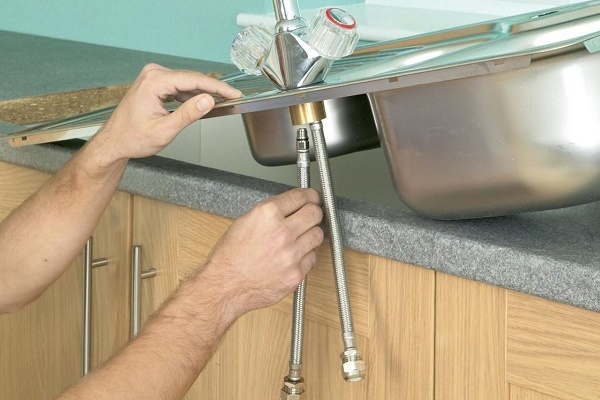
The design must be left for a day until the adhesive has completely dried and crystallized. Only then can you proceed to mixer installation and connecting the sewer.
Installation of a freestanding sink
The overhead sink is mainly held on the pedestal using its own sides, which protrude beyond the base. These models also differ in the availability of space for drying, the number of bowls, size and shape.

Installing a sink of this type in the kitchen is much simpler compared to the previous method. The main difference is the lack of the need to make a cut, which is the most time-consuming part of the process. Several installation methods are used.
Mount on glue. The overhead sink is installed on a special cabinet, which along the perimeter should be smaller than the sink. The sides of the shell should completely cover the edges of the cabinet. The ends of the substrates are treated with a sealant based on silicone or polypropylene.
After that, the product is placed on the pedestal and pressed tightly along all sides. After a few days, a completely sealed layer is created, which will not allow water to leak under the cabinet.
When installation work is completed, you can begin to connect to the sewer - siphon installation.
Mounting on mounting brackets. In some cases, special fasteners are sold along with the sink. First, self-tapping screws are braided into the inner walls of the cabinet, on which the brackets are suspended. Then the screws are screwed onto ¾. After that, the sink is installed in the opening with mixing on the mounting bracket.
In the process of maneuvering, it is necessary to ensure that the sink is completely pressed against the curbstone, and the self-tapping screw is fixed in place of the deepening of the corner. Then the screws are screwed all the way.

Mounting on wooden blocks. This method is used when the previous two are not suitable, for example, due to a defect in the countertop or the lack of corresponding connectors on the sink.In this case, you will need 4 wooden bars and furniture corners. Using these materials, you can make an installation site.
The height of the bars is selected so that the sink is at the same level as the rest of the kitchen furniture. Under the size of the cabinet, bars are cut and fastened from the outside with the help of furniture corners. A home-made design is installed on the pedestal and, with the corners with self-tapping screws, is screwed from the inside to the walls of the table.
In the last two ways you need to take care of tightness. To do this, apply a layer of sealant to the contact points of the cabinet / wooden platform with the sink.
For more information on mounting the sink, see this article.
Conclusions and useful video on the topic
This video visualizes the installation process of the sink and helps to see some of the subtleties of the wizard.
Mounting mortise model:
Installation of a sink is a responsible task on which functionality of a working space and reliability depends. Incorrect installation can lead to rapid destruction of the countertops if water begins to penetrate the sink.
The main thing in the installation is the high-quality sealing of the joint between the sink and the ends of the kitchen furniture.
If you have experience installing a sink, please share this information with our readers. Leave comments on the article and ask questions. The feedback form is located below.
 Installing a siphon in the kitchen: how to assemble and install a device + circuits and installation example
  How to install a tulip shell on your own: phased instruction
 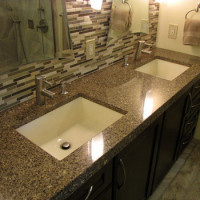 Countertop for the bathroom under the sink: types, how to choose and install correctly
  How to install a sink with a pedestal: step-by-step installation instructions
 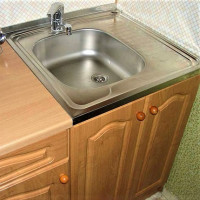 Installing a wash-on sink: the basic steps for installing a do-it-yourself sink
  How to fix the bathroom sink to the wall: a detailed instruction on how to fix it
  How much does it cost to connect gas to a private house: the price of organizing gas supply
  The best washing machines with dryer: model rating and customer tips
  What is the color temperature of light and the nuances of choosing the temperature of the lamps to suit your needs
  Replacement of a geyser in an apartment: replacement paperwork + basic norms and requirements
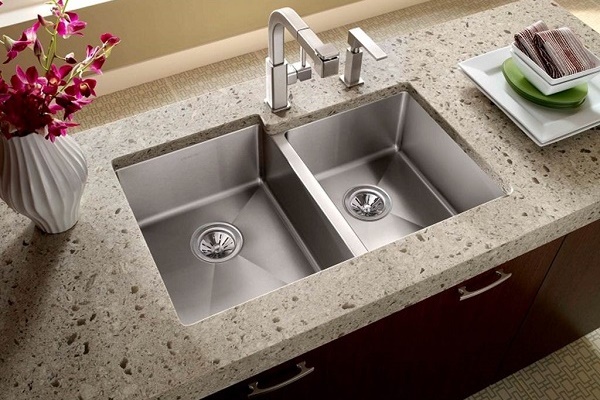
At home, we use a freestanding sink; its appearance leaves it to do the best. Thinking about replacing: I want to put a mortise model. There is no desire to pay extra for installation at all, so we will install it ourselves. Your recommendations turned out to be useful, perhaps I will use them. It may be possible to save money on installation of the sink, because it is better to spend them on the purchase of a better option.
We used to have an old kitchen wall, where a separate stand without a top stood out under the sink. It was installed elementarily. Now bought a new wall, mortise sink. I also mounted it myself, it’s generally not difficult, but I didn’t think of the fact that in the process I drank to insert self-tapping screws into the slot. Just put the stool inside the cabinet, the cut out part on it and landed.
You can, if you buy a new countertop, buy the necessary sink in advance and give it (on receipt, for example) to the furniture makers in the workshop, so that they accurately mill, on a woodworking machine, the hole in size and even mount it in advance. And when installing on site yourself - it is better to rent a manual router.
Hello. For giving did so. Cut out with an ordinary jigsaw, a countertop from an ejected computer table.