How to install a tulip shell on your own: phased instruction

A washbasin with a pedestal, combining an attractive appearance with functionality, is a popular option for sanitary ware. It looks simple and it seems that installation can be done by any home master, right?
You already bought everything, but do not know how to install a tulip sink with your own hands, so as not to attract plumbing? We will help you understand this issue - the article discusses the installation process, shows the main mistakes that beginners make when installing the sink yourself.
Also, the main pros and cons of the tulip sink are analyzed and recommendations for choosing plumbing with a pedestal for the bathroom are given.
The content of the article:
- Distinctive features of the tulip shell
- Classification of washbasins with pedestal
- Pros and Cons of a Tulip Shell
- Tips for choosing plumbing with a pedestal
- Detailed installation instructions for the tulip sink
- Features of installing a sink with a semi-pedestal
- Typical errors during installation
- Conclusions and useful video on the topic
Distinctive features of the tulip shell
A characteristic difference between the tulip model is a high hollow pedestal leg, thanks to which the model acquires resemblance to a flower from which it got its name.
The support column not only gives the model an elegant look, but also performs a number of useful functions:
- The pedestal gives the design the necessary rigidity, stability, reliability.
- During mechanical influences on the bowl, the leg takes a load on itself, protecting the sink from damage.
- The hollow column allows you to remove from view service communications (water supply and drainage systems), so the room looks neat and beautiful.
The pedestal, like the bowl, can have various decorative design, due to which a wide variety of models is achieved.
Classification of washbasins with pedestal
There are several classification options for this type of shell. The following characteristics can be taken as a basis.
By the way the sink is arranged
According to the recommended installation location, two groups of sinks can be distinguished:
- Ordinary. The most common modification is the tulip shell, which is installed against the wall. A wide range of such models allows you to choose the option that is ideal for any bathroom.
- Corner As the name implies, these structures are designed to be installed in the corner of the room. Such plumbing, as a rule having small dimensions, makes it possible to rationally use the usable area, ideally suiting for the arrangement of miniature bathrooms. More ideas for choosing a small sink we brought here.
Corner models have an ergonomic design.

Structurally, the washbasin is not structurally installed along the wall, while the straight model is easy to put in the corner, fixing along one of the walls.
By design features of models
According to the design features, three main groups of washstands can be distinguished:
- monolith;
- compact;
- half tulip.
Monolithic models are a holistic design in which the sink is inextricably connected to the leg. Such options are quite rare in the consumer market: they are difficult to manufacture, which affects the cost of such products.
Much more often on sale you can find washbasins of the “compact” type, consisting of two components: a wash bowl and a supporting column.
The advantages of these models include affordable price, practicality and ease of use. If the monolithic model has to be moved completely when the siphon is clogged, then to remove this problem from the compact, simply move the pedestal.
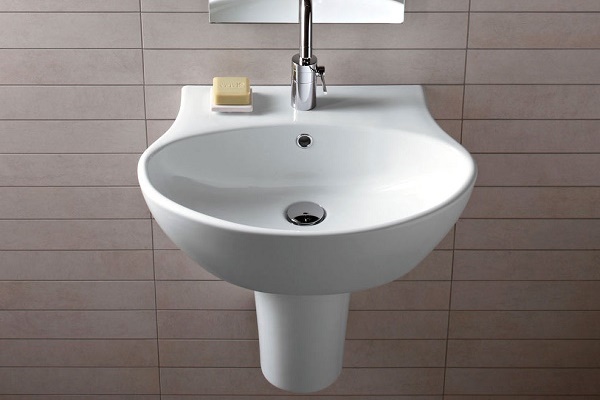
Modifications with a leg that does not reach the floor are called a “half tulip”. They have a more modest appearance, but they have certain advantages.
Advantages of the third type of models:
- such products can be mounted at the desired height, which provides additional comfort during their operation;
- a half-tulip sink installed in the bathroom greatly facilitates the cleaning of the room, since the floor under it remains completely free;
- a half-column, like a full-fledged pedestal, closes all communications well;
- this option is well suited for hanging plumbing, however, in this case, an additional installation is required to firmly fix the model.
A washbasin with a semi-pedestal will look great in a compact bathroom, it is also often used when decorating office spaces in offices or at enterprises.
According to the material of manufacture
The material from which the sinks are made affects the decorative and functional qualities of the models, as well as their cost.

The most common options include the following:
- Faience. A common and affordable material that is often used to produce plumbing.Despite the budget price of faience tulip shells, they have good operational properties, are quite strong and durable.
- China. A fairly expensive option is often used to make designer models. Porcelain translucent in the sun have an elegant noble appearance, however, in terms of consumer qualities, they are close to faience designs.
- Acrylic. Artificial material with many useful qualities. Acrylic designs have a budget cost and a fairly low weight; they are hygienic and shockproof. In addition, this plastic is easy to process (grinding, engraving) and coloring, which allows you to create the most incredible options for tulip shells. Of the disadvantages, some fragility (the material is easily scratched) and combustibility can be noted.
- A rock. Strong and durable material from which impressive washbasins can be made. Most often, granite and marble or more affordable artificial stone are used for this. In addition to the high cost, the main disadvantage of such models is the large weight: it not only complicates the handling, but also gives a large load on the floor. We recommend that you familiarize yourself with stone sinks.
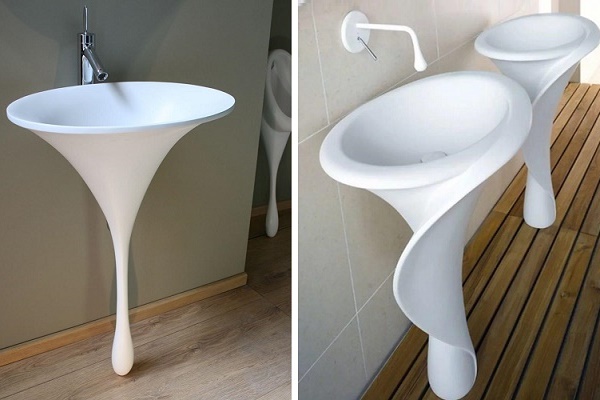
In addition to the above options, there are tulip shells made of glass, various types of plastics and other materials.
In addition, tulip shells vary in size. Typical options are models with a bowl size of 50-70 cm, however, there are miniature and large-sized modifications.
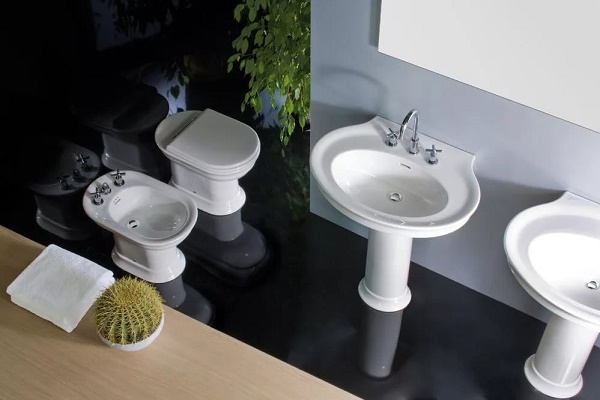
Pros and Cons of a Tulip Shell
Washbasins with a pedestal have a large number of important advantages:
- Large range of models. On sale there are a variety of modifications, which differ not only in design features, but also in design, color, size. Thanks to this, you can always choose the option suitable for the interior of various stylistic orientations.
- Affordable cost. The cost of a “tulip” mainly depends on the material from which it is made. However, ceteris paribus, the price of this type of washbasin is slightly lower than other models (for example, moydodyr).
- Compact design. Even ordinary modifications have relatively small dimensions, which allows them to be installed in fairly compact rooms. In addition, there are miniature models - corner tulip shells and options with a semi-pedestal. At the same time, even small-sized structures can effectively remove official communications (plumbing and sewer systems) from the eyes.
The tulip shell is practically devoid of flaws. The impossibility of using the space under the washbasin (for example, under the bedside tables) can be considered as some inconvenience.
However, there are models that provide additional cabinets and shelves that are attached to the column.

You should also take into account the features of models made from different types of materials (porcelain structures are fragile, stone ones are heavy and so on).
Tips for choosing plumbing with a pedestal
When choosing a model, it is important to pay attention to the following factors:
- The height of the support column. Its length should be such that when washing, the person does not have to bend too much. The typical size is 70-80 cm; if it does not fit, it is better to look for another model or stop on a tulip sink with a semi-pedestal. In another article, we examined in detail installation height standards shells.
- The size and depth of the bowl. The best option is a sink with a width of 55-65 cm. A large modification will take up a lot of space, and from a smaller one, the splashes will scatter along the sides during washing. It is not too convenient to wash from a very shallow bowl, it is better to choose a deeper sink. We talked about the dimensions of the sink in more detail. this stuff.
- Holes for the mixer. Depending on preferences, you can choose a model that includes one modern mixer or separate taps for hot and cold water.
- The presence of overflow. The function avoids a flood in the bathroom when the outlet is blocked. It should only be remembered that a special siphon and an additional non-standard pipe are required for overflow.
- Accessories. Since drain fittings are usually not included in the set of washbasins with a pedestal, you will most likely have to buy them specially. It is better to immediately pick up the tulip sink, siphon and faucet produced by one company.
- Correspondence of the size of the washbasin to official communications. If a tulip sink is purchased to install it in the bathroom after a major overhaul with the replacement of water, sewer pipes, absolutely any option will do. When choosing a washbasin to replace previous plumbing, it is important that it matches the remaining communication systems.
Before going to the store, it is advisable to measure and record the distance from the floor to the supply of water pipes and other communication parameters.
Unfortunately, the mismatch of the conclusions provided on the model with the existing wiring is very difficult, and often impossible to fix. In this case, it is better to return the unsuitable model back to the store.

After the purchase, do not forget to check the availability of all parts of the kit, and only then start installing the washbasin.
Detailed installation instructions for the tulip sink
For plumbing work, you will need the following tools and materials:
- roulette;
- hammer drill;
- level for leveling the bowl;
- hammer;
- adjustable wrench;
- drill bits for concrete and tile (in the presence of ceramic tiles);
- dowels for fastening;
- adhesive sealant;
- soft pencil / marker.
To create airtight joints, tow or fum tape will be required.
The following selection of photos will help to get acquainted with the sequence of works on installing a tulip sink:
Stage # 1 - dismantling the old washbasin
First of all, you should disassemble and remove the old plumbing. To do this, you need:
- Shut off the main water supply.
- Unscrew the nuts on the mixer and disconnect the flexible or rigid connection, and then remove the mixer.
- Go to the drain: loosen the nuts on the siphon and remove it.
- Remove the old washbasin from the fixtures, making room for a new one.
After that, you should check or re-prepare all the communications connections: cold and hot water outlets, sewage. Their location should coincide with the holes on the newly acquired plumbing.
After that, you can proceed to the main stage of work.
Stage # 2 - installation of stopcocks and bowl
Installation of the “tulip” is carried out in several stages.
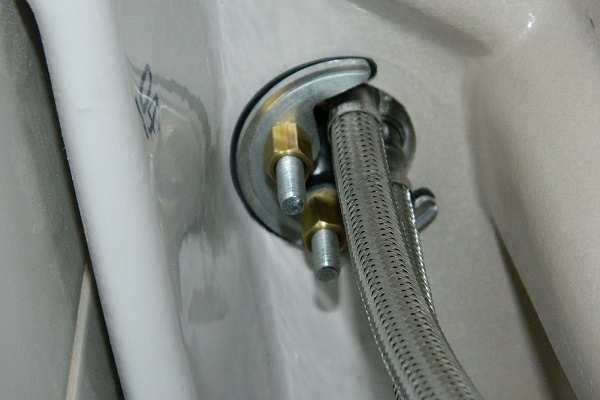
It’s best to start by installing stopcocks. For insulation and durability of the connection, it is advisable to wrap the fum tape or tow mixed with a small amount of oil paint on their threaded part, which guarantees improved protection against water leakage.
After that, we proceed directly to the installation of the plumbing kit.

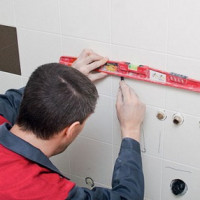
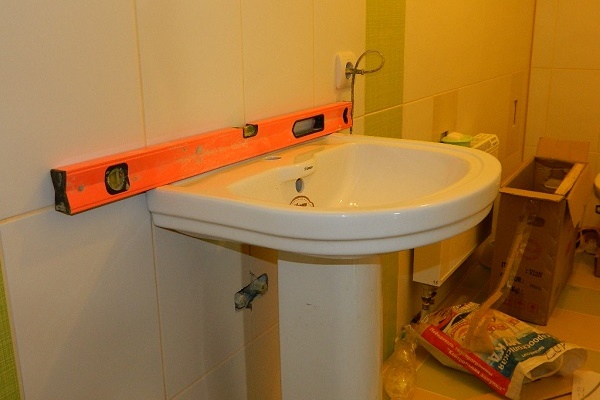
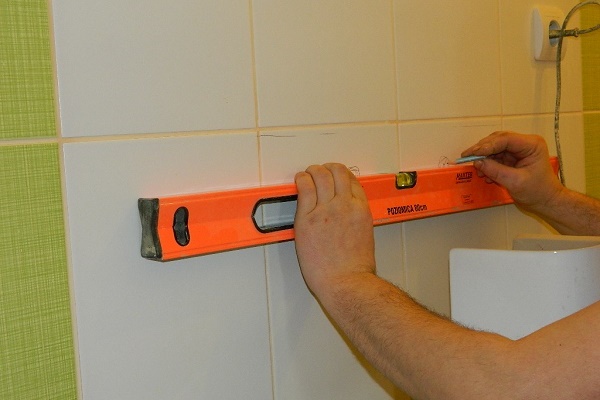
To determine the location of the fasteners, we put a support column, on which we put the bowl without fixing it. It is important to align the structure with a level, and then use a pencil or marker to mark places on the wall for attaching the sink.
Using marks with an electric drill, we drill holes whose diameter and depth correspond to dowels prepared in advance. If the wall is finished with ceramic tiles, drilling must be carried out very carefully using a special drill.
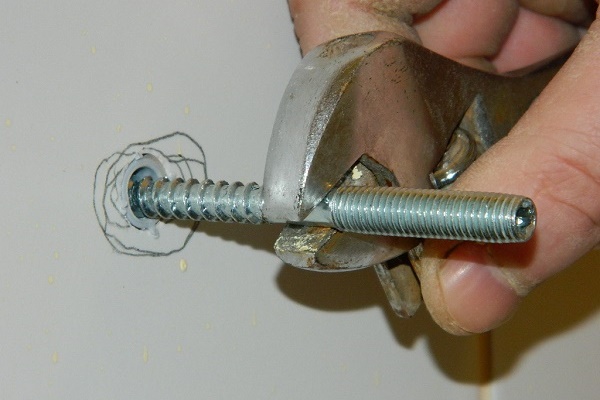
Using a hammer, we expose the plugs into the holes made, into which we carefully and carefully screw the brackets. It is important to ensure that their position is strictly perpendicular to the wall.

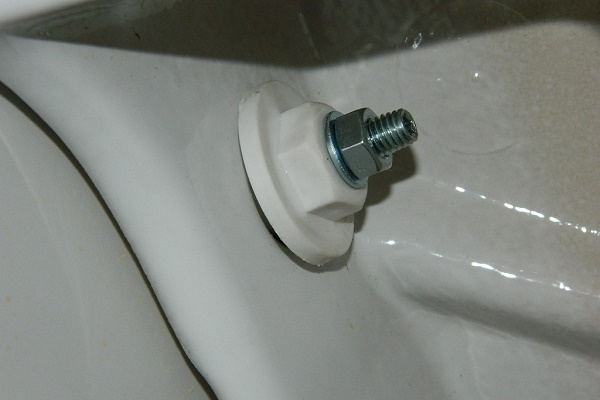
We hang the washbasin bowl, and bait the nuts through plastic or rubber gaskets.
We have a more detailed step-by-step instruction on our website. fixing the sink to the wall.
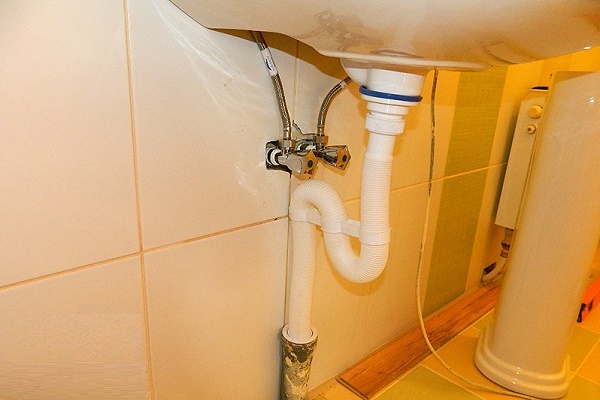
Stage # 3 - Connecting to Communications
After that, you need to do communications. We close the drain hole with a reverse corrugated hose, which prevents the flow of water. Then, without fixing, we insert a metal drain cylinder into the hole.
We connect the washbasin to the wiring. At the same time, fixing the main drain is mandatory with gaskets on the outside and inside. Only after this the connection is twisted, but in no case is tightened to avoid mechanical damage to the bowl.
Install the mixer. It is important to take into account that the diameter of its part immersed in the sink must correspond to the size of the “tulip” hole intended for this purpose. We recommend you to see a detailed briefing on mounting the mixer to the sink.

We mount shutoff valves. We take into account that when pulling the rod out of the mixer, the valve closes, while when the rod is fully inserted, it is open. The valve opens and closes using the angle clamp on the bar.
At the ends flexible water hoses there are nuts by which the mixer is connected to cold and hot water.We check the operation of the system, inspecting the structure for leaks.
Stage # 4 - installation of the pedestal column
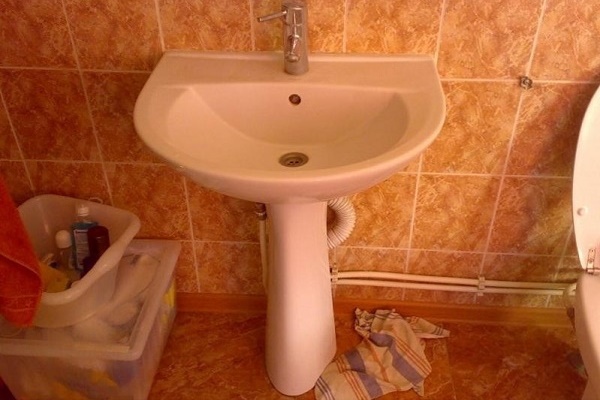
We close the communications with a hollow support column, performing the job as carefully as possible so as not to accidentally damage the pedestal.

All seams are treated with sealant in the color of the wall, plumbing or transparent colorless. After that, the installation of the tulip shell can be considered completed.

It should be noted that in some cases it is more advisable to first connect the mixer, and only then install the bowl on the brackets.
In addition, depending on the supplied communications, it is sometimes better to replace the corrugated hose with siphons of a different type (specific information is usually available in the instructions for the purchased plumbing). Recommended to consider types of siphons for the washbasin, their pros and cons and recommendations for choice.
Features of installing a sink with a semi-pedestal
Installation of a compact model of this modification is carried out similarly to a conventional tulip sink, however, it has some features:
- First of all, you should choose the right height for mounting the bowl. The standard parameter is 75-80 cm, however it is better to take into account the convenience of using the washstand.
- According to the above instructions, holes are drilled in the wall, dowels are inserted and the brackets on which the bowl is suspended are fixed.
- After this, the standard procedure for connecting the mixer and siphon to communication systems is performed.
- Additionally, marking is performed to complete the fastening of the semi-pedestal; in the lower part of the structure, you also need to make holes, hammer in the dowels and fix this part so that it covers the pipes.
The difference in the installation of a half-tulip lies in the last paragraph, since the leg of the sink, which does not reach the floor, cannot give the structure the desired strength and stability.

Typical errors during installation
In order not to violate the performance of the equipment during installation, we consider what mistakes should be feared.
Among the shortcomings that are often found when installing a tulip shell yourself are the following defects:
- Tilt the sink. If you apply markings on the wall and install fasteners without level control, the bowl may be hung unevenly. Skewed to one side, the sink, of course, does not decorate the bathroom too much. Correcting this defect is quite difficult: you will have to re-dismantle all the parts and re-drill the holes, carefully checking with the level.
- The gap between the bowl and the wall. The edge of the washbasin should fit snugly against the wall or partition. If even a small free space remains between them, water will constantly flow into it, which will sooner or later affect the safety of the wall. To avoid this, after installation of the structure, all cracks and gaps must be carefully sealed.
- Leaking water or sewer. Leaking water or sewage can have serious consequences, including flooding of an apartment (one's or one's neighbors). Most often, it happens due to poorly tightened threaded connections. After performing such operations, you need to check the connections, giving water under high pressure.
- "Stirring" the shell. Unstable bolts or an uneven floor under the pedestal may cause instability of the bowl of the tulip shell.In the first case, the problem can be solved quite easily: you just need to check and fix all the connections of the parts. Things are a little more complicated if a second reason is identified.
You can temporarily fix the situation by placing suitable gaskets under the washbasin foot (preferably silicone ones that do not look out from under the structure).
With large irregularities, it is better to level the floor using a cement mixture.
There is another installation instruction on our site that describes the process. installation of a sink with a pedestal.
Conclusions and useful video on the topic
In the video below you can clearly see how to install the sink.
As you can see, having available tools at hand, the installation of the “tulip” is quite easy. A little effort and time spent - and your bathroom will be decorated with an elegant washbasin resembling the head of a beautiful flower.
Do you have experience installing a tulip in your bathroom? Or are you professionally engaged in the installation of plumbing and want to share useful tips with beginners? Leave your comments in the block under this article - many home craftsmen will be grateful to you.
Or maybe you only understand the process of installing the sink and you still have unclear moments? Feel free to ask questions - we will try to help you.
 How to properly mount the sink to the wall: step-by-step instruction
  How to install a sink with a pedestal: step-by-step installation instructions
 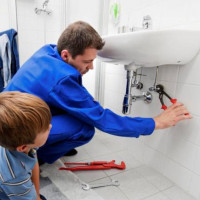 How to fix the bathroom sink to the wall: a detailed instruction on how to fix it
  How to install a sink in the kitchen: installation rules for mortise and freestanding models
  Countertop for the bathroom under the sink: types, how to choose and install correctly
 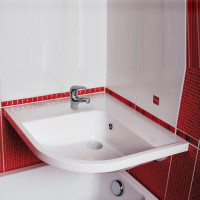 Hanging bathroom sink: step-by-step installation instructions
  How much does it cost to connect gas to a private house: the price of organizing gas supply
  The best washing machines with dryer: model rating and customer tips
  What is the color temperature of light and the nuances of choosing the temperature of the lamps to suit your needs
  Replacement of a geyser in an apartment: replacement paperwork + basic norms and requirements
I myself installed such a sink. This was my first experience, I did everything from video lessons from the Internet. Since the mixer and stopcocks were already available, the process of attaching the sink to the wall became the most difficult. It was important to drill carefully so that the tiles do not crack, and drive the dowels so that they are perpendicular. I put a board under them, so as not to be mistaken) The rest compared to this is nothing.
Installing a tulip is more difficult than sinks with a pedestal, but not by much. It is important to have a suitable tool and carefully measure the space under the holes with a level. It will be easy for a man. After the sink is screwed on, connecting the siphon and installing the cabinet is easy. I still walked on top with silicone, clean so that the water would not flood, and in half an hour I did everything.
The first time is always difficult. But then, like clockwork, the installation goes on. I did it the first time. The main thing is to do everything according to the instructions.