Restoring a bath with liquid acrylic: DIY repair of an enamel coating

Faced with the need to replace the bath, which has lost all its attractiveness, the owner feels horror. After all, a replacement will entail a full-scale repair, and this is a lot of time and money. A reasonable alternative in this case is to restore the bath with liquid acrylic, which can also be done with your own hands.
We will tell you how to restore a damaged coating. In our article, we provide a step-by-step guide for the entire cycle of work: from preparing plumbing to applying the composition. Based on our recommendations, the bath will be perfectly repaired.
The content of the article:
Liquid Acrylic Bath Repair Options
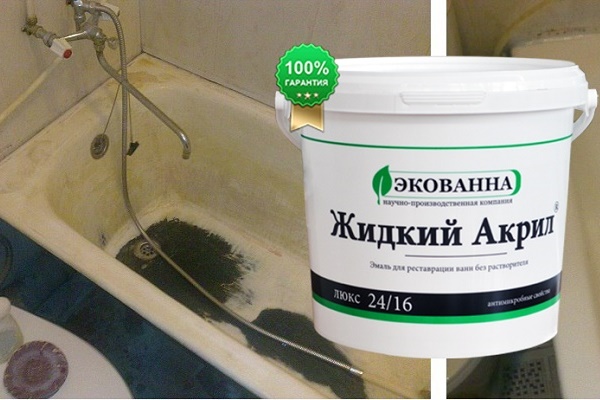
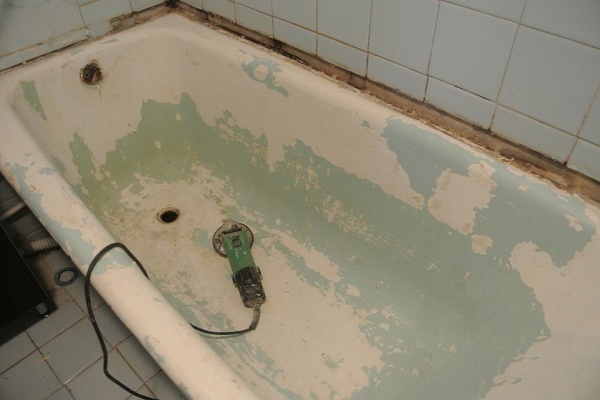
The familiar bath, in which my mother was bathing with her baby, began to look unpleasant over time - chips, rust appeared, and in some places it became rough. And it was simply impossible to wash it clean.
Many owners of cast-iron and steel bathtubs have to deal with this situation. Their plumbing is usually 10, 15 or more years. After 12-20 years of use, your favorite bath looks very deplorable, and to wash it, you will need to make titanic efforts every time.
To repair old enamel without starting a terrible repair, you can use liquid acrylic. This material was specially designed to update the surface and improve the performance of bathing containers and other plumbing products.

Several methods can be used to restore the peeling enamel of an old bath:
- invite an expensive specialist;
- find a cheap master;
- do it yourself.
Collaboration with an expensive and experienced master can be very enjoyable - the end result of his work will please the whole family and many friends for many years. But the work of such a specialist cannot be cheap.
And reviews about the company itself should be positive. Well, if one of the friends / acquaintances, this company has already made a similar repair, and they were satisfied.

Too high cost of services, standing out against the general background of such proposals, should alert. Such firms, according to employees, use only imported materials. It is the high cost of foreign acrylic and the high level of professionalism of their masters that explain their prices.
In fact, these firms most often turn out to be scammers. The work is carried out in violation of the technology, and the material itself is additionally diluted to a too liquid state to reduce its consumption. This is fraught with peeling, yellowing and peeling of new enamel.

In the process of work, masters from dishonest companies take extra money for each of their actions. After payment, no one answers the phone calls of indignant bath owners. They do not correct their mistakes.
As an alternative to an expensive master, find a cheap one. There are a lot of proposals to make quickly, efficiently and, most attractively, inexpensively, on the Internet. But contacting such miracle professionals will prove to be more expensive.
Firstly, no one will work at a loss. A quality material can not be cheap. Secondly, you need to add to the cost of acrylic painstaking work on the preparation of the surface. All this in total cannot be cheap.
The use of poor materials and a violation of technology will please only the price. In a couple of months, at best, the bath will turn yellow in some places, and in the worst, it will begin to climb around.

The best option is to do the restoration of the enamel surface of the bath with your own hands. After all, who, if not yourself, can be completely trusted without fear of deception.
The independent implementation of the restoration process will require the acquisition of additional knowledge, supplies, patience. You will also need to understand the essence of the selected type of repair work and take into account important details, without which it is impossible to achieve the optimal result.
Stages of the recovery process
Having decided to do everything with his own hands, you have to stock up on free time, patience and the desire to do everything efficiently. Moreover, many home masters like to do homework on their own.
After all, what could be more pleasant than defeating another difficulty, then for several years admiring a job well done and proud of it.
Visual assessment of the scope of work
The first thing that needs to be done to restore the enamel coating of the bathtub that has lost its decent appearance is to evaluate the overall size of the work ahead.

To do this, you need to carefully examine your capacity, paying attention to the following points:
- suitability of the bath for further use;
- installation method;
- joints with the wall;
- the presence of a tiled screen;
- state of discharge-overflow;
- bath size;
- current product color and desired after restoration;
- the state of enamel on the sides and bottom of the tank;
- the presence of chips, cracks, rust;
- tap status - flowing or not.
All these nuances are important for the organization of the further repair process. Firstly, the presence of chips, deep cracks and rust can significantly affect the general condition of the tank and its suitability for long service.
If the damage is insignificant, it is easy to clean the rust, repair chips and large cracks with a car putty, and liquid acrylic can cope with small ones. This repair material, like a diving suit, tightly fits all the hollows and bulges, successfully masking cracks.

If there is a tile in the bathroom, it will have to be protected from accidental contact with materials and tools during the repair process. To do this, you will need masking tape, a special film to protect against building dust or newspapers, unnecessary wallpaper, rags. For flooring, it is better to use paper or cloth, for walls and screens - film and tape.
The worn out overflow and overflow parts will have to be replaced with new ones, because they still need to be removed during the restoration work. If these products are in good condition or have recently changed, then you can save on the purchase of new ones.
It is absolutely forbidden to start restoration work with a leaking tap. Water dripping onto a surface treated with bulk acrylic or, even worse, falling under a layer of material during pouring will ruin everything. The coating does not stick or begins to fall off.
The size of liquid acrylic depends on the size of the bath.The most common containers are 1.5 or 1.7 m long. Non-standard options are also found that significantly exceed this length. In such cases, it is important not to forget to mention this fact when buying acrylic material. After all, you need to buy such an amount that is completely enough to restore the enamel.
As for color, liquid acryl has a snow-white, creamy or milky white color. If a different shade is required, you should immediately purchase a tinting paste from the same manufacturer. Introduces plumbing painting technology next articlededicated to doing this work.

Having carefully examined the inner surface of the bath, you will have to prepare a power tool with the appropriate nozzle or, in its absence, a wooden block with emery paper. This is all useful to get rid of excessive smoothness remaining on the side or inner sides of the bath.
Cleaning, washing and drying
When all preliminary measurements are done and the necessary tools are prepared, you can begin to prepare the container for recovery. To do this, on its entire surface you need to go through a grinder with an emery grinding wheel or other abrasive disks.
Also, to give all areas a uniform roughness, you can use a drill with a rubber nozzle and emery. If there is no power tool, then a simple wooden block and sandpaper will do. Only time for processing will need much more.

Grinding is a dusty and dirty occupation. It is important to use personal protective equipment to protect yourself from dust and pieces of old enamel getting into your nose, ears, eyes and lungs.
After grinding, they remove dust not only in the tank itself, but in the whole room. Then the bath is thoroughly washed with soda, pemolux or other substance. This is necessary for degreasing. It is better to do this procedure 2-3 times, thoroughly rinsing everything with warm water.

After washing, you have to dry everything. Warm water, washing off the degreasing substance, provides quick drying. But in inaccessible places - at the joints of the bath with the wall, in the corners, water always remains.
To remove it, it is better to use a household or building hair dryer. You also need to remove the drain and overflow grill and clean the places under them.

After drying, it is better to vacuum everything well again and stick the protective coating on the walls and screen. The remaining pieces of furniture in the bathroom also need to be wrapped. Place paper / old newspapers on the floor and wrap the tap over the bathtub in plastic or plastic bag.
Grinding, degreasing and drying will ensure the best possible adhesion of the surface to the bulk material.
Acrylic: how to choose and cook
To get a high-quality coating in place of old and peeling enamel, you need to buy a good bulk acrylic and prepare it correctly. So, about 3 kg of liquid acrylic goes to a bathtub with a length of 1.5 m. Consumption depends on the individual characteristics of the purchased goods - for all manufacturers in different ways.

There are many different offers on the building materials market. As evidenced by the practice of using bulk acrylic by various craftsmen, the best are Stakril Ekolor, PlastAll, ECO-BATH.
When buying liquid acrylic, it is imperative to take an interest in documents confirming its quality, safety and that it really is related to this material. After all, acquiring a fake is not difficult at all, without making sure that the relevant documents are available. You also need to look at the expiration date - expired material is unsuitable for repair.
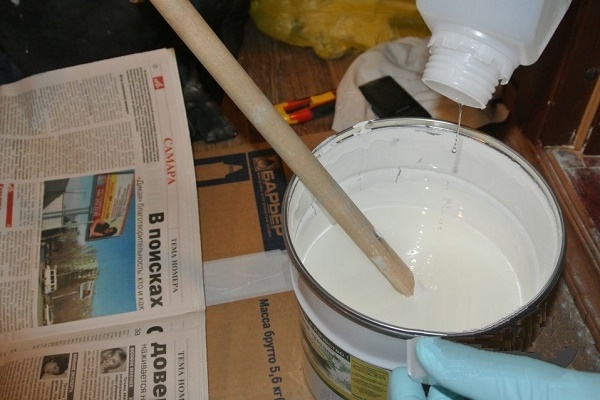
Quality liquid acrylic It is delivered in a complete set, along with it comes a bottle with a hardener. These 2 substances have to be thoroughly mixed. This must be done strictly according to the instructions given by the manufacturer. Moreover, the time of kneading, hardening and drying for different brands is different.

To properly prepare the mixture, you must carefully and for a long time, as indicated in the instructions, mix the components. Acrylic should become homogeneous, both at the bottom of the tank and along the side walls. If this is not achieved, the heterogeneous material that forms the new acrylic surface of the old bath will turn yellow.
Having finished kneading according to the instructions, you may have to wait 5-10 minutes, and then repeat the mixing process. These are also the individual characteristics of a particular material. It is important not to rush here, so as not to whip into foam. We must try to avoid the appearance of bubbles.

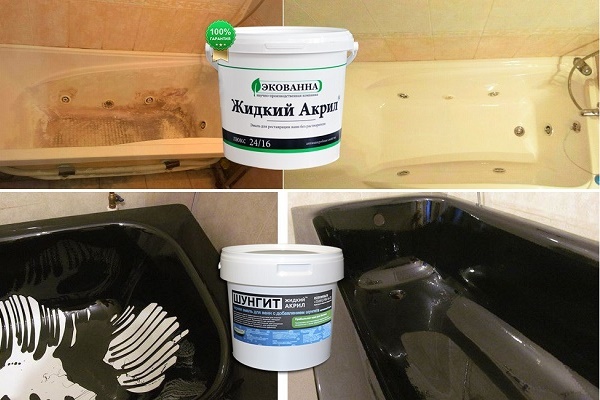
If the future coating is planned in color, then in the mixing process the right amount of tinting paste is added. In the case when the updated bath will be black, it is better to immediately buy liquid acrylic called shungite. Its formula is well developed by the manufacturer, which will protect the home master from errors in calculating the right amount of dye.

Another important point in the preparation of liquid acrylic - you can not add solvent or any other substance to it, except for the hardener included in the kit. Otherwise, this material will have nothing to do with liquid acrylic. You need to immediately buy the right amount, so that enough to pour over the entire bath.
Acrylic dousing and cleaning
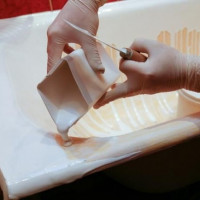
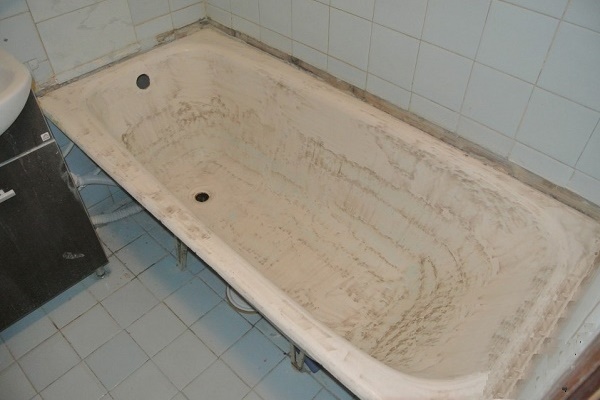
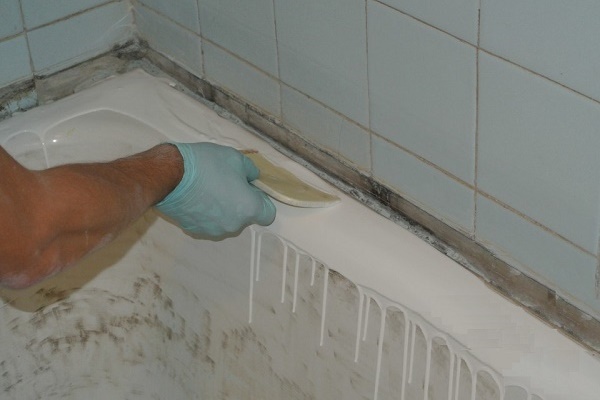
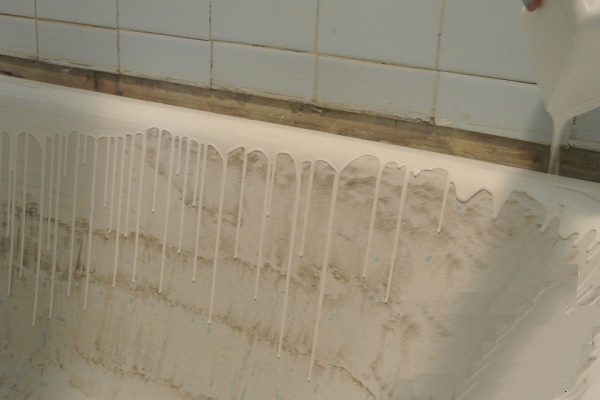
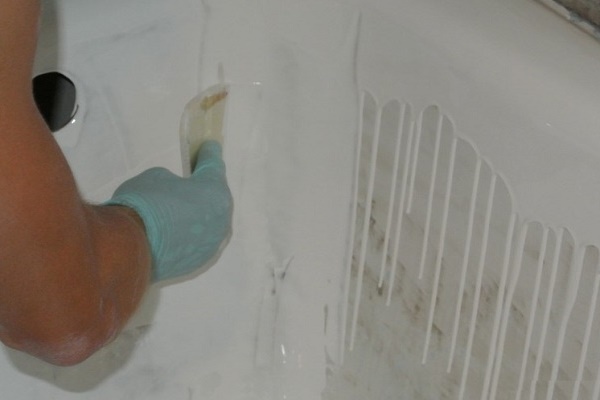
When the mixture is ready, it is necessary to quickly and accurately fill the prepared surface of the bath. To do this, take a plastic cup, put on gloves and begin to water the container, starting from the far corner.
Walking in a circle, generously pouring liquid acrylic on the side. Having closed the upper circle, proceed to pouring the second circle from the middle of the sides. At the bottom, with a rubber spatula, everything is leveled.

If air bubbles have formed on the surface, it is better to take a wide brush and, barely touching the fresh layer, burst them. This is done before the hardening of the material. To prevent liquid acrylic from dripping onto the floor through an open drain hole, a small glass or other container is placed there.
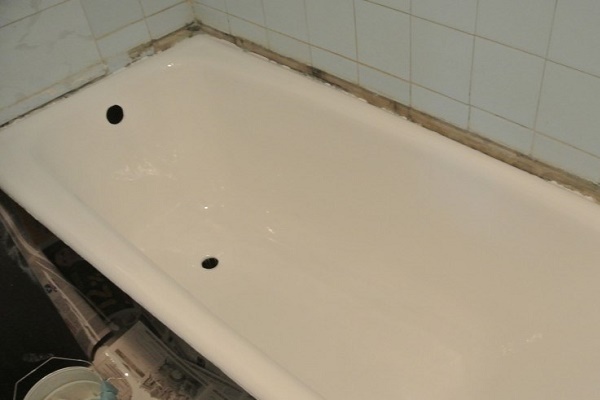
When the pouring is completed, care should be taken to calmly and completely dry the renewed bath. After all, dust, hair, villi and other things will ruin the perfect appearance of the coating.
The full drying time is clearly indicated in the instructions. This is from 24 to 48 hours, sometimes more. Only when everything is dry, do you need to carefully cut acrylic drops at the bottom of the drain hole on the outside and put the drain and overflow in place.You can also remove protective coatings from walls, furniture, floors and use the bathroom for your pleasure.
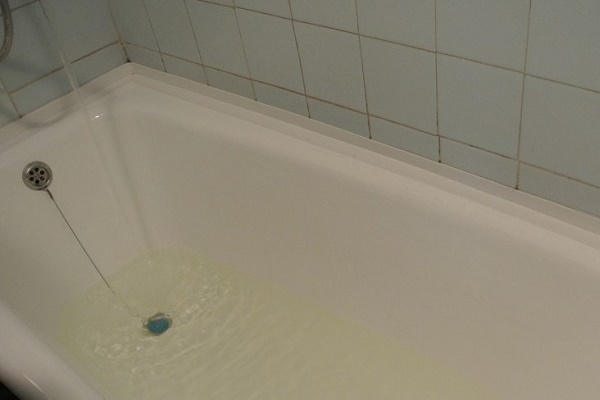
Quality update and complete restoration of the bath will allow you to enjoy a beautiful capacity for many years. It is important to properly care for him and not to drop a hammer or knives inside. Scratches that occur during operation can be easily repaired with special tools included in the repair kit for acrylic bathtubs.

Care for bulk acrylic coating should also be the same as for an acrylic bathtub - wash with a soft soapy sponge or a special tool.
Annoying mistakes: what to fear
Independent work on updating the bath with liquid acrylic requires not only compliance with a certain technology. It is also important not to make gross errors that will nullify all efforts. Moreover, knowing the features of the material itself and not having practical experience working with it, it is easy enough to miss something important.
In the future, such small nuances will quickly render the newly restored enamel unusable. It may begin to peel off and peel off the surface of the bath.
The main mistakes made during restoration work:
- buying a fake instead of liquid acrylic;
- improper mixing of components;
- poorly prepared surface preparation;
- moisture residues in hard to reach places;
- inappropriate temperature conditions;
- dust and other impurities;
- early operation of the restored capacity.
Liquid acrylic is in demand among craftsmen professionally engaged in repair work. Also among the townsfolk who decided to independently restore the old and dead bath. Therefore, buying a fake instead of high-quality material is quite simple.

Unscrupulous sellers, in order to cash in on an inexperienced consumer, offer expensive acrylic produced in Finland, Germany or Slovenia. In fact, in these countries they have not heard anything about the products allegedly produced by them.
Another mistake is incorrectly mixed components. To avoid such an annoying misunderstanding, you need to carefully read the manufacturer's instructions and only after that proceed to its literal execution.

If you prepare the surface of the restored bath “at random”, ignoring the recommendations of experienced masters, the result will be disastrous. In a month, bubbles will appear and the gloss will come off, exposing the dull outlines of the old container.
Water left in some places will ruin all the work. The fact is that liquid acrylic peels off a damp surface.
All work must be carried out at a temperature not exceeding 25 ° C. Otherwise, the drying process of the material can be significantly accelerated, which is especially sad for the home master. An experienced specialist, evaluating the temperature in the room, will act in accordance with it.
The ingress of dust, drops of water, villi from towels and other third-party objects on the dry surface of the restored enamel will ruin its appearance. Trying to fix such a nuisance can make the situation even worse. It is better not to use the room at all to completely dry the surface.

Of great importance is the observance of the time frames specified by the manufacturer of liquid acrylic. If it is written that after application of the material until it has completely dried out, 48 hours must pass, then you can not take a bath before this period expires. Otherwise, ugly dents will appear, because the acrylic did not have time to harden completely.
Knowing all these errors, you can try to avoid them. Then the work will be performed efficiently, and the updated plumbing will please with its perfect smoothness and long service life.
The details of the repair of cast-iron bathtubs are given in next article. It details the technology for restoring plumbing, gives useful recommendations.
Conclusions and useful video on the topic
A detailed video for self-restoration of enamel using liquid acrylic:
Video clip with explanations on how to properly prepare the surface before acrylic treatment of the bath and apply liquid acrylic with your own hands:
A visual video of how cheap specialists work who improperly prepared the surface of the bath and used fake or expired material that they gave out as liquid acrylic:
Having restored the enamel of your favorite bath yourself, you can save a decent amount from the family budget. The work done will allow not only to enjoy the brilliant appearance of the product, but also to feel a real surge of pride from the fact that all this is done with your own hands. And the nerves will be in order, avoiding communication with bad craftsmen and hacks.
Want to talk about how you restored your own bathtub with acrylic? Have a desire to share the technological subtleties known only to you? Please write comments in the block below, post a photo on the topic, ask questions about your points of interest.
 DIY enamel bath: how to treat the bath with liquid acrylic at home
 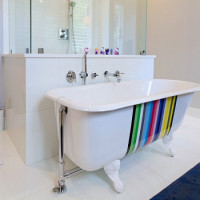 Do-it-yourself cast iron bathtub repair: common damage and repair
 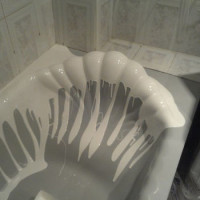 Restoration of bathtubs with liquid acrylic: how to properly cover the old bathtub with new enamel
 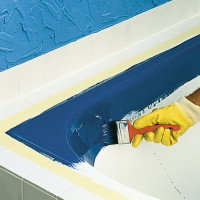 DIY bathtub painting using epoxy enamel and liquid acrylic
 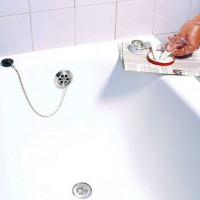 Restoring a cast-iron bath at home: step-by-step instruction
  DIY acrylic bathtub installation: detailed step-by-step installation instructions
  How much does it cost to connect gas to a private house: the price of organizing gas supply
  The best washing machines with dryer: model rating and customer tips
  What is the color temperature of light and the nuances of choosing the temperature of the lamps to suit your needs
  Replacement of a geyser in an apartment: replacement paperwork + basic norms and requirements
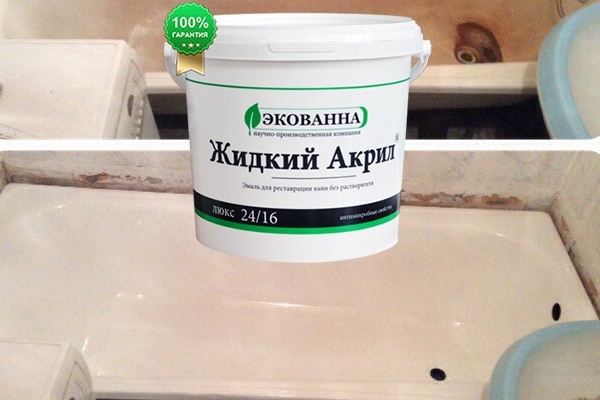
Of course, we ourselves did not dare to independently restore the enamel of an old bath. Invited masters from a company that has been engaged in this work for many years. He did everything quickly and efficiently, the price suited us well, since we live not richly, if not poorly, every penny we have in our account! Therefore, we recommend that you use this method of repairing the bath bowl.
It seems that it’s already there, I can do everything, man with hands, it’s written how to do it, in detail, and so all hands do not get down to such work. I'm afraid to screw up so that it becomes even worse than it is now. The bath, of course, is in a sad state, and taking a new one is not an option now. It’s really cheaper to buy a glass and pour, but that's where to put up a family, while it all dries. And it probably stinks not weakly. In general, I want to, and prick.
If with hands, then there should be no problems with restoration. Children can be sent to their grandmother for the weekend, well, or just to carefully monitor them and not let them in. Another thing is that such a restoration is a temporary measure. 3-4 years will be in good condition, then the problems will begin again.