Restoration of bathtubs with liquid acrylic: how to properly cover the old bathtub with new enamel
One of the main advantages of cast-iron bathtubs is their durability. Such plumbing can serve faithfully for several decades, while maintaining technical specifications. However, over time, the bath may lose its original whiteness.
Agree, not everyone is ready to get rid of high-quality cast iron for the sake of plastic or steel counterparts. An alternative solution is the restoration of the bath with liquid acrylic at home. The work is simple, but requires compliance with some nuances.
We will tell you how to choose high-quality acrylic for a bathtub, identify manufacturers you can trust, and also describe in detail the sequence of updating old plumbing. The information given will help home craftsmen restore the former gloss of the coating and extend the life of the font.
The content of the article:
Which acrylic to choose for the bathroom?
First, let's deal with the terms. The domestic market for acrylic products designed to restore the bowl of a used bathtub is full of brands. Plastol, Jarley, "Standard", StakrilFinnacril and even Ecoemalk - a lot of names.
All enamels are two-component, approximately similar in price - 1400-1500 rubles. for 3.4 kg a jar that is enough to cover one and a half meter capacity with acrylic.
All paints and varnishes of the “liquid acryl” group, including each trademark from the above, the restoration of the bath. The walls of the plumbing bowl are poured with two-component acrylic, which polymerizes and hardens, turning into a smooth and durable coating in a day.
A full bath is not a commercial product, but a paint technology. It consists in pouring a new coat of paint over the existing worn paint layer.Manufacturers are developing their acrylic-enamel series of restoration materials for bathtubs, the formulas of which are carefully hidden from competing enterprises.
In the circle of masters for the restoration of bathtubs and their customers, liquid acrylic of any brand is usually called glass. Although Stakril is a brand of the St. Petersburg-based Ekolor enterprise, the name of its brand is given to the popular rumor by all liquid acrylic compositions.
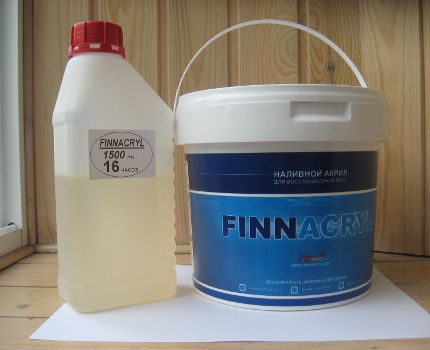
set of three products - liquid acrylic, hardener and degreaser
The reason is simple: Stakril was the first widely advertised polymer material for bathroom restoration, which is why it became a household name for liquid acrylics in general. The technically correct name for acrylic-based bath paints is “bulk acrylic”.
Therefore, when choosing an acrylic bath paint, you need to name a certain brand of product, and not "you have glass".
Now about the quality. Bulk acrylic manufacturing companies LLC Ekolor (brand Stakril), Plastol LLC, Ekovanna LLC and NPK YarLi CJSC (brand Yarli) are the largest enterprises in Russia.
It is their products that are recognized as the highest quality in the domestic market. For self-repair of the enamel coating of the bathroom, you should choose one of these brands.
In addition to having our own technical laboratories, many years of experience in production and distribution of products throughout Russia, the products of all four of the listed manufacturers of bulk acrylic have one more advantage - they are trying to imitate it.
On the one hand, this is a plus, because it’s pointless to release a fake brand and product. However, a minus is also obvious - the likelihood of acquiring low-quality goods.
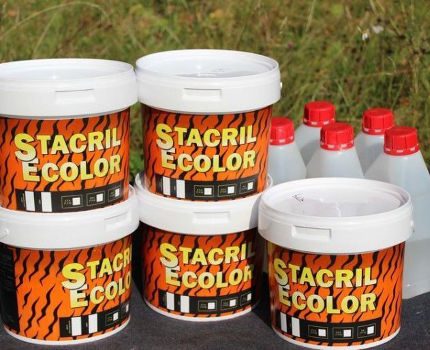
acrylic containers mean only one thing - fake
Fake bulk acrylic
Homeowners interested in enamel restoration in the bath, from year to year more and more. Following the growing demand, manufacturers of bulk acrylics are expanding production and improving a series of acrylic enamels for plumbing equipment. But the most different types of “entrepreneurs” are eager to make money on this paintwork.
First type: small companies intending to occupy a niche in the local market. Before reaching consumers with liquid acrylic in their production, they buy the products of large companies in bulk, pour them into their container containers and trade them under their own brand.
Having positioned customers for a “new product” within a few months of sales, such firms no longer start to spill their products, but their own. Lacking sufficient funds and equipment, these companies are developing acrylic technology with "optimal performance" using raw materials from questionable suppliers.
Second type: Similar enterprises also purchase large batches of liquid acrylic with hardener from well-known manufacturers, but only in the original container with a label.
After that, each container is opened, from there part of the product is cast and the solvent is added. Diluted acrylic is marketed and sold under the guise of an original product.
If liquid acrylic is diluted with a solvent, its performance will drop sharply. Such a coating does not adhere well to the bath; it is too liquid and brittle. After a short time, the painted bath turns yellow, the enamel exfoliates. Note that liquid acrylic cannot be diluted with anything other than the hardener included in the kit.
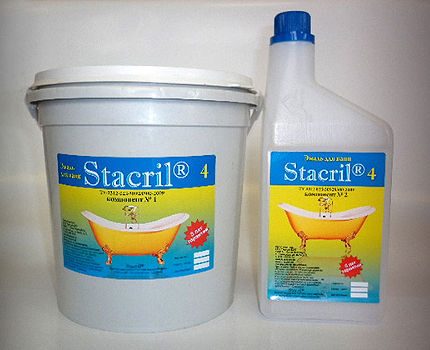
Third type: a small company acquires several tanks of liquid acryl of famous brands, trying to copy them.Having developed a very approximate formula and technological process, this company buys the cheapest raw materials. Product launches with colorful labels and names.
The manufacturer does not attempt to popularize a certain product brand, because poor quality goods and soon there will be no buyers for it. However, the company often changes the shape of the containers and the name of the product, thereby restarting its marketing again and again. Such liquid acrylic can not be called qualitative, only cheap.
Most often, fakes for acrylic enamels appear on the regional markets of Russia Stakril, Ecowanna and Plastol. To interfere with imitators, manufacturers of these brands periodically change the color scheme and shape of cans with liquid acrylic, with a hardener.
You can find out the actual type of a brand of interest by visiting the manufacturer’s website and studying the product description page.
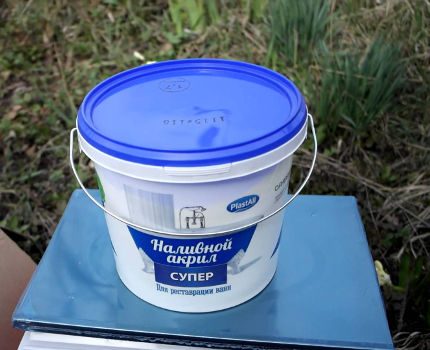
This is an original product. The seal on the lid is intact, which means that the acrylic from this bucket was not cast
However, the goods differ in different regions in different ways - some batches are bought up for months. Within the factory warranty period and subject to proper storage, calibrated liquid acrylic is fully usable.
Suppose you are offered a brand product, say, “Plastol” - the expiration date is OK, but the bucket is framed in the outdated design of the manufacturer. The seller explains: the batch of acrylic was received before the design change of the cans by the Plastol company, and the rest of the goods are original.
Inspect the acrylic bucket and hardener bottle:
- Marking on the cover. Plastol prints the batch number on the lid of the cans using laser lithography. Manufacturers of Ecovanna and Stakrila mark the covers with adhesive labels, where the lot number is printed. There should be no other labels on the covers.
- Cap color. Be sure to make sure the color of the caps on the jar and the bottle matches the product image on the manufacturer’s website.
- Brand logo. Stickers on the sides of the can and bottle must contain a valid logo of the manufacturer;
- Correct sticker. Labels on the sides of acrylic cans, on solvent bottles, are applied by the original manufacturer through machine-based gluing. Skews, wrinkled areas mean that the label was glued by hand and this is fake;
- The integrity of the seal. The plastic fuse on the caps of the hardener bottle and liquid acrylic cans must be intact (not cracked).
The caps of bottles containing liquid hardener are usually signed with a marker when a batch is released - this is normal. There is not enough space on the bottle cap for full printing or label placement.
Additional information about the types of bulk acrylic, as well as tips for choosing restoration enamel, are given in the articles:
- How to choose enamel for bath restoration: a comparative overview of popular products
- Bulk acrylic for the bath: seven popular compositions for restoration + what to look for when buying
Do-it-yourself bath restoration
Independent restoration of the enamel coating of the bath bowl will save an average of 1200-1700 rubles (so much take the master).However, you need to evaluate your skills before starting work: minimal experience in assembling plumbing and performing painting work is essential.
The process of preparing the bath and casting a new coating requires accuracy, otherwise a long-term quality cannot be achieved.
Applicable materials and tools
So, you have acquired a sufficient amount of liquid acrylic and hardener. Please note: you need a volume of acrylic enamel, which will be enough to finish your bathroom. Soviet-made models have a length of 1400-1700 mm, European products are made with a maximum length of 1800 mm.
Carefully evaluate your readiness for work. At the stage of stripping, work stoppage is still acceptable, but after
mixing acrylic with hardener must not stop
Manufacturers indicate on tanks with liquid acrylic the length of the bath for which a calibrated volume of material is designed. Measure the length of the bowl at its center, from the edge of one side to the edge of the other. If your object of work is longer than the size indicated on the jar with acrylic, you need to buy more material. It is important.
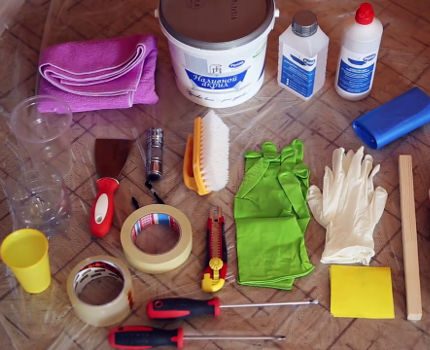
To enamel using the “bulk bath” technology, the following tools and materials are needed:
- Stirrer. When manually mixing acrylic with hardener and color, you will need a wooden or plastic spatula - the width of the blade is 40-60 mm, the length of the handle is 500-600 mm. Mixing with a drill with a mixer should not be done, only manually.
- Sandpaper - 5 pieces. (230 * 280 mm). Emery is required of brand P60 (according to ISO-6344) or 25-H (according to GOST 3647-80) on a fabric basis, waterproof.
- Solvent No. 646 or 647. It will be required to degrease the surface of the bath bowl after sanding and washing it.
- Putty knife - width is 100 mm. A metal spatula will work, but only a new one, without dirt and rusty drips.
- Duct tape - adhesive tape, 50 mm wide. Two types of adhesive tape are needed - masking tape (on paper) and fixing tape (on film).
- Wallpaper knife. It is necessary for cutting adhesive tape and trimming dried acrylic drips from the bathroom drain hole before reinstalling the drain-overflow.
- Screwdrivers - direct and cross to remove the drain-overflow siphon. A gas key may also be required;
- Stool. Mixing acrylic with a hardener and collecting prepared enamel in a container for applying is much more convenient if you put a bucket of liquid acrylic on a stool.
In principle, for the preparation of the walls and the bottom of the bathtub for acrylic casting, it is quite sufficient to manually process them with sandpaper. But only if it had not been stained before, i.e. factory enamel on the surface. Otherwise, cleaning with a drill or grinder will be required.
To eliminate the secondary enamel to the drill, you need a Velcro nozzle and emery wheels of the P40 (or 40-H) brand, for a grinder - grinding wheels of a similar brand.
Protective equipment required:
- Work clothes - pants, a long-sleeved shirt or jacket. Droplets of acrylic on the skin are harmless, but after drying, removing them is quite difficult.
- Headdress - at least a scarf. Hair should not get on the enamel coating during the casting process.
- Respirator - at least a "petal". Scrubbing the bath will cause a strong dust emission, you should not breathe such air.
- Disposable latex gloves. Hands must be protected from contact with liquid acrylic.
Newspaper sheets or PVC film will be needed to cover and hang surfaces around restored plumbing. We remind you: drops of hardened acrylic spilled during the restoration process are very difficult to remove.
Preparation of the bathroom
Collect and take out the items usually found in this room: toothbrushes, towels, laundry basket, other cosmetic and hygiene items. It is necessary to remove the shower curtain, if possible - the bar for the curtain should also be removed.
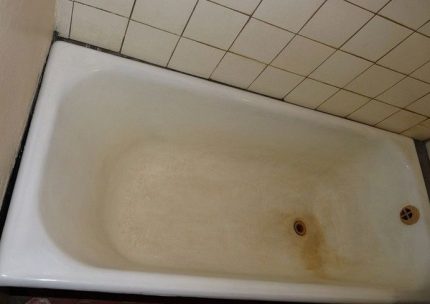
If the washbasin cabinet and the washing machine stand close to the side of the plumbing, they need to be moved or if it is impossible to remove completely. A clearance of 100 mm between the wall of the bathtub and any closely spaced object is sufficient.
To prevent dust particles of old enamel from entering the neighboring rooms, the ventilation hole in the bathroom is covered with PVC film. It will not be possible to open it until the end of the restoration work.
If the bathroom does not have a dismountable geyser, as well as other objects and devices that can suffer due to an excess of dust, it is necessary to close them with newspaper sheets or plastic wrap with adhesive tape.
Cleaning the bowl of the restored bath
The inner surface of the bowl must be thoroughly cleaned by emery manually, with a drill with a special nozzle or grinder equipped with a grinding disc.
For manual stripping, use a special tool for attaching sandpaper or wrap it around a short wooden block of suitable width.
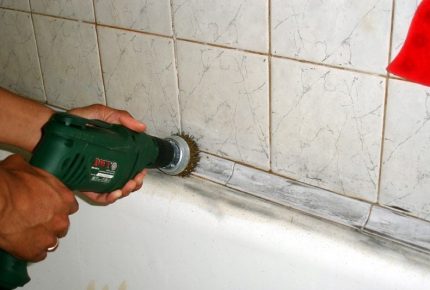
The entire enameled surface of the bath should be cleaned up, paying special attention to the bottom, the zones of the transition of the bottom to the walls and their bends. When stripping, perform circular and horizontal movements, alternating them. In conclusion, you need to walk on all surfaces in a circular motion.
The purpose of stripping: to remove rust and form a shallow (not more than 0.5 mm) relief on its inner surface. Such irregularities will ensure reliable fastening of liquid acrylic and will not cause its overspending.
If you tried to restore the bath before staining, you will need to completely remove this layer of enamel. We remind you that you should not try to completely remove factory enamel from the bathtub - there is no need for this.
The cleaning is considered complete if the entire inner surface (including the sides) has become a little rough, without chips and protruding edges of the factory enamel coating.
Washing and drying plumbing
After cleaning with hand-held electrical appliances, the air in the room will be very dusty. To precipitate the dust, douse the bathtub and the tiled wall around it with hot tap water. The hotter the water, the more steam it gives - the better.
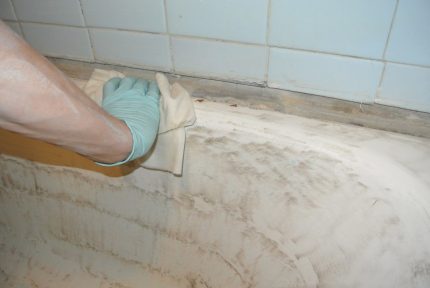
Carefully remove dust particles from the tiles on the walls around the bowl, from the shower bar, from the surfaces of the sink, from the washing machine, from the mixer and other objects. Dust cannot be left categorically - the slightest draft and it will fly up, settling on a freshly applied acrylic coating.
Thoroughly clean the surface of dust particles accumulated after cleaning. Dip the bathtub with water from a hose, use liquid detergents without abrasive particles. Consider: the cleaner the bowl is, the stronger the acrylic enamel will adhere to it.
After flushing, completely close the water taps on the mixer. Remove the shower hose (there will be a gasket, do not lose it), remove it to another room.
Not a single drop of water should be in the bath. If the faucet leaks, wrap it with plastic wrap or, as a last resort, block the access of water with shut-off taps on the water pipes.
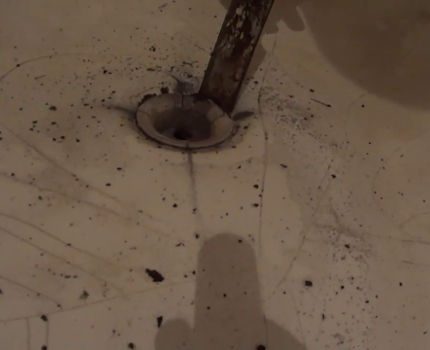
Remove the drain-overflow, acting carefully - after staining it must be put back. Under the drain hole, you need to install a suitable container with a volume of half a liter, where the excess liquid acrylic will merge during the pouring of the enamel composition.
Turn up the hole in the elbow of the sewer pipe, where the drain pipe from the drain-overflow was previously inserted. Otherwise, water may leak when draining through the sink in the kitchen.
Dry the bowl, the tiled walls located above the bath and the surfaces adjacent to it. After washing, there will be drops of water on them. Use a lint-free cotton cloth and, if possible, a building hair dryer.
Especially thoroughly drain the areas adjacent to the sides of the bathtub corners, there are always drops of water. If the cracks in these areas are difficult to dry, use a hairdryer designed to dry your hair.
Laying the floor and degreasing the bath
The process of applying acrylic coating is accompanied by smudges from the sides. You will need to lay newspapers, polymer film on the floor - to overlap, overlapping the edges. It is very difficult to tear off acrylic drops from the floor, so try to reliably block access to the floor covering.
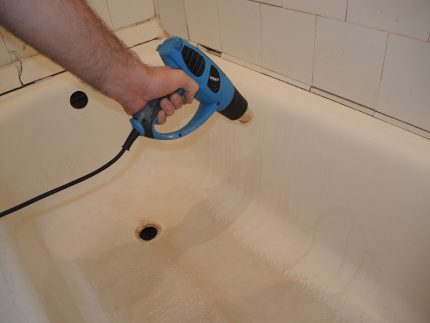
Walls adjacent to the sides should also be pasted over with paper and scotch tape, before placing masking tape along each side. If there is a sliding screen on the wide side, it is necessary to dismantle it whole. If the screen is tiled, glue it with newspapers (film).
If plumbing enamel has deep chips, they must be thoroughly puttied. Use quick-drying car putty - it is sold by auto enamel shops. To work with putty, use the instructions of its manufacturer indicated on the packaging.
The last stage of preparation for enameling is the degreasing of surfaces. Wetting lint-free rags with solvent, wipe the entire bath with maximum quality. It remains to collect dust particles and pile remaining after wiping and degreasing.
With an open, dry and clean palm, walk along the sides and walls of the bathtub, dumping garbage to its bottom. Then drive the debris from the bottom into the drain hole.
Preparing liquid acrylic for application
Before mixing the acrylic enamel, the containers with the components should be kept warm for 24 hours at room temperature. The best working temperature is 24-26 ° C.
If at the time of acrylic casting the room is cooler (less than 20°C), it is necessary to heat the mixture by placing it in a basin with warm water. Warm liquid acrylic to a temperature of more than 26°C should not be.
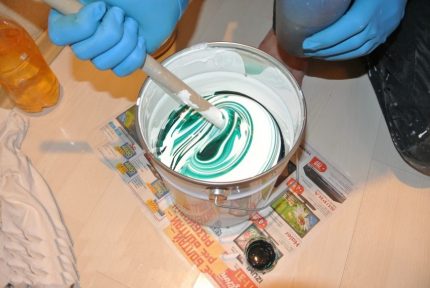
Open a bucket of acrylic, a bottle of hardener (with latex gloves!), Pour the hardener into a jar of acrylic. Next, mix with a wooden (plastic) spatula, following the manufacturer's instructions. Note that they give different times for the mixing process.
For example, “Plastol Premium” needs to be mixed for 12 minutes, then allowed to sediment for 3 minutes and mix again smoothly for 3 minutes. And “Stakril” after ten minutes of stirring and three-minute sludge can be poured onto the walls of the bath.
To tint acrylic enamel, after mixing the composition for three minutes, pour color into it without stopping mixing. But no more than 5 drops - the acrylic mass will thicken, it will be impossible to work with it. A saturated color for decorative protective enamel is impossible, only light shades.
Stirring to perform circular movements, periodically changing their direction. In the process of mixing, sweep the spatula along the walls and along the bottom of the bucket, removing unreacted acrylic and connecting it to the hardener.
Take your time, drive the blade smoothly - air bubbles are unacceptable. Do not use the mixer on the drill, as the mixture will contain a lot of air.
Check the time required for stirring strictly on the clock dial or the screen of the smartphone. The minutes indicated by the manufacturer for the preparation of the mixture should be strictly observed.
Casting acrylic enamel into a bathtub
A bucket of liquid acrylic is too large to pour enamel directly from it. You need to prepare a small container made of plastic, for example, the same hardener bottle. Cut it in half, wipe dry with a rag.
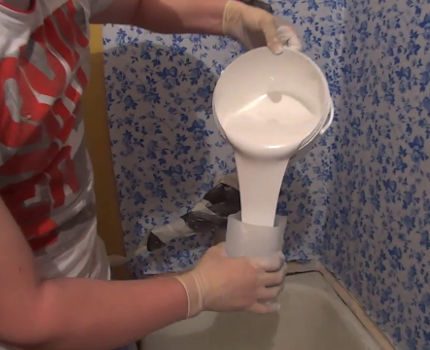
After 40-60 minutes from the moment of completion of mixing, the acrylic mixture will begin to solidify, it will be impossible to work with it. Do not waste time in vain. Put a jar of acrylic in the bathtub, next to it is a prepared container for casting. Fill the last with acrylic mass and proceed with application.
Stand steadily next to the bathtub so that you can reach any of its edges without changing the position of your legs. Do not place your feet right at the edge of the rim - acrylic will fall on them.
The first stage is the sides
Start pouring liquid acrylic from the far left edge of the bath bowl, gradually moving your hand to the right. The sides should be filled with so much enamel so that it completely covers the surface and re-pouring is not required. Add acrylic to the container as it empties.
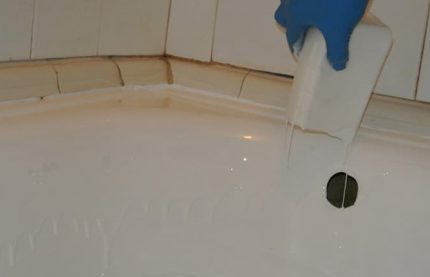
Be careful - if you pour too much acrylic, it drains from the sides to the floor and the enamel may not be enough for the whole bath. If there are empty areas on the sides, apply the composition to the spatula and close the non-flooded places with it.
The second stage - the walls
They need to be covered with a composition in two runs. Perform the first pass from the edge of the back of the bathroom bowl (the area where the wall goes into a fully vertical position) in the direction from left to right. Do not save especially the enamel composition, its excess flows to the bottom, but it still has to be painted.
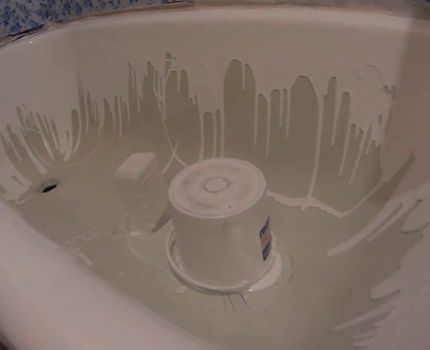
so that the moving remains of acrylic enamel flow out independently
The first passage along the walls will ensure their coverage is almost half. Be careful - drops from the filling container should not fall onto surfaces already covered with the composition. Otherwise, streaks will be visible.
Pour a lot of acrylic onto the back of the bathtub, it is less vertical and the composition will drain slowly. Remove the acrylic bucket from the container.
Make the second pass in the same direction as the first. Only pouring enamel follows from the level to which the acrylic compound stack in the previous pass. Then liquid acrylic will cover the walls completely, over the entire height.
The composition that crashes to the bottom will try to drain into the drain hole - do not let this, put it with a spatula to the center of the bottom of the bath. Drain the remaining acrylic mass directly from the can to the bottom of the bathroom bowl, then remove the empty container to the side and away so that it does not interfere.
No need to scrape a bucket from under the liquid acrylic to collect the entire composition and transfer it to the bath! In these places there is a lot of material not mixed with the hardener, and when laying it in the bowl of the bath, stains and yellowed places are inevitable.
The third stage - fixing bald spots
If you find incomplete patches on the walls, do not worry, this is usually the case. Using a spatula, collect a small amount of material from the bottom, then spill it into unopened places. The acrylic poured into them should be enough to expire to the bottom level.
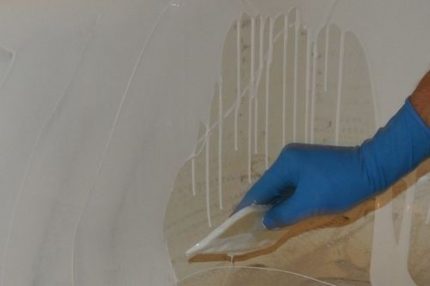
Inspect the walls, look for errors - somewhere you touched the coating, or there was a drip due to a lack of liquid material. From the spatula, dye the defective spots with acrylic in a volume that allows it to drain to the bottom. Then all errors will be aligned.
The fourth stage - acrylic bottom coating
There is enough liquid material - it has leaked from the walls and is poured from a can. Align the acrylic coating with a spatula along the bottom, adding uniformity to the layer on the eye. Be careful not to cling to the bottom transition walls. Excess enamel can now drain into the drain, do not impede this.
Gravity will cause liquid acrylic to drain to the bottom, but the layer itself will be uneven. With light movements of the spatula, the enamel coating must be visually aligned.
For full alignment of the enamel layer, draw the edge of the spatula along the bottom surface - draw a grate for it. After leaving the bath alone for 15 minutes and the acrylic coating will even out by itself.
It remains with a spatula to collect drops of acrylic hanging from the lower edge of the rim. Guide the putty knife carefully, without clinging to the main plane of the side of the bath. Wait 10-15 minutes - drops may form again.
How to dry a bulk bath
The acrylic coating hardens gradually, with each passing hour more and more. Meticulously examining the results of enamel pouring, workers sometimes notice small defects, try to wipe them with acrylic from neighboring areas. You can’t do that!
Everything, the enamel has already hardened enough and any touch on it will only make it worse. Expect preliminary drying (polymerization), then apply a factory repair kit.
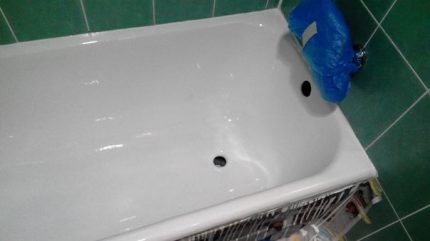
After 48 hours from the moment of applying the acrylic composition to the surface of the sanitary container, its preliminary polymerization will begin.
Until this time, no one - neither you yourself, nor other household members, nor pets - should enter the bathroom. Otherwise, every speck of dust, each hair, introduced by a stream of air through an open door, will stick and spoil the appearance of a freshly painted bowl.
In order not to spread airborne pollutants, do not touch newspapers on the floor with acrylic drips. It is safer to remove them later, after waiting for 48-hour polymerization.
It's time to put the harness
The new enamel layer is completely dry, there is no need to wait longer. Bet overflow overflow, having previously removed the drive for flowing acrylic and cutting dry streaks with a wallpaper knife. Before assembly, check the suitability of the gaskets on the harness - if they have lost flexibility, lubricate with sealant before use.
Having installed the drain and overflow, twist the drain pipe to its previous position - the inlet hole is deployed “to the bathtub” horizontally. Connect the harness to it, remove the protective film from the mixer and open the water - you need to make sure that the drain does not leak. That's all, the bathtub has been repaired and ready for use.
In order for plumbing to remain attractive for longer, it is necessary to adhere to elementary rules for the care of the coating and choose the right one bath cleaner.
It should be noted that cracks are not subject to restoration. Therefore have to pick up a new bath and carry out its installation.
Conclusions and useful video on the topic
Enamel enamel bowl, previously painted with other enamel and requiring puttying of individual sections:
Video instruction for restoring the finish of the bathtub with liquid acrylic from the manufacturer of the restoration compounds “Plastol”:
The following video describes the process of installing strapping, dismantled before applying acrylic enamel:
Following the instructions in the article, you will restore the enamel coating of the bath yourself. The updated capacity will last as long as it was carefully repaired.
Note that the acrylic finish requires careful cleaning. It is impossible to use abrasive products, only liquid ones, substances with a solvent content will not work either.
Share with your readers your experience in restoring an old cast-iron bathtub. Please leave comments on the article, ask your questions, participate in discussions and attach photos of updated plumbing. The feedback form is located below.

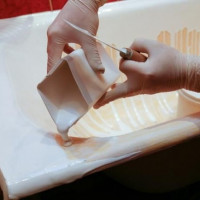 DIY enamel bath: how to treat the bath with liquid acrylic at home
 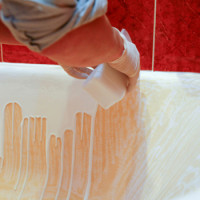 Restoring a bath with liquid acrylic: DIY repair of an enamel coating
 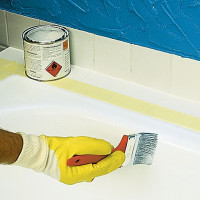 How to update an old cast-iron bath: a review of restoration and repair work
 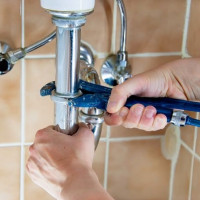 Installing a siphon on a bath: how to properly assemble and install a siphon
 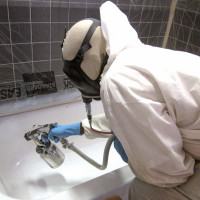 How and how to paint a cast-iron bath: an overview of the best restoration methods
  How and which bath is best to choose: an overview of options and recommendations for choosing
  How much does it cost to connect gas to a private house: the price of organizing gas supply
  The best washing machines with dryer: model rating and customer tips
  What is the color temperature of light and the nuances of choosing the temperature of the lamps to suit your needs
  Replacement of a geyser in an apartment: replacement paperwork + basic norms and requirements
The bath has already served us faithfully for about ten years. And recently, unfortunately, I noticed enamel damage on it. I wanted to buy a new one, but I read from you interesting ways to return to life old plumbing. The methods are simple, you can do everything yourself at home, and it’s much cheaper than buying a new bath, all the more so since the current prices for plumbing equipment are not very conducive to an early purchase.
It has long been a dream to restore a bath at home, but companies specializing in this business charge from 5 to 7 thousand rubles. Let's say right away, the service is not cheap. Now I’d rather decide to update the bath myself. Stakril saw in most construction stores in the city. The only question: when leveling the layer on the side walls, use a putty knife - is it silicone or rubber?
A spatula for aligning acrylic is used rubber, small and medium sizes. In principle, a durable brush is also suitable for this purpose. But I still recommend using a putty knife.
Hello. For us, the master very poorly restored the bath with liquid acrylic: he did not putty deep chips around the drain hole, unevenly flooded the sides, leaving a gap between the wall and the side.
Can I use the repair kit to fix these defects or is it more expedient to re-fill the bathroom again? And if you nevertheless re-fill it, is it necessary to remove the acrylic coating made by the master (he only needs three days), or can it be sanded and filled on it?
Hello, Catherine. Start by making a complaint to the master who was involved in the restoration of your bathtub. It is his responsibility to do his job efficiently! If you have estimates and checks, then it will be easier to push.
As for the fill, it must be done immediately, in one fell swoop so that the acrylic lies evenly. If defects are corrected, then the place needs to be prepared: clean, degrease and paste with special tape. After that, acrylic is already applied, it dries for at least 16 hours. But all the same, in the end, a difference in color after such work will be noticeable.