Connection of a shower cabin to the sewerage and water supply: step-by-step instruction

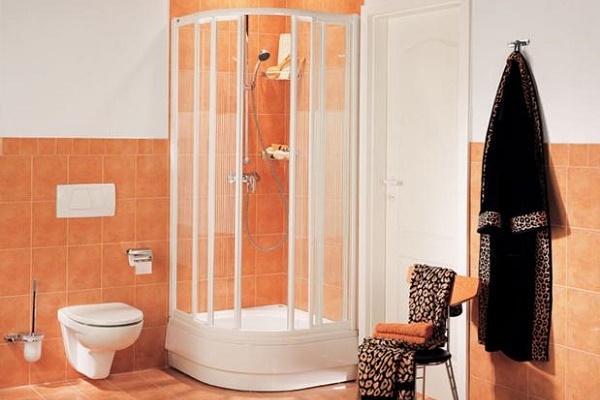
As a result of installation, instead of a bathtub, a shower-cabin, the free space in the bathroom becomes larger. At the same time, the functionality of this room does not decrease. Independent connection of a shower cabin should not even cause difficulties for a novice home master.
It is only necessary to observe the simple rules of its connection to the water supply and sewage system, which are listed in the article we presented. We suggest you familiarize yourself with the detailed connection technology. Here you will find valuable recommendations shared by experienced plumbers.
To simplify the perception of information supplement photo collections, diagrams and video briefings.
The content of the article:
Types of showers and the nuances of their installation
The shower cubicle in the bathroom is a plumbing fixture in the form of a small box designed for taking water procedures. It consists of a pallet, enclosing structure with swinging or sliding doors and water supply devices (taps, shower heads and hydromassage nozzles).
Some models are also equipped with built-in radios, steam generators and aromatherapy devices.
All showers are divided into two types:
- Open - without a ceiling in the structure, only with a fence on the sides.
- Closed - with the internal space closed on all sides.
The widths and lengths of shower cabins are very diverse - from small models 70 x 70 cm to large ones with a bath 2 x 2 m instead of a pallet. The latter is available in acrylic, enameled steel, cast iron or artificial marble.

The technology for connecting to sewer and water pipes, the materials for the manufacture of this plumbing and its dimensions do not have a special effect.In all cases, uniform connection schemes, techniques and tools are used.
Difficulties can arise only in the absence of a pan, when the drain hole and the drain from it into the sewer are walled up in the floor.
The easiest to install standard prefabricated prefabricated model with a tray and shower panel. To connect it to communications, it will be enough to connect a siphon (drain ladder) to the sewer, and hot / cold water pipes to the corresponding water pipes on the bathroom wall.
The wiring of all pipelines by the time of installation of the shower cabin should already be fully completed.

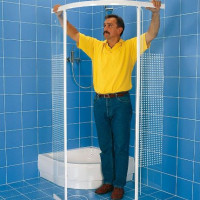
Difficulties can also create a shower without rear partitions and without a shower panel. The role of the first in a similar design is performed by the walls of the bathroom. And instead of the second, a simple mixer with a watering can is mounted.
In this case, the connection of the shower cabin will consist in connecting it to the sewer and fixing the water tap on the wall. In this case, it will be necessary not only to lay water pipes to the mixer, but also to cover them beautifully with tiles.
Shower cab technology
Water and drain points for different models of showers are located in different places. Before doing water distribution in the bathroom and sewage from risers, it is necessary to purchase installed plumbing equipment, or at least examine its documentation.
Some shower cabins may require laying a drain pipe in the floor screed or constructing a stand (pedestal).

The closer the water sockets will be to the mixer, the shorter the length of flexible bends will be required to connect the plumbing to the water supply. The situation is similar with sewage. The shorter the branch from the shower drain to its main pipe, the less likely the drainage will become clogged.
The following manual will help you familiarize yourself with the sequence of stages of assembly and connecting the shower cabin to the sewer:
Suppose we did not have to transfer water sockets, water was already supplied to the installation site of the system and a mixer was installed. Having completed the connection of the pallet to the sewer system through a siphon and a section of the sewer pipe, we proceed to the finishing work:
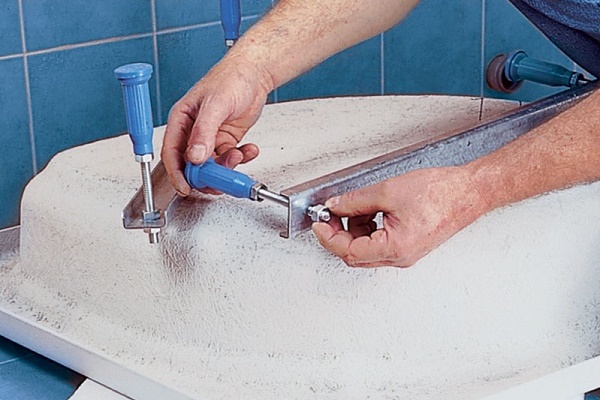
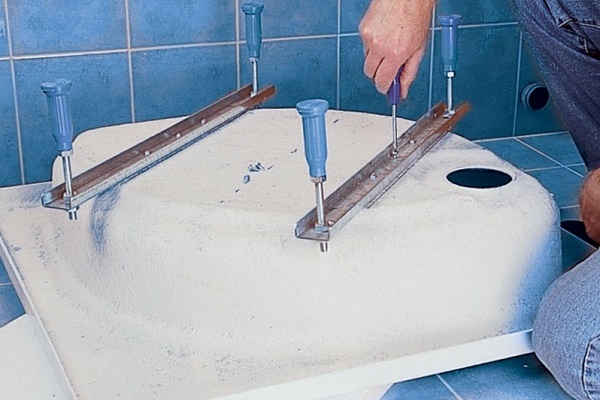
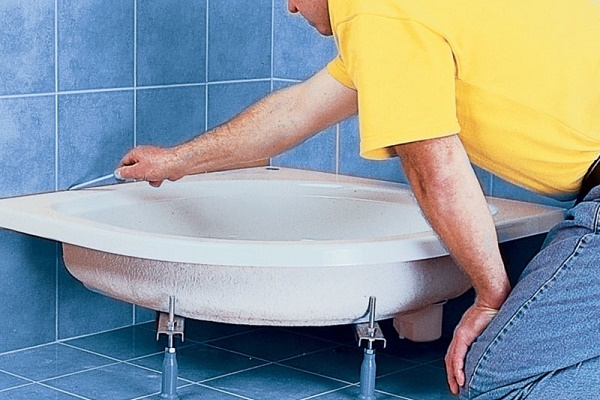
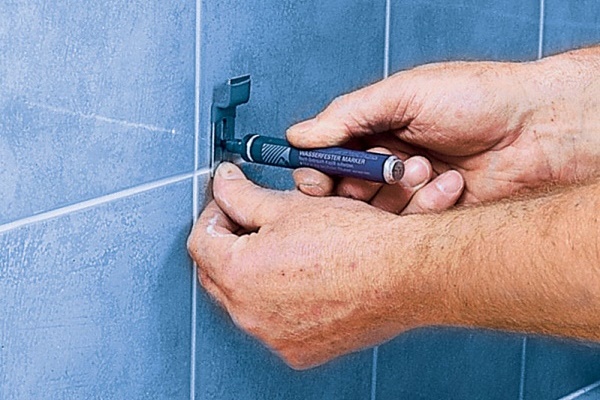
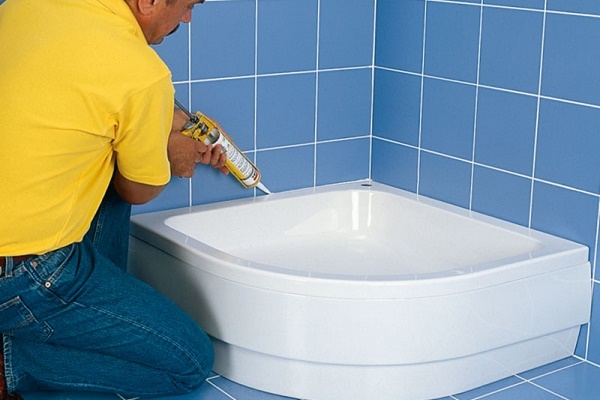
Step # 1: installing a pallet or podium
First produced pallet installationif it is provided for by the design of the shower. This “bath” is installed on adjustable supports that allow you to adjust the height from the floor. With their help, the horizontal arrangement of the side is evened out in level.

The pan should be strictly horizontal, then the water from it will drain into the drain all without a trace. Its bottom at the factory is specially made with a slight bias towards the sewer. If installed incorrectly, puddles and dirty stains from drying out will remain in it.
If the shower tray is missing, then you will have to do it instead construction with a drain ladder. The easiest way to make this elevation is from concrete with tiled or mosaic lining.
For this, the perimeter of the pedestal is laid out first from full-bodied ceramic brick. Then, a ladder is installed inside at the desired height with its connection to the sewer. Then a concrete screed is made with a bias towards the drain hole.
So that it does not subsequently become wet, it is recommended to add liquid glass or PVA to the cement mortar to improve water-repellent properties.

Tile on the screed should be glued with waterproof glue, and then the joints should be rubbed with hydrophobic paste or sanitary sealant. A drain pipe for a ladder or a drain with a siphon in all cases is selected with a standard diameter of 4 cm.
If you select a smaller section, the risk of clogging will increase sharply. And too large a pipe will simply be difficult to place in a narrow space under the pallet or floor of the cab.
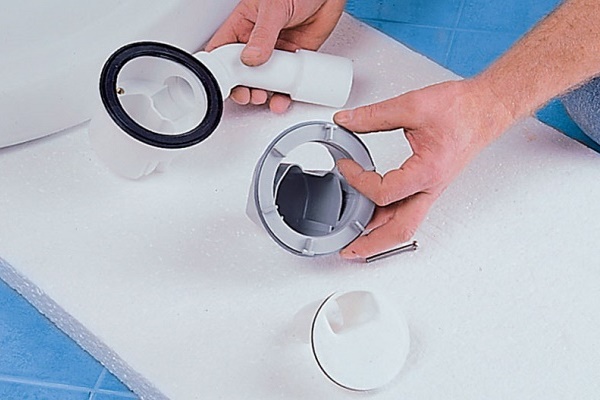
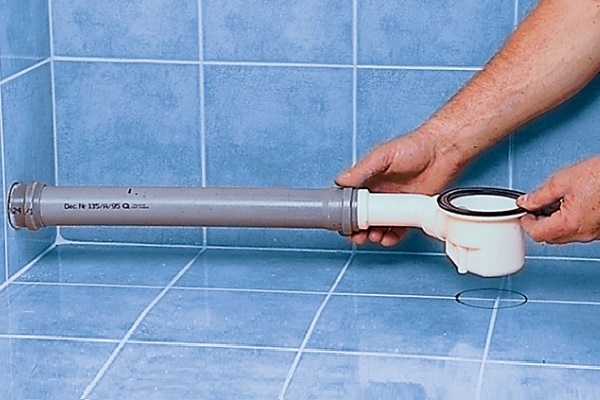
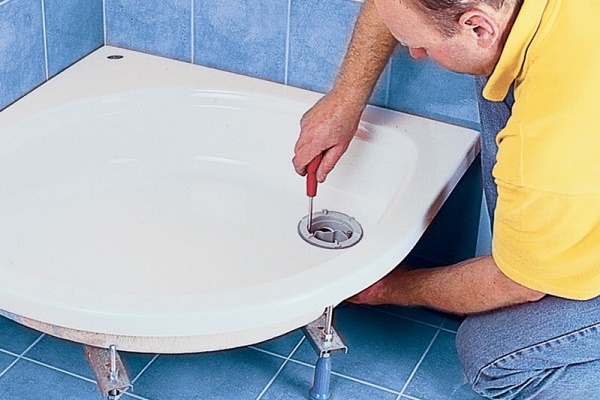
Step # 2: connecting the drain pan to the sewer
When connecting a shower cabin with a pallet to the sewer system, the work technology is as follows:
- A drain is mounted on the pallet in the corresponding hole.
- A siphon is installed.
- Corrugated drain pipe is connected for discharge into the sewer.
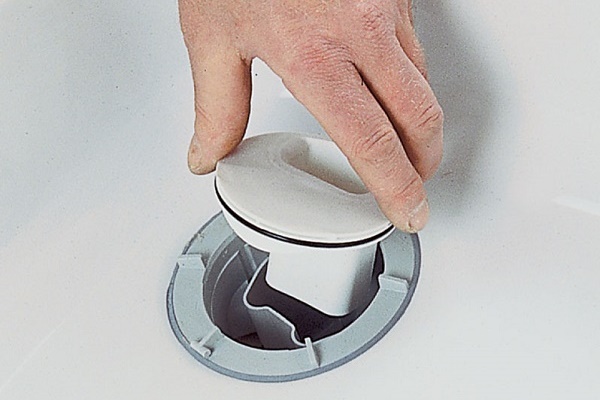
In the connection scheme of the shower cabin to the sewer pipe flat siphon should be included without fail. It forms a water lock preventing unpleasant odors from exiting the drainage system.
If it is absent, the stench will constantly spread from the drain hole, which will turn the bathroom into an outdoor toilet in a closed room. And then in the process of taking a soul, one will have to inhale the amber saturated with the stench.

Unlike siphons for sinks, their counterparts for shower cabins are non-separable and have smaller dimensions. This is due to the lack of free space under the pallet above the floor.
If the drain hole of the shower cabin is equipped with a click-clack mechanical push-in plug, then it cannot even be cleaned with a cable if it is clogged. When forming inside the cork from the garbage, it is necessary to move the shower box and disassemble the drain system.

So that the junction of the corrugated pipe and the sewer inlet does not let odors pass, it is necessary to put on a rubber cuff at the end of the first. It should correspond to the diameter of the sewer tee, where the drain from the shower cubicle is inserted.
Step # 3: connecting the water pipes
It is best to bring water to the soul from the washbasin. This is done using long hoses or by installing plastic bends. And in order not to completely cover the entire water riser in case of repairing the cabin, they should be equipped with additional valves.
If the water in the pipes is of poor quality, it is also necessary to install filters. Otherwise, the nozzles of the soul will quickly clog.
As a rule, all the nozzles on the shower panel for supplying water to various nozzles are connected to a single system at the factory. Simply use a wrench to pull out all the fitting nuts for reliability. If the set of pipes and fittings is disassembled, then it will have to be assembled beforehand according to the instructions.

To connect a cabin with a shower to the water supply, the following steps must be performed:
- Completely shut off the water supply.
- If a mixer is connected, open the taps to relieve pressure in the water supply.
- Remove old taps and showers.
- Screw in adapters (eccentric bushings) at the ends of water supply leads and adjust them so that the axial lines correspond to the outlets of the mixer.
- If the panel is connected, then instead of the eccentrics, flexible reinforced hoses are connected.
- Tow threads or FUM tapes are wound onto threaded connections, and then the washers are tightened on the fittings.
The water supply to the shower is collected from plastic or plastic pipesinterconnected by welding or crimp sleeves. But its connection with the shower must be carried out by fittings with a threaded connection. The need for their separation can arise at any time.

No water pipes need to be connected to the hydromassage. His pump takes water for the formation of jets from the shower tray. The steam bath system also does not need a water supply connection. Water also enters the heat exchanger from the sump.
If installed in the shower thermostatic mixer, then you cannot connect it through a flowing gas water heater. When regulating the temperature, the thermostat causes a pressure drop in the pipes. And the automatic gas water heater in this situation simply turns it off.
When installing a shower cabin in a private house with autonomous water supply, it is recommended to supply hot water to it exclusively through a storage boiler.
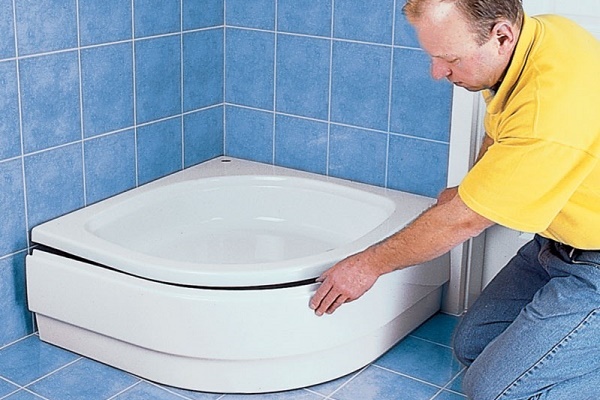
Step # 4: power connection and testing
Before checking the connections for leaks and starting up the water, you still need to connect the shower cabin to the mains and install all its glass panels on the pallet.
If the latter is made of steel or cast iron, then it must be grounded. The fall of a hair dryer or electric shaver into water cannot be ruled out, so worrying about safety will not hurt.
First, you need to assemble all the panels together without tightening the screws and screws until they stop. Only if everything worked out correctly, it will be possible to tighten all the fasteners to the full. The design as a result should not have distortions or rough displacements of elements.

The power supply line must have conductors of sufficient cross section and grounding. Modern shower cabins with a wide range of additional functions consume a lot of electricity. It is best for them to lay a separate three-core cable from the shield with an RCD.
All power supply of electrical appliances in the shower cabin is carried out through a step-down transformer with a voltage of 12 V, so the probability of getting an electric shock is almost zero.
However, in the bathroom there are many other household devices that are included in the 220 V network. Here the danger poses from them is very real. Therefore, cabins with a shower must be connected according to the rules to power supply via a cable with grounding and the devices themselves must be grounded, use should waterproof sockets.
Previously, when all water pipes were completely mounted from iron pipes, it was not necessary to carry out these extra operations. The pipeline lying in the ground served as a completely reliable ground electrode system. But now metal in many places is being replaced by plastic. As a result, this natural current conductor is broken in several places.
Tips from experienced plumbers
No matter how reliable the factory assembly of the shower panel may seem, the nuts of the connected pipes, hoses and pipes should be checked and tightened with a wrench. After installing the shower in place, all the connecting nodes will be invisible.
What will happen there behind the dull panels is not clear. It’s not worth bringing the matter to the flood. Tightness and once again tightness. No pipe connections should leak a week or a month after the connection is completed and mounting shower.
If the drain hole of the shower cabin is too far from the sewer inlet, you will need to install a waste pump. Gravity can not be organized through pipes here. Such a unit works silently, and the size is just suitable for placement under a pallet.

All piping should be slightly sloped. Gravity is needed and sewer and water supply. Sewer pipes stacked with an inclination to the riser, and plumbing - from it to the shower cabin, so that when shut off, water flows completely from the system.
In excessively budget models, the discharge can be made of silumin alloy. This stock will last a maximum of two to three years. It is better to immediately invest and change it to an analog of stainless steel, complete with a normal siphon made of high-quality plastic.
Water pipes laid to the shower booth should be equipped with ball stopcocks and dirt traps. Water in centralized systems is not always perfectly clean. If the openings of the watering can still do not clog with grains of sand, then the nozzles will cease to work necessarily. Filters with valves can be installed directly at the riser or at the ends of the inlets at the cab.
If you want to know how to repair a shower box, you can from one of popular articles our site.
Conclusions and useful video on the topic
Videos will help to understand the nuances of the assembly and connection of plumbing equipment.
Video # 1. Instructions for assembling and connecting the shower cubicle to the water supply:
Video # 2. How to mount and connect a shower cabin:
You can connect a shower cabin to utilities without the involvement of specialists. It is only necessary to possess the skills of handling a wrench for connecting pipes and a screwdriver for assembling the cabin itself. It will take several hours to complete the installation, but everything will be done exactly in good faith.
You can share your own experience in assembling and installing a shower box, ask questions, and talk about the features of operation in the block below. Please comment and ask questions.
 Repair of a shower cabin: how to repair popular damage to a shower cabin with your own hands
 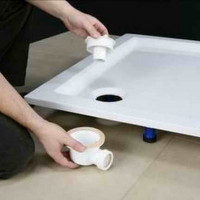 Siphon for shower tray: design, purpose, installation features
 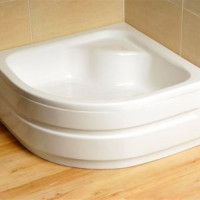 Installing a shower tray: installation instructions
 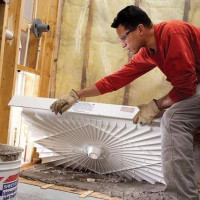 How to assemble a shower tray: mounting options for typical options
 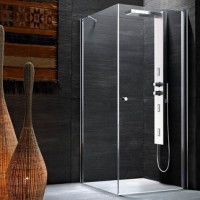 The device of a shower cabin without a pallet: detailed assembly instructions
 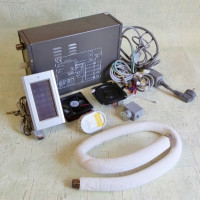 Steam generator for a shower cabin: types, principle of operation + recommendations for selection and installation
  How much does it cost to connect gas to a private house: the price of organizing gas supply
  The best washing machines with dryer: model rating and customer tips
  What is the color temperature of light and the nuances of choosing the temperature of the lamps to suit your needs
  Replacement of a geyser in an apartment: replacement paperwork + basic norms and requirements
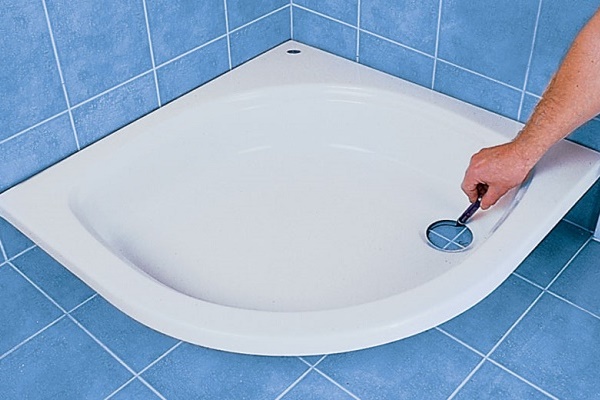
As experience shows, a shower cabin in an apartment, if the bathroom floor is not equipped with a ladder, is a time bomb. At the same time, strangely enough, the most harmless option is when a person buys a cheap shower corner without a back wall and a cover. If he sensibly sticks the siphon hose into the sewer and isolates the adjoining of the pallet to the wall with something like a swallow curb, almost nothing threatens his neighbors below.
But serious buildings with a faucet on the back wall and a lid ... there are so many opportunities not to be screwed on, so many seams that you can forget to coat with a sealant, which even if they are missed, can dry and crack over time ... Apartments in which neighbors have such a cabin on top should cost 10 percent cheaper.
It’s a pity that the shower cabin is not going to, as a designer, and even if you know where the specified part is from, it still doesn’t work out the first time. The main thing is that it should be a quality thing, otherwise this procedure will drag on for several days. For some reason, the bottom of the cabin doesn’t fit snugly ... just as I installed it, I ran into something that had to be sealed between the side and the adjacent wall, from there the water flowed the first time it was used.
Nice article, thanks!
I liked the article, a lot of useful