Replacing the toilet bowl: how to remove the old tank and put in a new one

The most vulnerable component of the toilet is a container for collecting water. Most often it is her who has to be changed. Replacing the toilet bowl is much cheaper and much more practical than acquiring a new plumbing kit. In addition, you can save money if you find a suitable tank and install it with your own hands. Do you agree?
We will tell you how to correctly select a tank for restoring the functionality of an important plumbing facility. Here you will learn how to dismantle a used tank and install new equipment. Subject to our recommendations, replacement activities will be seamless.
We offer proven methods, provide detailed training. Visual perception of information will provide illustrations, photo and video guides.
The content of the article:
- Types of toilets and flush tanks
- Scheme of the toilet bowl
- Reasons for replacing the drain tank
- Choosing a new drain tank
- Replacing the compact type drain tank
- PORTA toilet bowl installation photo guide
- Replacing a separate toilet flush tank
- Installation of a new tank for installation
- Conclusions and useful video on the topic
Types of toilets and flush tanks
Over the centuries of the existence of toilets, the principle of their engineering structure has changed little. Current manufacturers produce four types of sanitary ware for toilets.
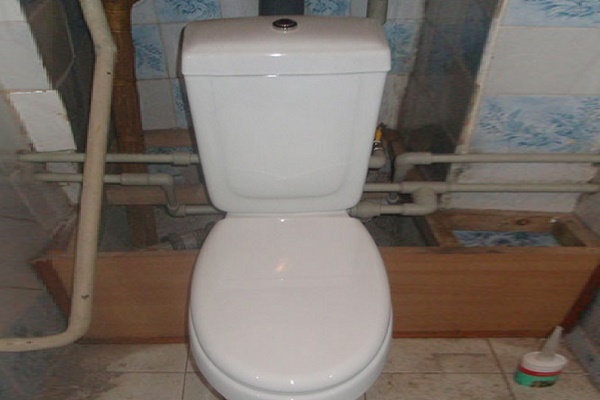
Compact. In this version of the toilet, the back of the bowl has a platform for installing a removable tank, the fastening of which is done using two long bolts. The advantage of the compact is the convenience of repairing drain valves in case of breakage.

Monoblock. This type of toilet has the appearance of a single ceramic block combining a bowl and a water tank located behind. This design is easy to mount, and it is possible to lean on the toilet while sitting.

Separated. This design of the toilet involves placing the tank at a certain height and connecting it to the bowl with a hose or pipe. Separate plumbing is characteristic of public places where there is a high probability of tank displacement and leakage.

Hidden. This type of toilet is also called suspended, it is mounted on a frame hidden behind the casing - installation. Only a bowl is visible, and the drain tank and other structural elements are hidden in a decorative box or behind a wall.

The tank in the installation separately is almost never replaced, therefore, in the event of a breakdown in the internal mechanism, the main problem is the dismantling of the wall or plasterboard box to access the frame.
The most difficult is the dismantling of the compact toilet flush tank. This is due to the peculiarities of the location of the plumbing and the minimum free space for work.
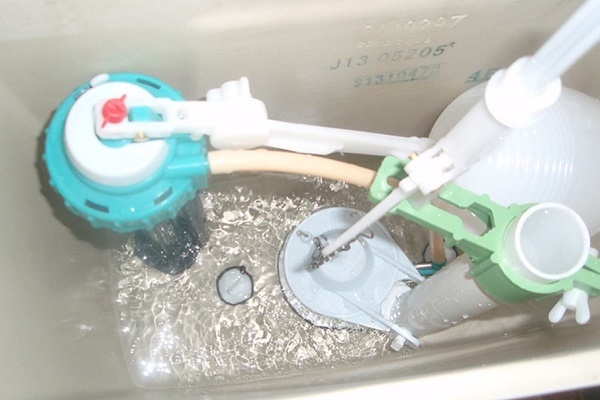
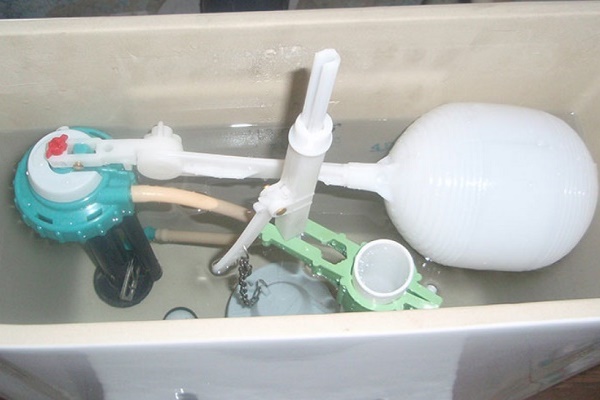
Scheme of the toilet bowl
A standard home drain tank consists of:
- housing;
- float mechanism;
- trigger mechanism.
The tank can be attached to the toilet in various ways. Manufacturers usually do not place fasteners directly on the drain hole, but instead fix bolts on their sides.

To seal the tank between it and the toilet bowl lies a rubber gasket, which is then simply pressed by the side fasteners.
Internal complete drain tank different in different models. The mechanism can be either an elementary plug with a float, or a cartridge that includes all the necessary tools for draining at the same time.

The cover is fixed on the outside by a clamping decorative nut near the drain button, which a novice plumber might not know about.
When replacing the drain tank, the scheme of its operation is not so important, because the internal mechanisms in a new product are usually either installed inside, or an individual installation instruction is attached to them.
Reasons for replacing the drain tank
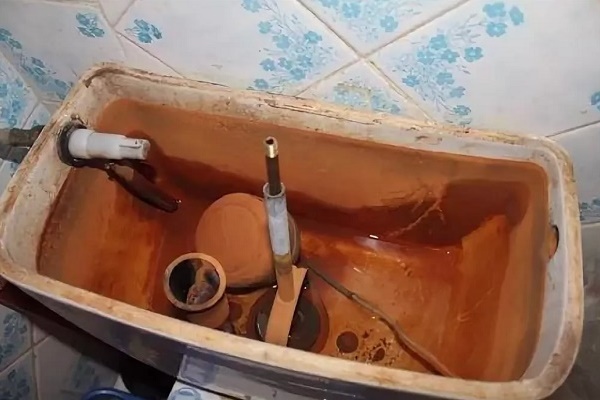
Direct failure of the drain tank rarely causes its replacement due to the fact that it consists only of a ceramic container with a lid and fasteners. There is simply nothing to fail.
People are forced to change the drain tank, leaving the old toilet bowl in place, such reasons:
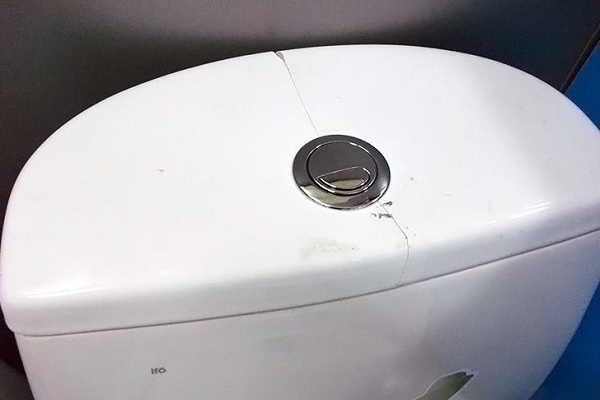
- Mechanical damagethat lead to the destruction of the drain tank or carry the risk of subsequent injury to people.
- Obsolete design. Separate tanks for this reason are easiest to change because they usually do not require structural compatibility with the toilet bowl.
- Damage to the internal drainage mechanism with the impossibility of replacing it. This annoying reason is typical for exclusive toilet models, whose components are difficult to find even on the Internet.
Replacing the toilet flush cistern is always cheaper than acquiring a new complete plumbing kit. The only problem may be finding a model compatible with the old toilet bowl.
It often happens that instead of installing a new flushing tank, only repair the tank. Check out repair options for breakdowns. It is possible that your option is described there.
Choosing a new drain tank
The attachment points of the drain tank to the bowl are not standardized, so there is no guarantee that it will be possible to find the necessary tank on the old toilet bowl. You can choose a similar model of the same company, but over the years of operation, usually all labels are erased, and it is impossible to determine the name of the device.
But you can find the company name on a decorative washer near the drain button. In an extreme case, you will first need to dismantle the drain tank, photograph the shelf of the toilet bowl, take the dimensions, and then with all this go to the store and try to find the necessary model.
It is also required to measure the distance between the axes of the two holes for mounting the tank to the toilet bowl.
Replacing the compact type drain tank
Toilets with an attached flush cistern are the most common because of the cheapness and ease of mounting. They can be installed on any section of the toilet, where it is possible to organize the supply of water and drainage.
Stage # 1. Selection of tools and materials
To independently change the drain tank, a person must take care of the availability of such tools and materials:
- new tank with internal drainage mechanism;
- gaskets and fasteners;
- spanners;
- silicone sealant;
- Screwdriver Set;
- new flexible hoses;
- hacksaw for metal (if necessary).
The proposed list is minimal and does not imply the presence of serious problems when dismantling equipment.
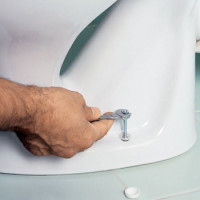
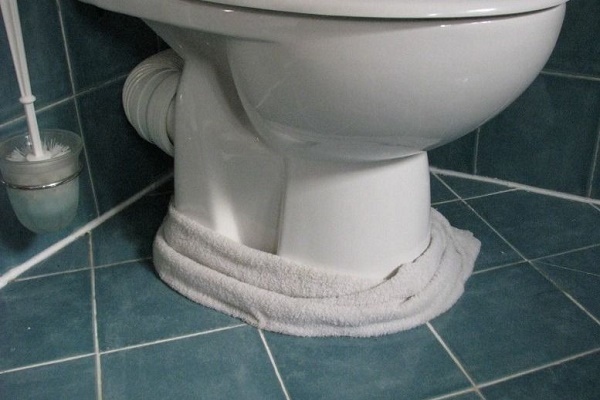
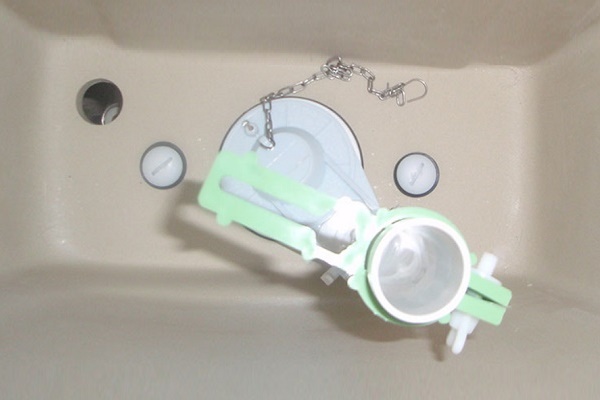
Stage # 2. Dismantling the tank on the Compact
Removing the drain tank from the ceramic bowl begins with draining it and turning off the water supply. To do this, the water supply pipe or hose is closed and a complete drain is made. At the bottom of the tank a little water remains, which can subsequently get wet with a rag.

After removing the cover, unscrew the water hose. Its location can be completely different. The nozzle of the drain mechanism can be located on the side, at the bottom or behind the drain tank.
When loosening the nut with a wrench with your second hand, you must hold the water supply mechanism inside the toilet.

Then you need to unscrew the fixing nuts under the toilet bowl. If the plumbing has been in the toilet for many years and the room is constantly damp, then the bolts with the nut can rust so much that their unscrewing becomes impossible.
In this case, it remains only to carefully cut the bolts. There is no other way to dismantle the tank.

After loosening the fixing bolts, the drain tank can be lifted up and removed. A rubber gasket should remain on the toilet bowl, which is recommended to be replaced with a new one. A set of rubber bands is usually included with the purchased drain tank.
Be sure to wipe the shelf of the toilet from dirt, fungus and rust.

After installation and mounting a new drain tank to the toilet casing there is no convenient opportunity to wipe this place
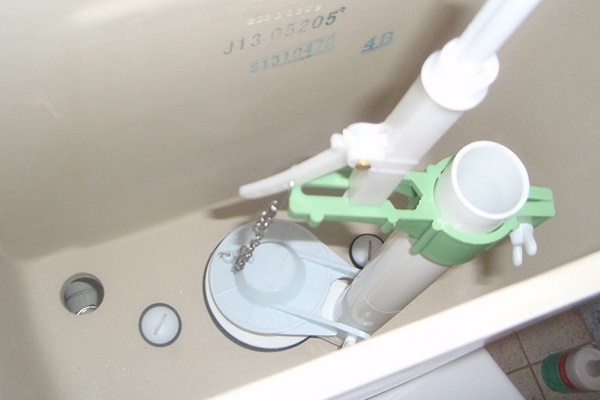
Stage # 3. Installing a new drain tank
After selecting and acquiring a new suitable drain tank, you can proceed with its installation.

Before mounting the float and trigger mechanisms into the tank, it is advisable to check the structural compatibility of the lower outlet with the gasket and toilet bowl.
If all the elements are compatible and the tank stands firmly and firmly on the toilet, then you can proceed with its step-by-step installation.
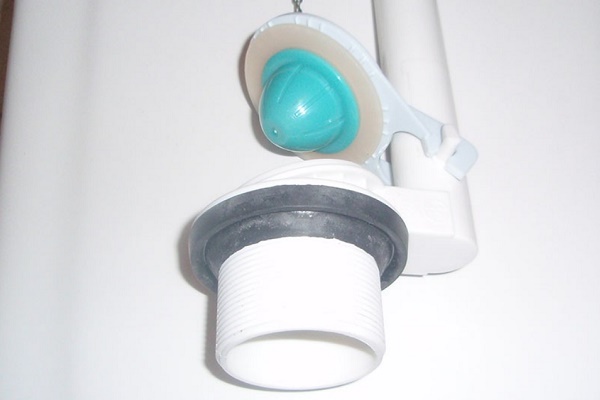
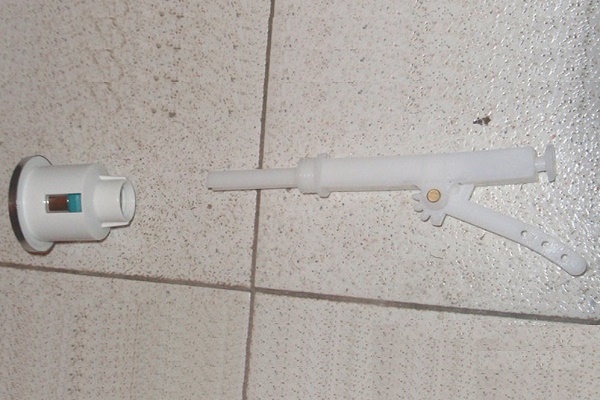
Step one. Install the drain valve mechanism. To do this, put a sealing ring on the valve pipe and insert the device into the bottom hole of the tank.


It is not necessary to clamp it tightly with a key, manual effort will be enough.
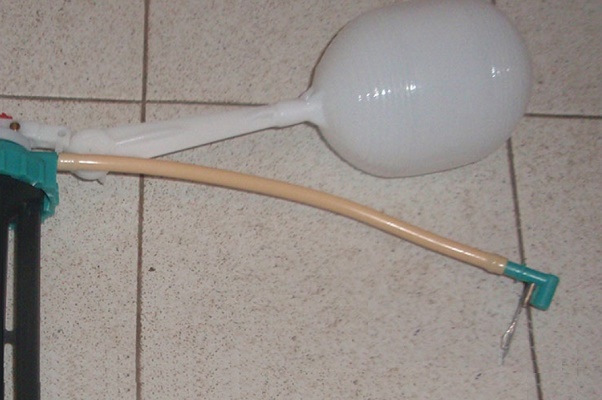
Second step. Installing a filler valve. Its branch pipe can exit from either side of the tank, depending on the model.


If water is supplied from below, there is a risk of water leakage. Therefore, it is recommended that you lubricate the outer gasket and the threaded connection with silicone before tightening.
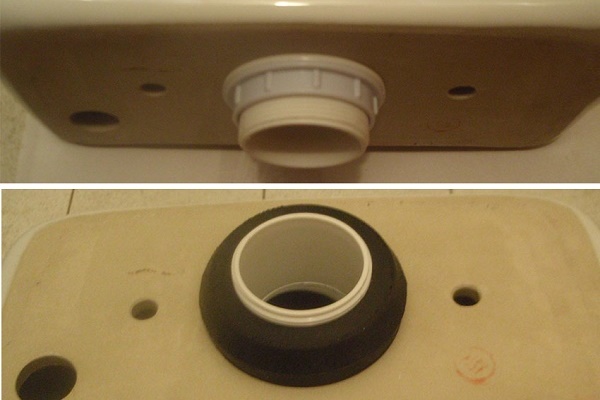
Step three. Installation of a sealant. A rubber sleeve is put on the outlet pipe of the drain valve. In some models, it is more convenient to put it in a groove on the shelf of the toilet bowl. Although this large sealant will not be pressurized, it is recommended to lubricate it on both sides with a thin layer of sealant.

Fourth step. Fixing the drain tank to the bowl. It is necessary to smoothly and clearly align the outlet of the tank with the corresponding opening of the toilet bowl. Through channels for fixing bolts can serve as an excellent reference point for the correct location: if you look at them exactly from top to bottom, the floor should be visible.
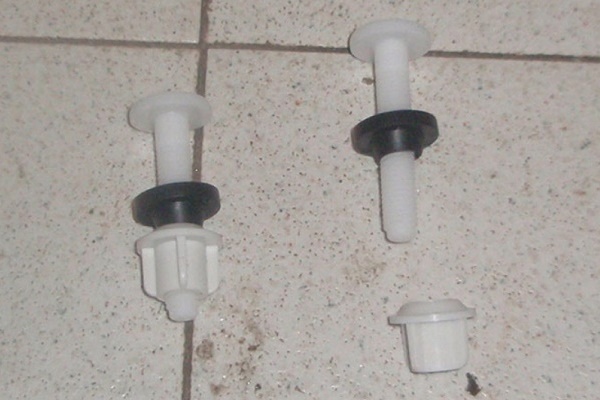
We stick plastic or metal bolts into the mounting holes and gently tighten them with nuts from the bottom.

Do not forget to put cone-shaped gaskets on the bolts on the inside of the drain tank.
Fifth step. Screwing the flexible hose to the filler valve.

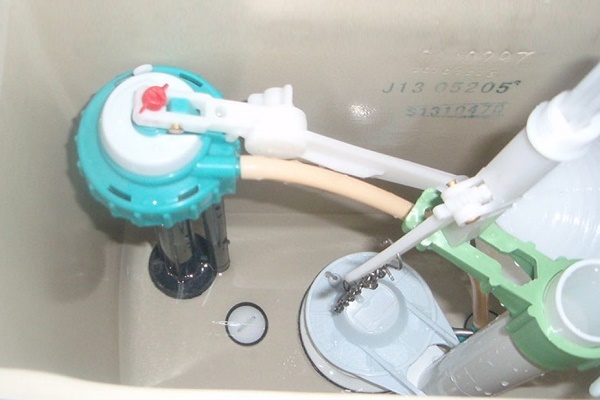
After attaching the hoses, you can open the water and look at the work float mechanism with an open tank lid. If the float worked normally, then a test discharge of water should be carried out.
Sixth step. Screwing on the cover and drain button. The drain valve mechanism is actuated by a button, which is usually screwed into its upper part. As a result, the valve body is stretched between the drain hole at the bottom and the button at the top.
The mechanism for fixing the cap may differ from the above, so carefully read the instructions attached to the tank. On installation of a cover of a tank its installation comes to an end.Subsequently, you can install the toilet seat, clean the bathroom and comfortably use the new equipment.
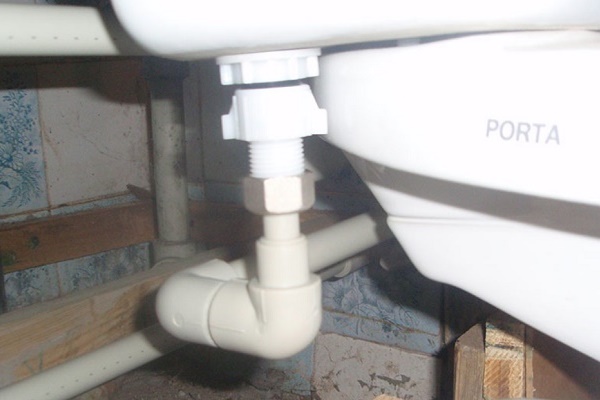
PORTA toilet bowl installation photo guide
We begin the process of installing the drain tank with an introduction to the components and with the assembly of the drain valve. Its feature is a non-separable button mechanism, which will have to be completely changed in case of breakage, and the presence of a pear in the water collection system.

Having successfully completed the valve assembly steps, we proceed to install the tank and attach it to the toilet:
We check how smoothly the tank is installed. We fix it by tightening the nuts evenly. In order to avoid complications during the installation of fittings, we study the components:

Then proceed to the installation of fittings:
Replacing a separate toilet flush tank
Replacing the drain tank on separate toilets is much easier than on Compacts. The equipment is either fixed to the wall with special fasteners, or the case is screwed directly to a vertical concrete slab.

After removing the old tank, according to the instructions, it is necessary to assemble a new one.

In the already assembled form, the purchased hinged tank is mounted on the wall and connected to the water hose. The drain pipe is inserted into the corresponding hole in the toilet bowl and this completes the installation of the separate toilet bowl.
Due to the noise and external unattractiveness, these types of drain tanks are practically not found in houses and apartments.
If replacing the tank was only a partial solution to the problem, and the bowl also needs to be changed, then useful information and detailed toilet installation instruction, you will find the same on our website.
Installation of a new tank for installation
Serious damage to the drain tank during installation is a very unpleasant problem. To eliminate it, the dismantling of a decorative box or tile in the bathroom is required.

The fixation of the plastic case to the metal frame is usually done with latches.

After disassembling the installation, you only need to remove the old one and fix the new tank on the frame. The installation of a new tank is carried out after inspection of the supporting frame of the hanging toilet and repair installation in case of breakdowns.
Next, the installation is attached to the wall, after which a water hose is attached to the tank.
Then you can again mask the support frame and install a toilet bowl on mounting studs fixed in it. In wall mounted toilets, the drain tank is only a block component, the replacement of which lasts several minutes. But the dismantling and installation of the decorative box can drag on for weeks.
Conclusions and useful video on the topic
The presented videos will complement the understanding of the sequence of actions when replacing the drain tank and introduce you to the nuances of this process.
Video # 1. Installing the drain tank:
Video # 2. Dismantling and assembling the toilet tank:
Video # 3. Installation of a flush toilet wall mounted toilet:
The process of replacing the drain tank on the toilet is quite simple and does not require specific knowledge. The main difficulty is finding the right model of equipment in the store. Solving the remaining problems will help to carefully follow the above recommendations.
You can tell about the experience of replacing the flushing tank and share interesting subtleties in the block below. Ask questions and comment on the information we offer here.
 How to remove an old toilet: an overview of the technology for dismantling old plumbing
 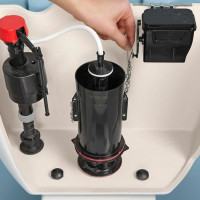 Fittings for the toilet flush tank: how the spillway device works and works
 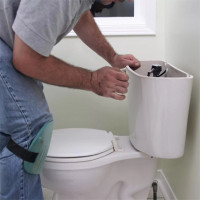 How to disassemble the toilet flush tank: instruction on working with various designs
 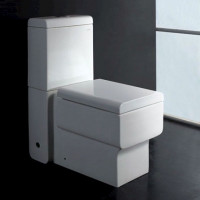 The toilet bowl is leaking: what should be done when a leak is detected
  Do-it-yourself toilet drain tank repair: instructions for fixing typical breakdowns
 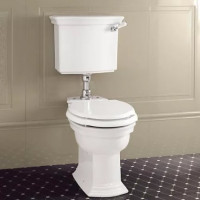 Why the toilet bowl sweats: the causes of fogging and how to eliminate them
  How much does it cost to connect gas to a private house: the price of organizing gas supply
  The best washing machines with dryer: model rating and customer tips
  What is the color temperature of light and the nuances of choosing the temperature of the lamps to suit your needs
  Replacement of a geyser in an apartment: replacement paperwork + basic norms and requirements
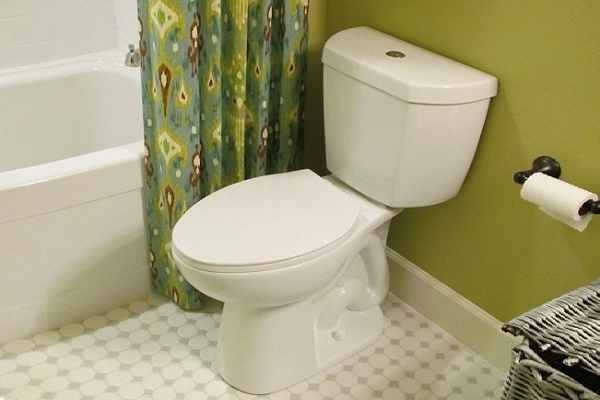
When my tank broke, the plumber from the housing department said that the toilet was old, it was easier to replace it than to fix it. I did not listen to it, I spent a lot of time while I was looking for a suitable mechanism, but in the end I still found it.I had to sweat, but managed to remove the old plumbing and put the acquisition. In fact, the faience part itself does not know the demolition, and if you can simply replace the drain mechanism, then why change the toilet bowl completely.
When the tank broke, I thought that I would have to completely change the plumbing. But, after reading various recommendations on the Internet, I realized that you can try to replace it yourself. I bought a new tank, the necessary materials and got to work. I had to tinker for several days, but it turned out to make a replacement on my own. The main thing is to approach the matter responsibly, then everything will surely work out!
At first I just wanted to replace the internal fittings, but as they say, “something went wrong” 🙁 I will change the tank. Moreover, new ones come with all the insides right away.