How to fix the toilet to the floor: an overview of the technical details and the best installation methods

Equipping modern housing with a toilet room is a traditional touch of any project. In turn, installing a toilet in a toilet is also a well-established procedure. Usually the default installation is carried out during the construction of housing.
We will tell you how to fix the toilet to the floor. Together with you we will figure out which method of fixing plumbing is better to use if you suddenly have to change the device during operation. Based on our advice, you can quickly and easily perform work without involving plumbing.
The content of the article:
Technical details of plumbing installation
A toilet bowl of any configuration, like a plumbing fixture as a whole, is mounted in accordance with the installation instructions. The initial installation of these plumbing fixtures (at the stage of housing construction), as a rule, is carried out by professional performers.
But in the future, already held property owners often carry out the reconstruction of the toilet, in particular, change the toilet. And they do it on their own in order to save on installation services.
Users often change equipment to suit their personal preferences. Some of them do not possess all the nuances of installation and methods of attachment.

Self-reinstallation is not prohibited and welcome. However, such owner intentions should at least be accompanied by knowledge of how to fix the toilet to the floor. It would seem that the banal detail of the installation procedure, but when they want to see a high-quality, reliable installation as a result, even the smallest details are important.
The nuances of installing toilet bowls are directly related to the one chosen for installation kind of plumbing fixtures. In everyday life, floor-mounted toilets are most often used. Moreover, most of the mounted devices have a configuration of compact products.
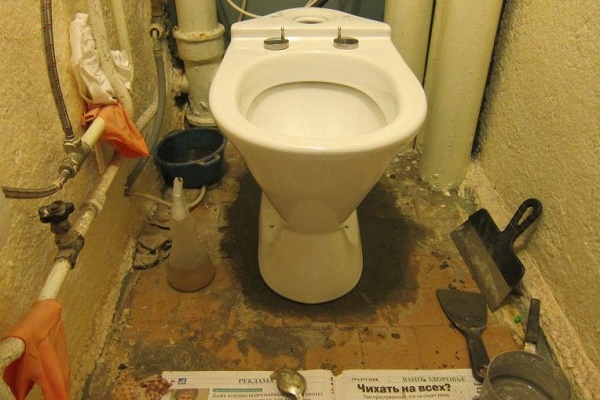
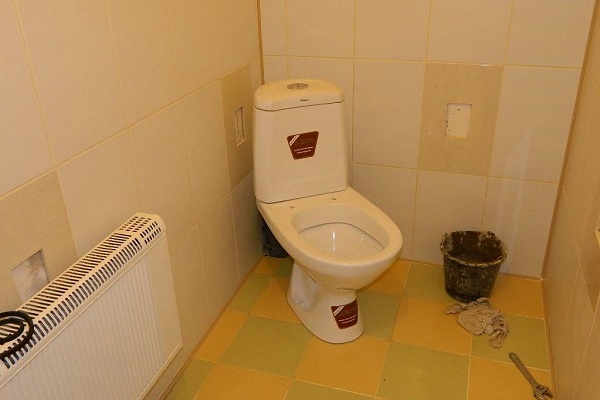
How to fix a compact and any other toilet to the floor of the toilet room, performing the installation yourself?

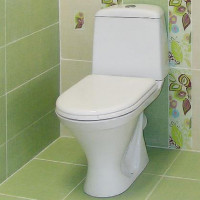
Approximately to such a result, self-taught masters should strive.
Analysis of fastener methods
Construction practice indicates at least three methods for attaching toilets to the floor surface:
- standard installation kit;
- by using special adhesives;
- by installation on a cement mortar.
A standard installation kit (dowel-screw) is usually recommended if installed on an exceptionally flat floor surface.
The method, from the point of view of reliability and stability of the structure, is considered acceptable, but does not fully satisfy in all cases. We apply the “standard” usually to models of a compact type, which are light in weight and modest in size.
Another way to fix the toilet to the floor - landing on glue - provides a high level of bond strength. But in this case, the quick dismantling of the product if necessary is excluded. Therefore, the installation method for glue is used, where installation involves the continued operation of plumbing without the prospect of replacing it.

Often, epoxy is used as glue. This glue is distinguished by high characteristics in terms of reliability and fastening strength.
Cement mortar is often considered as an alternative to standard and adhesive techniques. In fact, this method is not much different from “sticking to glue,” since cement contains an adhesive component. Meanwhile, the connection of the toilet bowl to the floor with a cement mortar shows a lower degree of strength compared to special adhesives.
The choice of mounting method to a large extent depends on the type of base on which the installation is made. About how to put toilet on wooden floor, you’ll learn from an article detailing this issue.
Technology for fixing the toilet to the floor
When referring to a particular method of attaching a home appliance to the floor, the master will need a certain set of tools.
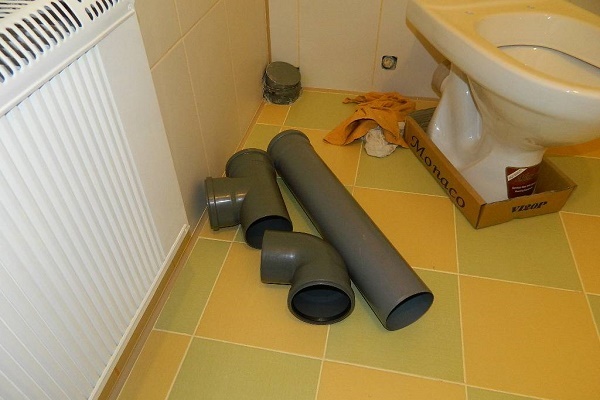
Usually the work is carried out without any difficulty, when at hand there are:
- construction punch (plus a set of drills of different diameters);
- hand drill (plus drills of different diameters for ceramics);
- manual mechanical press (pusher gun);
- screwdrivers, locksmith wrenches, pliers, hammer;
- tape measure, pencil, core, rubber spatulas (wide, narrow);
- emery paper (large, small).
Possible materials for installing plumbing:
- plastic dowels (d = 8-12 mm, 2-4 pcs.);
- metal screws (screws) (d = 6-8 mm, 2-4 pcs.);
- gaskets under the screw head (2-4 pcs.);
- glue (liquid nails, silicone, epoxy);
- cement, quarry sand (at the rate of 1: 2);
- wooden board (thickness 20-25 mm);
- sheet rubber (thickness 10-15 mm).
Installing the toilet and fixing this type of plumbing to the floor with standard fasteners involves drilling holes for dowels. If the configuration of the plumbing fixture is made for fastening with two screws (screws), two holes need to be drilled. In the other case, respectively, four.
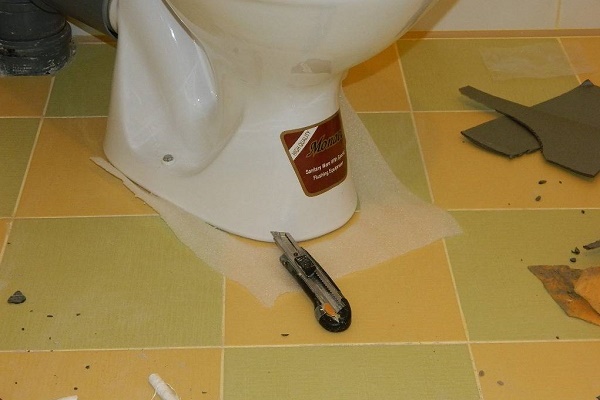
The drilling process is accompanied by some difficulties when put the toilet on the tile. Careless action, lack of experience, ignorance of the technology of drilling holes in ceramic tiles are the main causes of installation failures. Ceramics need to be drilled with a special drill, observing the rule of light pressure and low speed of rotation of the drill.
Installation with subsequent mounting on a cement mortar also has its own characteristics. Here, an important factor determining the quality of the compound is the composition of the solution. Therefore, it is recommended to adhere to the established ratio of 1: 2 (M200) as accurately as possible, where the first digit is the amount of cement, the second is the amount of quarry sand.
With this ratio, the brand of cement solution is obtained - M200, which is optimal for use in domestic conditions.

Cement mortar fastening is not often practiced in modern construction conditions.
Step-by-step screw mounting process
If the first option for fixing the toilet to the floor of the toilet room (standard with screws) is selected, the following steps are performed:
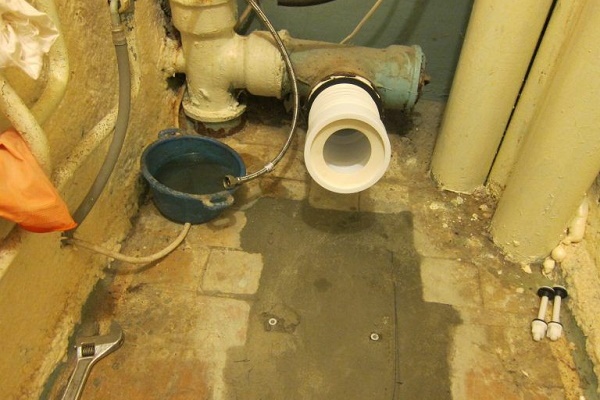
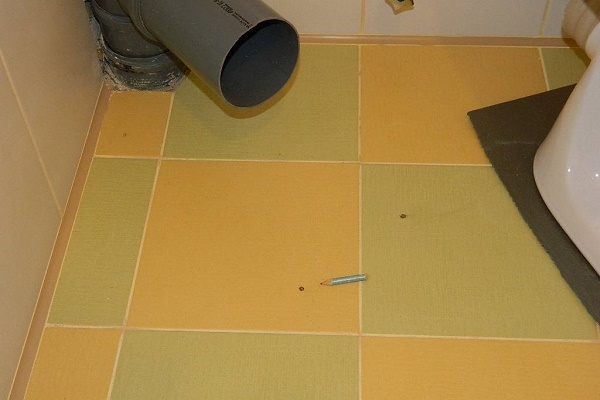
- The exact location on the sole floor of the plumbing fixture is determined.
- Marks the centers of the mounting holes on the surface of the coating.
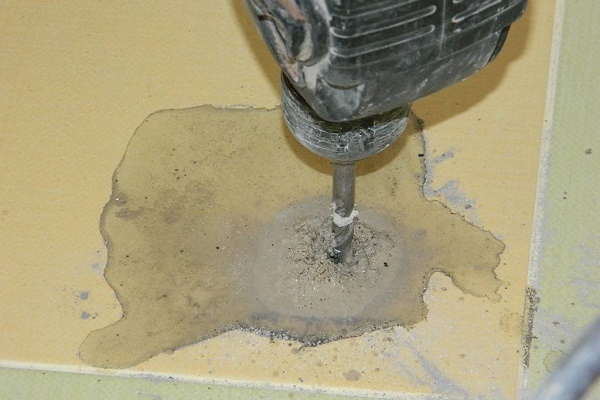
- A drill for ceramic tiles at the marked centers drills holes with a depth equal to the thickness of the tile.
- Using a drill on concrete, the holes are drilled to the desired depth (usually 60-70 mm).
- Dowels from the mounting kit are inserted inside the holes obtained.
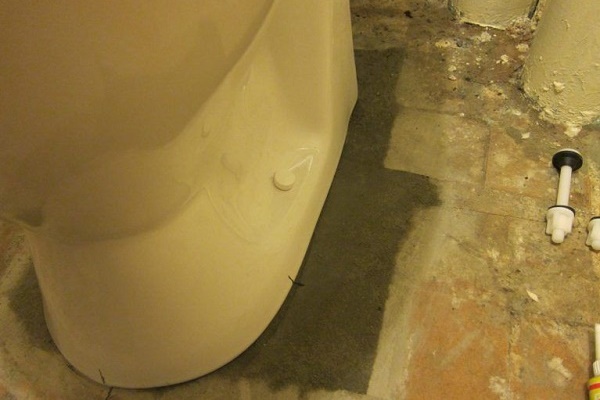
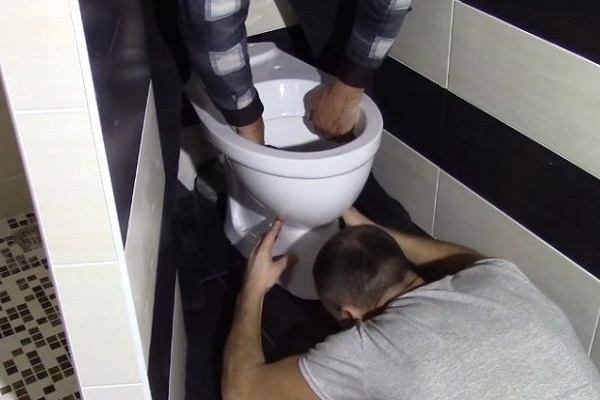
- Plumbing is placed at the installation site, the mounting holes of the device are combined with the holes made in the floor.
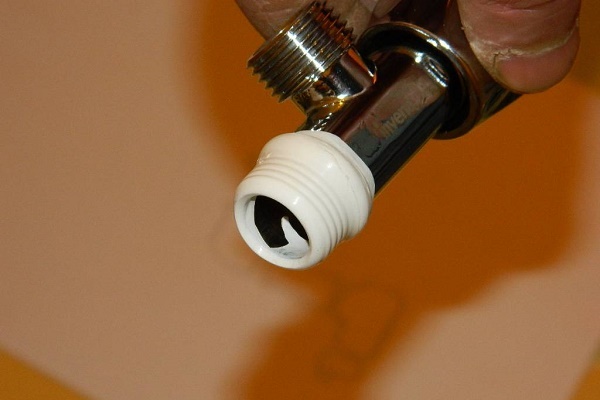
- The outlet pipe of the toilet bowl is connected to the sewer system with a corrugated hose.
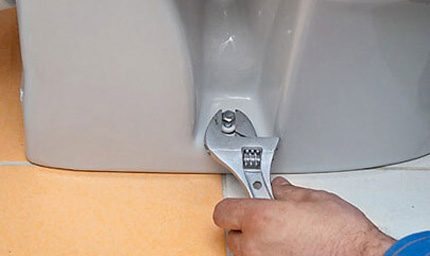
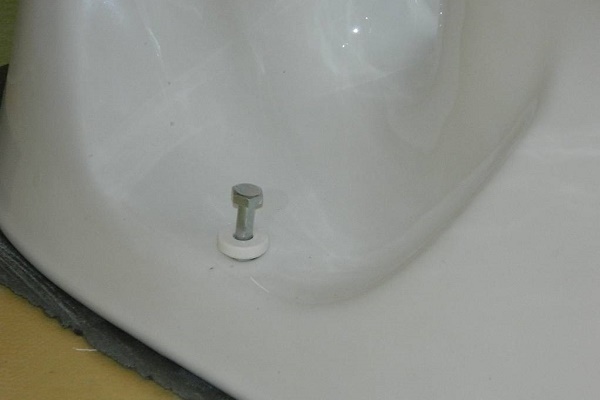
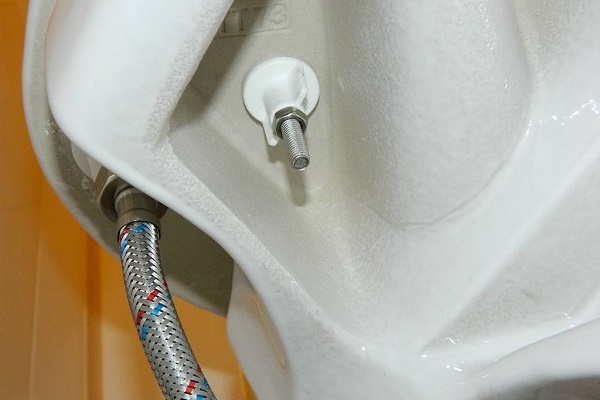
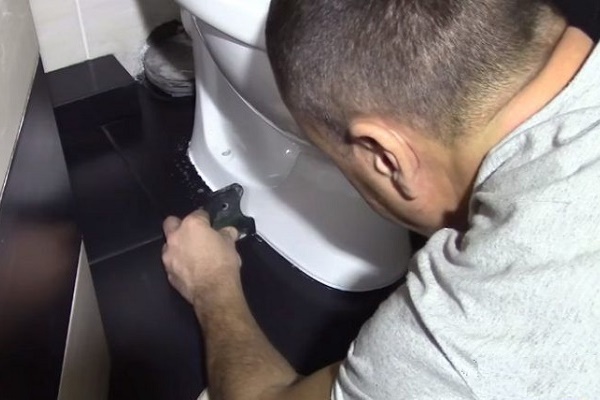
- The screws from the mounting kit fix the device to the floor.
After completing these works, the connection points are additionally sealed. corrugated pipe to the toilet and to the sewage system. For these purposes, sealant or similar products are used. Cosmetic sealing of cracks is also performed along the axis of pairing of the sole of the device with the floor plane, if any.

The installation of the toilet and its attachment to the floor in the second way are considered as simplified as possible. Here, the master-do-it-yourself master does not even need skills or knowledge regarding drilling various kinds of building materials.
All that may be required is an instruction manual for working with a manual mechanical press (pusher gun). And when epoxy is taken as glue, installers are completely dispensed with without a “gun”.
The process of installing and securing the toilet with screws involves a number of traditional steps:
Having successfully completed the preparatory work, we proceed directly to the installation and fastening of an important household appliance:
Bonding the toilet to the floor
Work on fixing the sole of the device to the floor with special glue is performed in the following sequence:
- Accurate layout of the toilet seat.
- Preparation of the sole of the device (cleaning, leveling, degreasing).
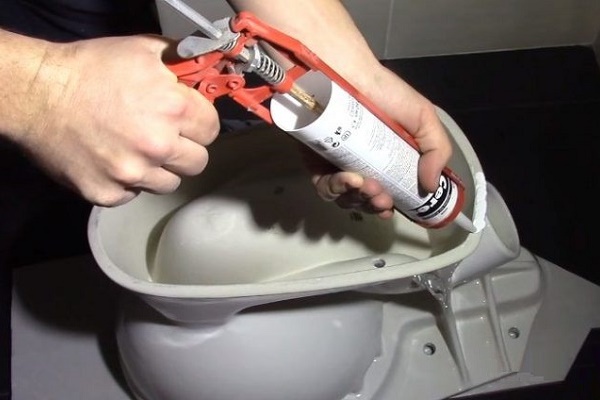
- Application of adhesive mass to the surface of the sole.
- Installation of the device exactly at the previously designated boundaries.
Under the weight of the plumbing, excess glue will inevitably appear along the outer edges of the sole. These surpluses are cleaned with a rubber spatula, after which the exit area of the adhesive residues is additionally wiped with a rag soaked in soapy water.
After completing the procedure, leave the plumbing for a day until it is completely fixed due to the drying of the adhesive mass.
About the same algorithm, work is performed when the method of fastening to cement mortar is selected:
- A small amount of cement solution is prepared.
- Markings are being made for installation on the floor of the toilet room.
- The installation site is thoroughly cleaned of debris and dust.
- At the installation site, a uniform layer of solution is laid out.
- The sole of the toilet is wetted with water, then the device is placed on cement.
- Excess cement slurry is removed with a spatula.
An exposure time for full fixing for this option is also recommended for at least 24 hours. Then you can perform additional actions - pairing the drain with the sewer, tank installation and fixationinstalling toilet seat.

Scheme selection connecting the toilet to the sewer determined by the type of release of the device. Connection options are described in detail in our recommended article.
Other mounting methods
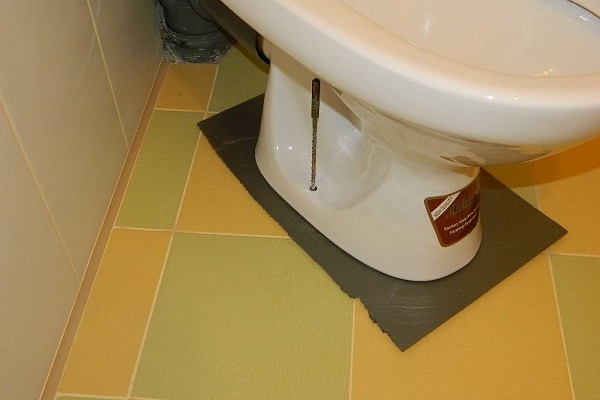
There is another way to fix the toilets on the floor of the toilet rooms. The technology is called “installation on taffeta”.
Due to its antiquity, this technique quickly loses its relevance, but sometimes it is still used, but, as a rule, on wooden floors. The principle is to attach a plumbing fixture to a wooden board - taffeta, carved according to the shape of the sole.

On the floor of the room, at the place of installation of the plumbing, a shallow recess is made (up to 50-70 mm deep). This recess is filled with cement mortar. They take taffeta and randomly pierce it over the entire area with nails. On the other side (bottom), where the nails came out, taffeta is laid on a cement pad.
On the outside of the taffeta, a toilet bowl is installed and fixed. Of course, this is done after the cement mortar has completely set. Fastening is carried out according to the standard - with screws.
Perhaps, the most modern technique - fixing plumbing to base frame - installations.

True, the "installation" is a metal structure, it already provides for a slightly different form of installation - suspended. That is, plumbing is not mounted with emphasis on the floor of the toilet room, but remains after installation in a suspended state.
Note to installers: helpful tips
Plumbing fixtures are made from strong but fragile materials. Therefore, fixing a porcelain or earthenware device with screws (bolts), it is not recommended to use maximum efforts for screed. Be sure to use soft pads (silicone, rubber, plastic), placing them under the screw heads.

If glue is used for fasteners, the quality of cleaning and degreasing of glued surfaces is of great importance in achieving bond strength.
Using epoxy resin, it is necessary to clearly observe the ratio of resin and solvent during the preparation of the adhesive mass.On the surface, glue must be applied evenly, to prevent the formation of air cushions.
When installing the device “on taffeta”, it is desirable to choose hardwood as a material. You can use multilayer plywood, but in any case, you should provide high-quality waterproofing for taffeta. A humid environment dramatically reduces the durability of any wood.
Conclusions and useful video on the topic
One of the options for attaching a plumbing fixture to the floor is discussed in the following video:
Which method of installing toilets is best is up to the property owner to decide where to install and fix the plumbing.
However, choosing a methodology, it is recommended to take into account possible loads on the toilet, the material of the device (faience, porcelain), as well as the design features of the toilet room. A careful approach to business will certainly help to achieve the desired result.
Want to talk about how to install a toilet with your own hands? Do you have useful information and pictures on the topic of the article? Please write comments, share your impressions and ask questions in the block below.
 How to install a toilet on a tile: an overview of the best ways and technical nuances
 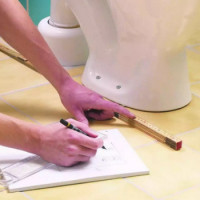 Fixing the toilet to the floor: an overview of possible methods and step-by-step instructions
 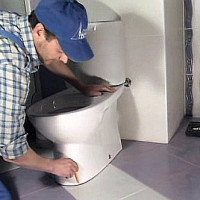 How to install a toilet on a tile with your own hands: step-by-step instruction + installation features
 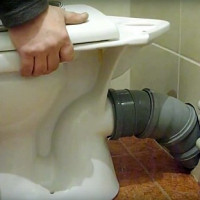 How to connect a toilet to the sewer: an overview of installation technologies for all types of toilets
 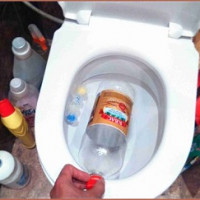 How to clean the toilet with a bottle: step-by-step installation + an overview of alternative methods
 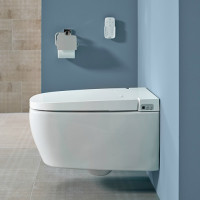 Electronic toilet: device, types + overview of the best models on the market
  How much does it cost to connect gas to a private house: the price of organizing gas supply
  The best washing machines with dryer: model rating and customer tips
  What is the color temperature of light and the nuances of choosing the temperature of the lamps to suit your needs
  Replacement of a geyser in an apartment: replacement paperwork + basic norms and requirements
In order not to spend a significant amount of money on the services of masters, most of the repair work in the bathroom was carried out independently. I can say from personal experience that the toilet can be easily changed yourself. I know about fixing with glue, but I prefer to use dowels more. This method is more practical. The only prerequisite is an even foundation, otherwise the water will not be flushed correctly, and the toilet itself will “walk”.
I always coped with the installation of plumbing myself, it turns out, already a lot of experience. I didn’t even know what it was called - “taffeta”, so I fixed the toilet with my mother-in-law, in her toilet some wooden panels on the floor. At home, it was fixed as standard, with dowels at one time. Then, after the repair, he installed the installation, so I had to suffer with it, it is difficult to align everything alone, a friend helped.