How to glue the curb onto the bath: analysis of laying rules + installation instructions

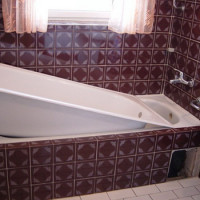
There is always a characteristic gap along the mating line between the side of the bathtub and the wall. Its size depends on the quality of the installation of the tank, the evenness of the walls, the features of the plumbing bowl. Regardless of whether this gap reaches a whole centimeter or a tenth of a millimeter, it freely passes water.
You must admit that it is not too pleasant to periodically or constantly conflict with neighbors from the apartment located below about the eternally flooded ceilings. But in order to avoid negative situations, it is enough to close the gap with a flexible or rigid border. It will hermetically shut off the pairing and effectively shape the perimeter of the bowl.
We will tell you in the finest details how to glue the curb onto the bathtub. For you, all the options for sealing and decorating the gap between the bowl and the wall, available for independent execution, have been collected and systematized. In addition to valuable recommendations, visual photo guides and video instructions are included.
The content of the article:
Choosing a border for installation
From which they just do not manage to close the junction between the bathroom and the wall - they use ordinary cement putty or glue plastic corners for a kitchen set.
But for these purposes specially designed:
- Flexible self-adhesive tape. It is used for temporary (one to two years) protection against moisture;
- Plastic corner. Designed for a much more durable service, which can be easily replaced when necessary - during the repair of a room, when replacing a bathtub or due to yellowing of the product itself.
- A border made of ceramic or natural stone. The most expensive option is used for solid repairs, serves as a reliable waterproofing.
In addition to the above products, often use polystyrene or polystyrene foam borders.But since they are not moisture resistant and are not intended to be installed on the sides of the bath, then there is no point in considering them further.

Option 1. Plastic corner for protection against moisture
Plastic curb is the most practical way to close the junction between the wall and the bathroom. The service life of this product is not too long, but this is easily offset by the fact that it is inexpensive, easy to install and dismantle.
It can be laid on and under tiles. On sale there are many options with different sizes, types of mounts, any colors and shades.

Option # 2. Ceramic border
Ceramic corner for the bathroom is often purchased complete with tiles or separately - their range is wide variety. Such a border provides reliable insulation of joints from leaks, has a long service life.

Among the advantages of ceramic borders, the following can be noted separately:
- aversion to yellowing;
- high mechanical strength;
- chemical resistance to detergents.
You can not lose sight of the curbs made of stone - marble, granite. They are used if this material has already been used in the interior, for example, for the production of a bathtub, washstand or as a decorative insert for wall lining.

The choice of material for the device of the ceramic border usually determines bath screen made of tiles.
Option # 3. Flexible tape for insulation of joints
Self-adhesive tape is the easiest way to protect the space behind the bathroom from leaks. It is a plastic tape with an adhesive on the inside, which is covered with a protective layer.
The tape corner does not pass water and is able to withstand dynamic loads during expansion and contraction.
Such an element can be considered a temporary measure, which sooner or later will require replacement, since the adhesive composition applied to them is not very high quality. In addition, when laying them, it is difficult to achieve accurate joints in the corners.

The selection of the option and method of arranging the joint between the plumbing and the wall should be oriented to the type of material the bowl is made of, view of the screen and wall decoration in a hygienic room.
General rules for laying a corner
Whatever material is chosen to seal the joints between the bathroom and the wall, there are several basic nuances of styling. Without them, it is hardly possible to successfully complete the installation and provide high-quality sealing.
Surface preparation for installation
Regardless of when and from which the corner for the bathroom is installed, it is necessary to carefully prepare the surface: clean it and degrease it. Without these preparations, it will be difficult to achieve a reliable grip of the border with the surfaces of the wall and bath.
First of all, they clean the side of the bathtub, removing dust, soap plaque, mold fungus. You can use liquid detergents, soda for this. Table vinegar or special chemicals will help to overcome fungal colonies.

Degrease the surface with soda or acid-based products (depending on the material). For a plastic border, it is better to use white spirit or gasoline - they do not dissolve plastic. Then the surface is washed with water and dried.
From now on, you can’t touch it with your hands. All work is carried out in rubber gloves and only with a clean sponge or washcloth - grease must not be allowed to enter the treated surfaces.
Application of adhesive
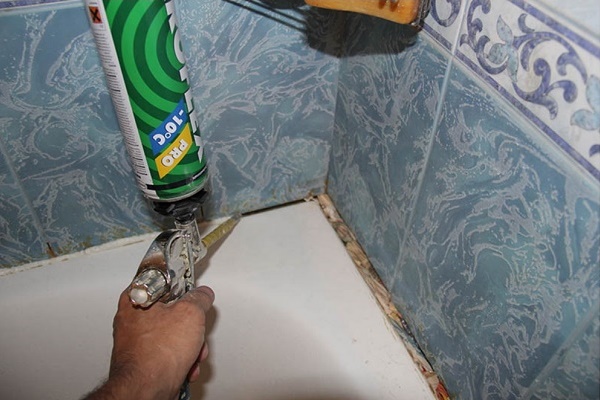
If the gap between the bathroom and the wall is large, then it must be repaired before proceeding with the installation of the curb itself. To do this, moisten the surface with water and generously fill it with waterproof mounting foam.
So that it does not stain the area on which the border will be laid, it is protected with masking tape. After applying the foam, it is lightly sprayed with water and left for a day until hardened. Next, excess material is cut with a sharp knife, tape is removed.

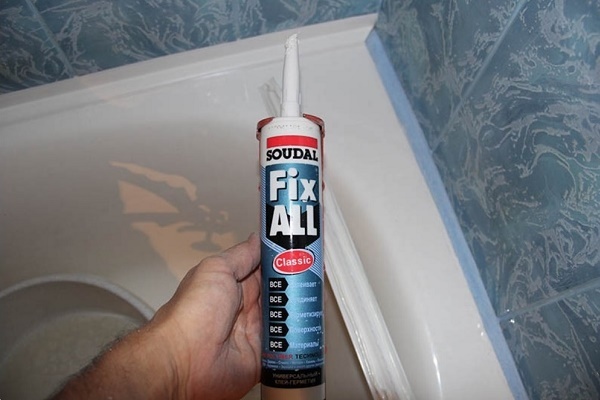
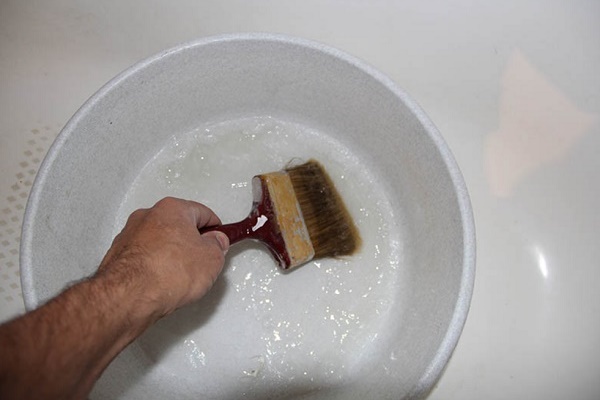
For laying the curb on the bathtub, if it is not a self-adhesive tape (although it can be further strengthened), use liquid nails, silicone or polyurethane foam. The main thing is that the adhesive is moisture resistant, because it will often be in contact with water.
For waterproofing cracks and joints, silicone sealant is used. It is best to use an agent with antiseptic and fungicidal additives that can resist the fungus.
You can use sealant for aquariums - it is the most water-resistant, does not mold, is relatively inexpensive and glues surfaces well, because it is even designed for the production of containers of several hundred liters.

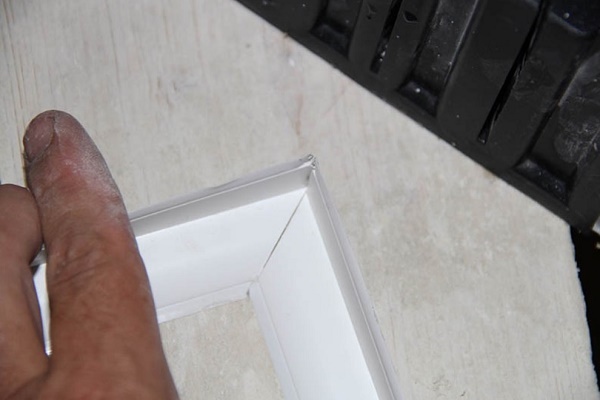
Before applying glue, it is necessary to measure the area, cut off the curb elements of the required size and attach to the installation site. Only if the joints and sizes converge perfectly, you can glue a piece of the corner.
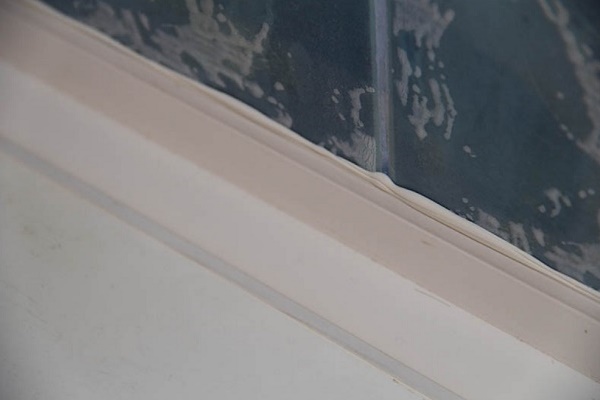
Apply the adhesive so that it fills with a thin layer the entire space between the curb and the surfaces. The glue should also fill all the bumps - the recesses at the joints of the tiles or plastic lining.
Particular attention is paid to corners. Remove excess and smooth the surface of the glue with a rubber spatula. An average of about one cylinder of silicone sealant per bath. But if there are large gaps and indentations, then two can be used.
Installation of a plastic corner
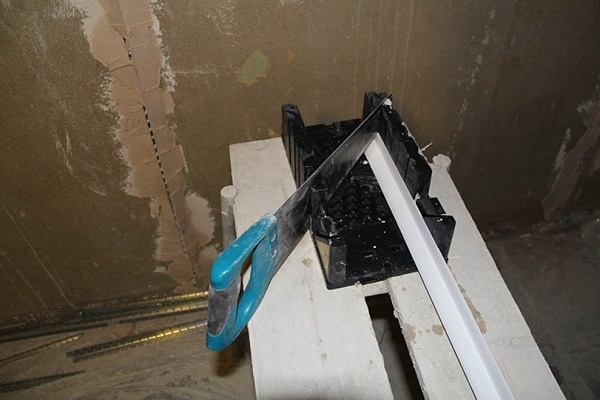
Laying a border, which is mainly used for arranging the perimeter acrylic bathstart from the corner. An element of a certain size is cut off, the angle is cut at 45 ° using a miter box and a hacksaw for metal. Immediately you can prepare the next segment and check the correctness of the joints and tight contact with the surface.
If the space between the bathroom and the wall was previously filled with foam, it may in some places interfere with the free fit of the curb. In this case, it must be trimmed.

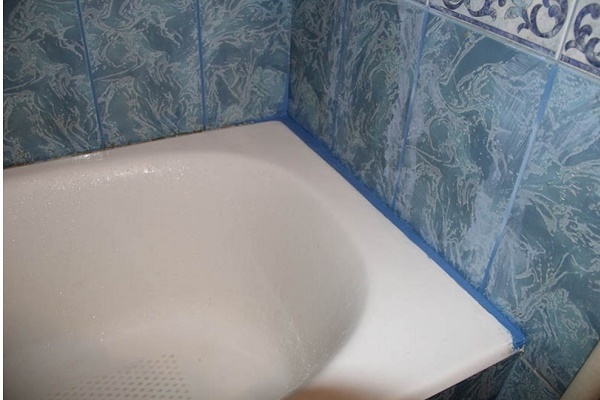
Holding the curb near the bathtub, glue over adhesive tape on top of it (2 mm higher) on the wall. The same is done from the bottom of the curb, on the sides of the bath, below 2 mm. This restriction will not allow silicone to stain surfaces.
Then, “liquid nails” or mounting foam are applied to the installation site and the corner is pressed in several places.
On long stretches, it is best to lay four hands.To hide the end of the corner, which ends with a bare cut, you can bend it down, preheating in hot water, and fix it with an adhesive.
Before installing a plastic curb along the interface line between the old bath and the wall, fill the gap, if any.
After eliminating the gap between the plumbing and the wall, you can safely proceed with the installation of the plastic border.
An additional layer of silicone is gently applied to the joints of the curb and wait for polymerization. Work with silicone sealant is carried out at a temperature of +5 ° C to +40 ° C. Hardening occurs within 24–48 hours.

Installation of a ceramic border
Despite the fact that many are frightened by the complexity of carrying out work on tiling, if you wish, you can still do without the help of professionals and carry out the installation yourself. Having studied the information on how to make a ceramic border in the bathroom, and proceeding to install it on the sides cast iron or acrylic containers, an understanding will come that there is nothing complicated in this matter.
What will be needed for styling?
Preparing the surface for laying a ceramic border on a laid tile is no different from the steps when installing borders from other materials. The corner over the cladding is set to “liquid nails”, the process itself is very similar to the installation of a plastic product.

Before starting work, they calculate and acquire material. Since when cutting tiles, it can crack, you need to take a little more than necessary. In addition to straight sections, you will also need corners and stubs.

For installation, you need to prepare a waterproof tile adhesive, sealant, grout. Of the tools, a special gun for applying foam, an emery bar, a spatula, a grinder will come in handy.
Phased job description
Ceramic curbs can be laid during wall cladding - or in other words “under a tile”. In this case, the next row of tiles can bend after laying the corner, or the top row can be laid out first, and only after, under it, a border is installed.
The termination work is carried out in the following order:
- Prepare tile glue. The proportions and cooking technology may differ for each brand, so follow the instructions.
- Installation starts from the corner and special corner elements are used for this. On the back of the ceramic billet, put so much glue with a spatula so that it fills the space under the curb and protrudes slightly upward. Excess glue is removed later with a spatula.
- Rectangular elements are pressed evenly to the surfaces, if it is necessary to slightly "drown" a side, tap on it with a rubber mallet.
- The next tile is laid in the same way. If you want to insert a smaller element, it is cut with the help of improvised tools. This can be a tile cutter, a grinder with a diamond disk, or a regular glass cutter (they glaze them and the tile breaks off evenly at the cut site). The cut site is ground with a bar.
- According to the technology, the next day it is recommended to moisten the still not completely frozen border so that the glue hardens correctly.
- After finishing the lining, until the glue is dry, wipe the tile with a damp cloth.
- When the glue under the curb sets, a waterproof grout or silicone sealant is applied to the seams. After that, the border is wiped again.
To protect the bath from accidental falling of heavy elements, it is covered with cardboard boxes (preferably over the entire surface). You can fix them with adhesive tape.
How to stick a flexible tape?
All work with a flexible self-adhesive border is carried out at a temperature of at least 10 ° C. Apply it mainly after steel bath installations or acrylic containers. The tape itself should not be stored at sub-zero temperatures. By purchasing it, they also pay attention to the shelf life - an expired product loses its adhesive properties.
The width of the product is selected depending on the size of the joint. After preparatory work on filling in the cracks between the bathtub and the wall, on cleaning and degreasing the surface, the dimensions are taken from the bathtub and the corners are cut 0.5-1 cm longer than the required length.

To close the joint in the bathroom using self-adhesive tape, perform the following actions:
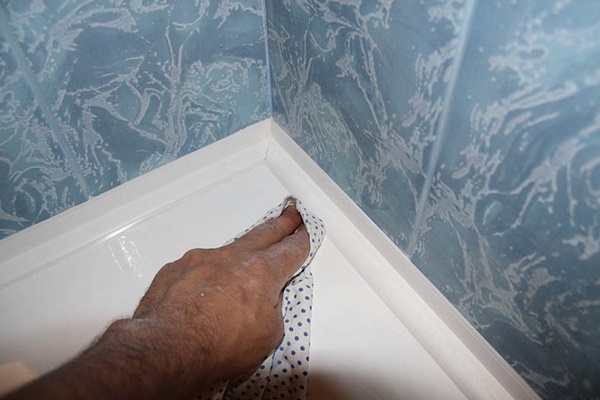
- The tape is bent along a longitudinal line, which is specially provided for this.
- Glue a flexible corner, gradually removing the protective film, starting from the corner. You do not need to immediately remove the entire film - a long stretch of tape will cling to the bathtub, and the adhesive coating will deteriorate. In order to better place the element, in the place of the longitudinal bend it is pressed with a flat object, for example, a spatula, trying not to damage it.
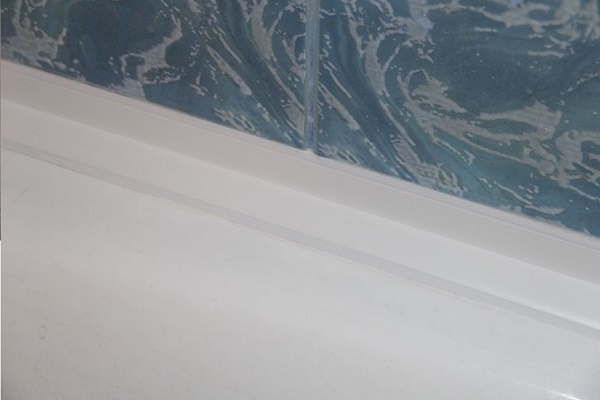
- Having laid a corner, they walk along once again, firmly pressing their hands to the bathtub. Do not iron the tape to prevent stretching. All the time you need to control the tightness of the fit, especially in places where the tile joints are deepened.
- The next segment also begins to be glued from the corner, superimposing it on the previous overlap. After the second element is securely fixed along the entire line, strips superimposed on each other are cut. A sharp knife, starting from the corner, lead the knife at an angle of 45 °, making a cut.
It takes 24 hours to dry the glue on the flexible tape.At this time, you can not use the bath and prevent water from entering the curb.

For better adhesion of the curb with the surfaces of the wall and the bath, after laying it is heated with a hairdryer and once again pressed along the entire length with your hands. In no case should you do this before laying, otherwise the tape will begin to stretch and deform.

The sequence of actions and installation technology can be seen in the section that describes the laying of the plastic border - they are completely identical.
Conclusions and useful video on the topic
Video # 1. How to install a plastic border:
Video # 2. A good example and a few nuances of installing a flexible self-adhesive tape:
No matter how well the joint is sealed and the steps of installing the curb on the bath are carried out, there is still the possibility of moisture penetrating into the pores or cracks. To prevent the development of the fungus, which will then be difficult to fight, you need to keep the corners clean and try not to miss its appearance. At the initial stage, it is easy to cope with it - it is enough to wipe the corners from time to time with ordinary table vinegar.
We look forward to your comments with stories about your personal experience creating a border or gluing tape around the perimeter of the bath. Your opinion is interesting, we will gladly take into account the suggestions and indications of defects in the text. Please comment in the box below.
 How to install an acrylic insert in the bath: insert installation instructions
  How to make a screen under the bath yourself: analysis of the nuances of installation
  How to make a mirror screen for a bath: step by step instructions
 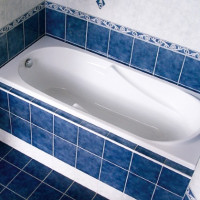 How to make a screen for a bathtub from a tile: methods of self-arrangement
 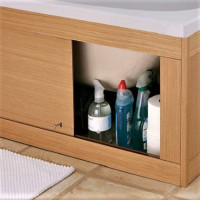 Sliding screen for the bath: step-by-step instructions for assembling the factory design + tips for craftsmen
  How to install a steel bath with your own hands: step by step instructions
  How much does it cost to connect gas to a private house: the price of organizing gas supply
  The best washing machines with dryer: model rating and customer tips
  What is the color temperature of light and the nuances of choosing the temperature of the lamps to suit your needs
  Replacement of a geyser in an apartment: replacement paperwork + basic norms and requirements
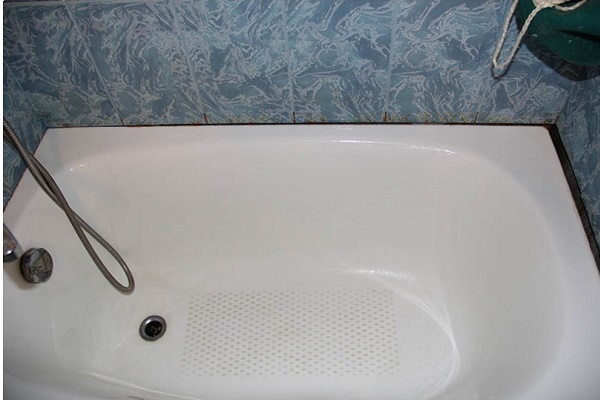
Personally, I prefer the ceramic border - it lasts a long time and looks great. But for those who plan to take plastic or flexible corners, I recommend that you carefully consider the choice of sealant. Do not buy the cheapest options. It is better to purchase material with fungicidal additives. In this case, the mold will appear much later, and the corners will last longer.
Guys, I’ll immediately emphasize that I’m a girl, so I’ll ask you not to explain in complicated terms right away) And now to the point. Workers glued such a border to me in the bathroom and at the junction of the wall and the floor, and at the junction of the two walls. The one between the wall and the floor keeps excellent, and the one between the walls that constantly disappears has been gluing itself 2 times already. Tell me what to do in this situation?
How long have workers done repairs in the bathroom? If several months have passed, and not years, then this is obvious hack that borders began to fall away. By and large, you need to call the company that was engaged in the installation, and ask to fix the defects. if there are no checks, then it is almost impossible to do, but still worth a try.
If you want to eliminate everything yourself, then in this case you will have to sacrifice comfort for a day. It is necessary to completely dismantle the curbs on the problem area, remove the entire adhesive layer, clean and degrease. Also recommend this videoto make it clear how the process is going. Here, the moment is shown in detail how to make a joint angle of 45 degrees - this is relevant for your case.
If this is difficult for you, then it is better to hire an experienced master so that he thoroughly remakes everything.
When they made repairs in the apartment, they placed a border around the perimeter of the bathtub made of ceramic elements, which they bought with tiles for decoration. I can say that this is the most aesthetically looking and durable option. In our rented apartment, the border was silicone, and after a year of operation it looked sad. It did not provide sufficient protection, and in some places mold began to form under this putty.