How to make a functional screen under the bathroom with shelves

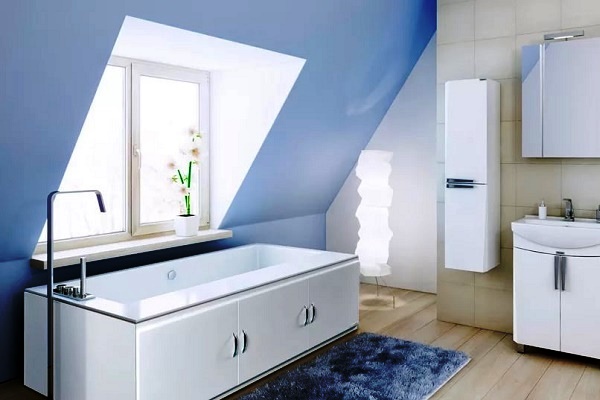
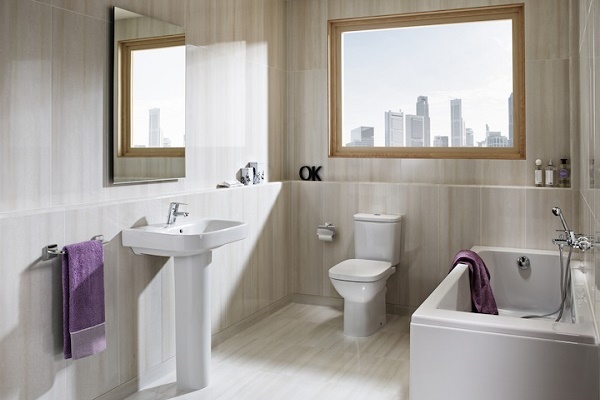
No matter how modern and modern the design of the bathroom is, the unaesthetic appearance of the sides of the bowl and the legs installed on the lining can reduce all efforts to nothing. The functional screen under the bathroom will help not only to mask unsightly communications, but also compactly place the little things needed in the household.
If you are doing repairs in the bathroom and are thinking how to ennoble the bowl, our material will help you solve this difficult question. Next, we will talk about what design options are and how to make them yourself, without resorting to the services of specialists.
The content of the article:
Design features of screens
The screen under the bath is an indispensable element of the interior for bathrooms that do not differ in spacious dimensions. After all, they make it possible to use space more rationally.
Opening cavities can have horizontal or vertical execution.
It is easy to place on them:
- household chemicals (gels and powders, fresheners and rinses);
- little things (sponges and cotton napkins for cleaning).
The packaging of most chemicals is rather cumbersome. Due to the concave shape of the bowl body, the free space between the walls can be filled with a drawer or spacious shelves. Boxes and bags with household chemicals of any size can easily fit on them.
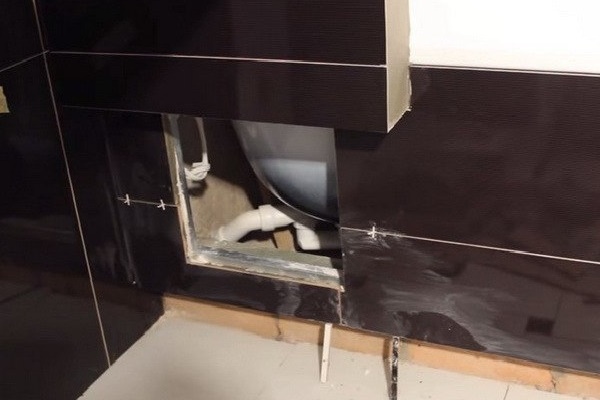
It will be easy to hide all communications behind the walls of the structure, protecting them from mechanical damage. Moreover, the installation of such a "screen" will not interfere with access to the pipes.
If necessary, it will be easy to remove.

Beautifully designed bath screen will make a great addition to any interior, giving it a touch of extravagance and unusualness.
Thanks to the variety of finishing materials, giving free rein to imagination, you can create an incredible design that will delight and surprise at the same time.

If it is not possible to make a sealed screen that does not allow water to enter the space bounded by the walls of the screen, it is necessary to provide ventilation. Everything that is hidden behind the external camouflage should dry out, and the condensate will erode.
Popular Options
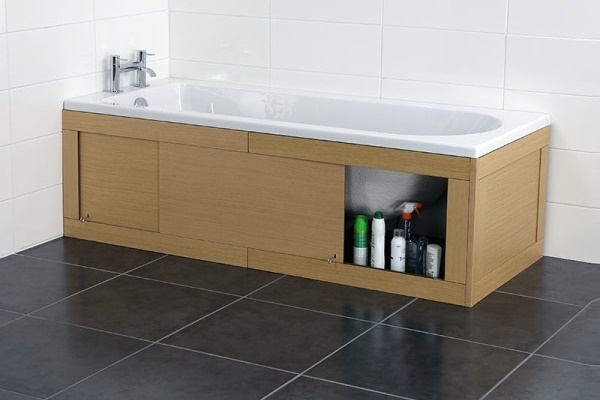
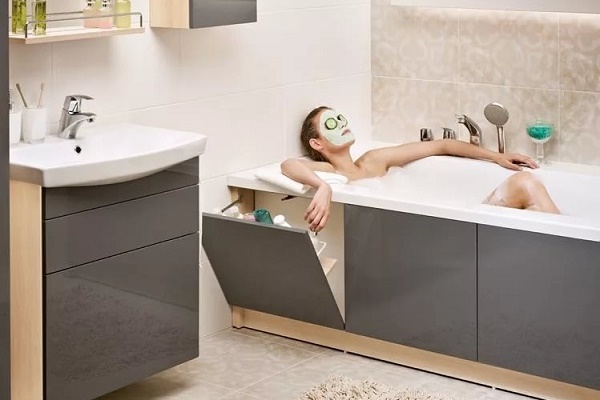
Modern screens are not just a blank wall covering the legs of the bowl and the communications laid between them. Almost all designs are equipped with at least one door for storing things and access to communications.
The choice of design depends on the size of the room, taste preferences and financial capabilities of the owner.
Solid tightly closing
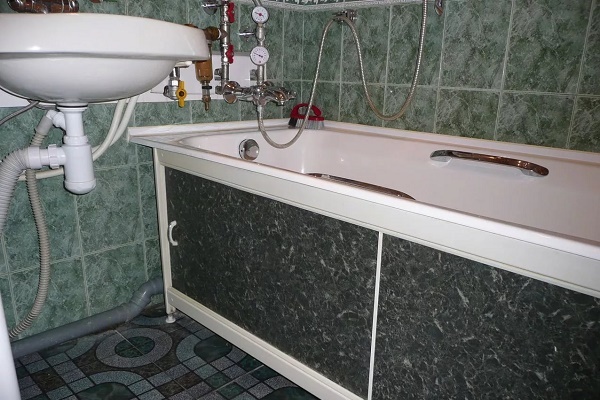
Solid screens, which are blind walls, cover all the excess space, hiding from the eyes the system of water and sewer pipes.
For this reason, when installing screens of closed deaf execution, you need to be sure that the piping is in perfect order. Solid walls should only be installed if plastic pipes are used that are not subject to corrosion.

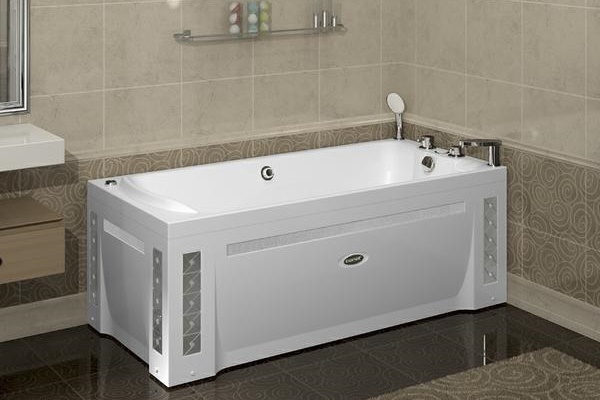
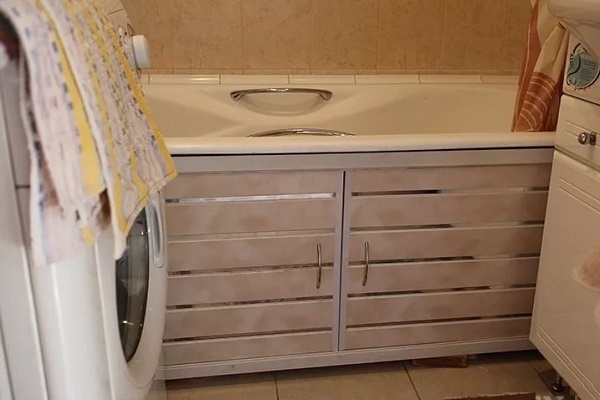
Swing Door Designs
Screens with swing doors are chosen for spacious bathrooms. Indeed, to open the doors at 90 °, additional free space is required.
Depending on the dimensions of the bath bowl, the screen can be equipped with one or two ergonomic swing wings.

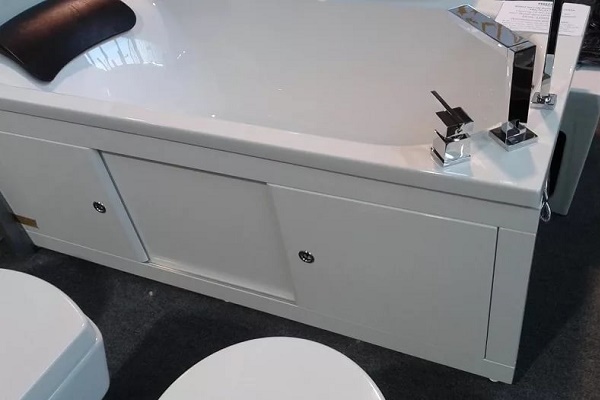
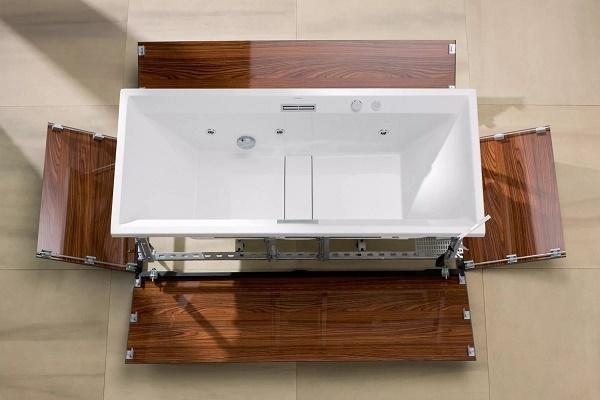
Sliding Door Systems
Screens with sliding doors owners of small bathrooms often choose. Indeed, to open the system does not require additional space. A convenient sliding system allows access to the farthest corners under the bottom of the bathtub.
Thanks to the guides, the doors move easily inside the system, providing a sliding effect of the “coupe” type. The only thing is that if dust and small objects get clogged, the movement of the doors is difficult.

Frame and sash material
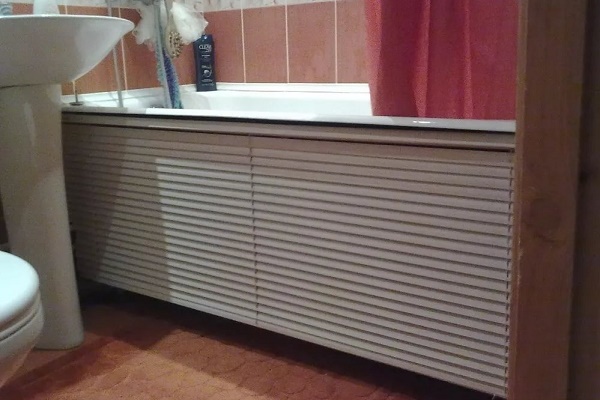
The basis for the manufacture of a screen for a bathtub with sashes or shelves can be any material: plastic and MDF, metal and ceramic tileglass and mirrors... The main requirement is that all materials used in the bathroom are not afraid of moisture and temperature fluctuations. In addition, they should not be susceptible to rapid destruction by mold or mildew.

But if you are an adherent of natural surfaces and screen doors you plan to make from the same tree, keep in mind - you will have to take care that moisture gets less on the panel. In addition, you will need to regularly air the room.
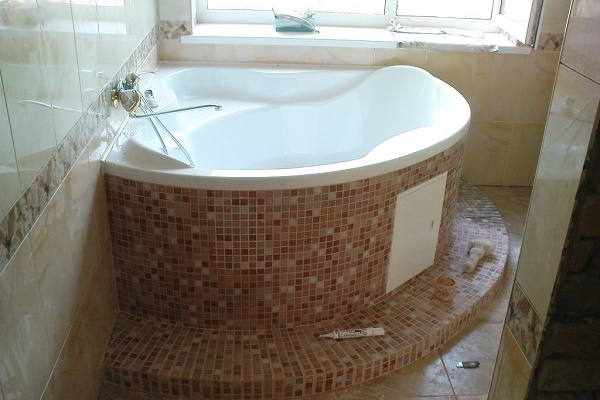
While some materials themselves have attractive properties, others require further decoration. For example, to drywall organically fit into the design of the bathroom, it is tiled with tiled mosaics.
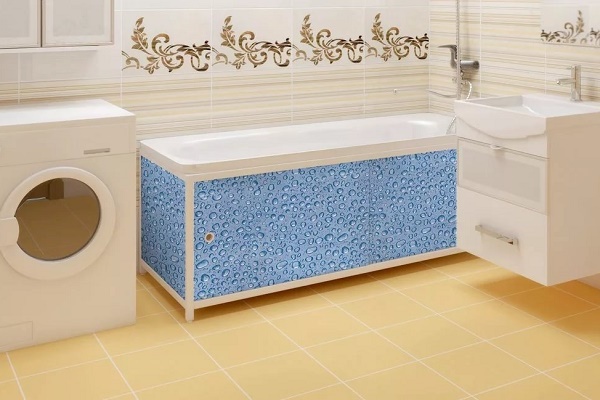
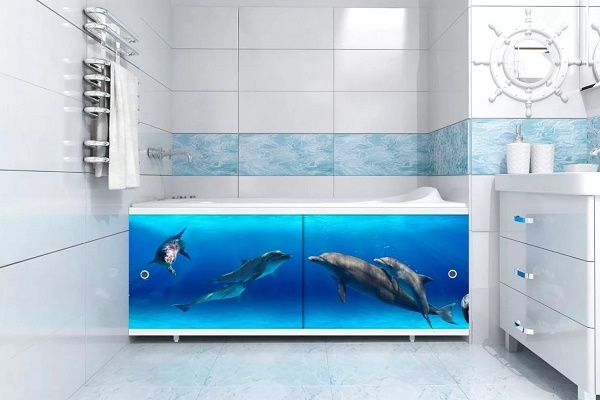
The easiest way to build a presentable and functional screen is to use plastic panels.

To eliminate contamination and plaque, you just need to wipe the surface with a damp cloth.
Do not like to search for necessary items and things for a long time? Install plexiglass panels. Organic glass, unlike its "ordinary" counterpart, is lighter and stronger, due to which it is widely used as a basis in the manufacture of interior items.

Do you prefer a non-standard way to isolate the space under the bathroom? An excellent solution in this case is a fabric partition made of nylon fabric. Covering the panels is not difficult to do on their own.
Drywall construction
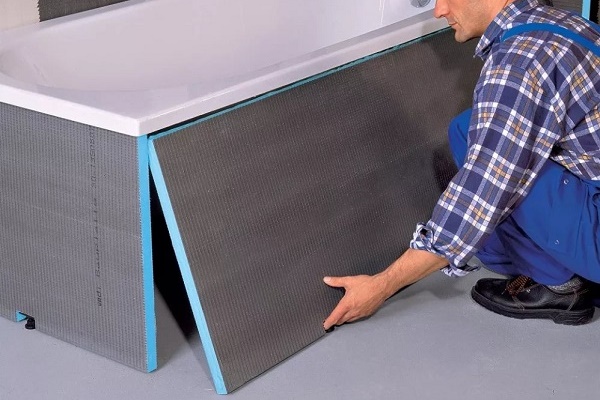
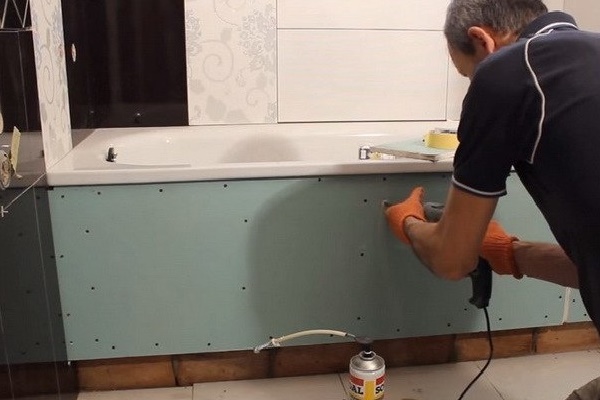
For construction screen in the bathroom moisture-proof drywall is ideal, attracting by its simplicity in work and affordable cost. The manufacturer of the functional design in the form of a box does not need special skills, moreover, in the construction market you can always get the materials necessary for installation.
The surface of the drywall box can be finished with mosaics, pasted with plastic or ceramic tiles, sheathed with any type of lining or other facing material.
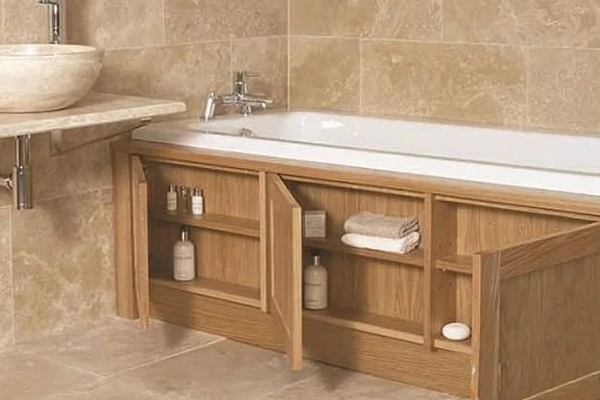
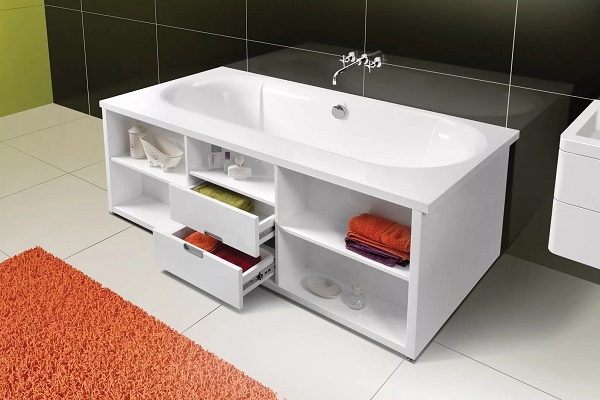
Making a screen for a bathtub with shelves
Making and installing the screen under the bath is not so difficult. If everything is done correctly, such a multifunctional design will last for more than one year.
Stage number 1 - preparation of the necessary materials
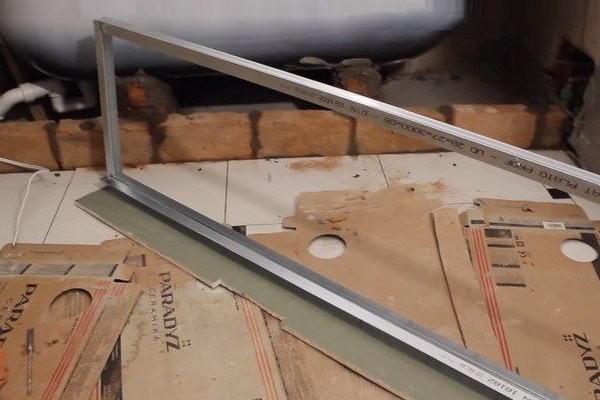
The wooden frame is made of a bar with a section of 40x40 mm or a reinforced metal profile PN 27 * 28.
The standard parameters of the sliding screen are: length 148 or 168 cm, the height, depending on the model, varies between 57-65 cm.
To carry out the work, it is necessary to prepare:
- a set of carpentry tools;
- building level;
- hammer drill;
- Bulgarian;
- sealant;
- polyurethane foam;
- "liquid Nails";
- construction knife;
- screws and screws.
When choosing the dimensions of the screws, focus on the thickness of the frame profile so that during the installation to eliminate damage to the bowl.

When planning to build a wooden frame, the wood blanks before installation should be coated in 2-3 layers with special impregnation. The primer will have a double effect: it will prevent the growth of microorganisms and protect the wood from moisture. In addition to wooden, you can build a frame from other materials.
If you want to build a screen from drywall, use moisture-resistant sheets for work. In places of likely contact with water, they need to be additionally treated with a water-repellent primer or putty.
Stage number 2 - construction of the frame structure
The main mistake made by some craftsmen is to make an error in determining the dimensions of the structure relative to plumbing, and also do not take into account the material of the bath bowl when constructing the support.
So, an incorrectly designed frame support can even raise a lightweight steel and acrylic bowl. As a result, at the first attempt to draw water under gravity, the structure simply deforms.
The construction of the frame is performed in the following sequence:
- The perimeter of the bath is marked.
- On the planned lines to the flooring with the help of dowels, the starting profile is fixed.
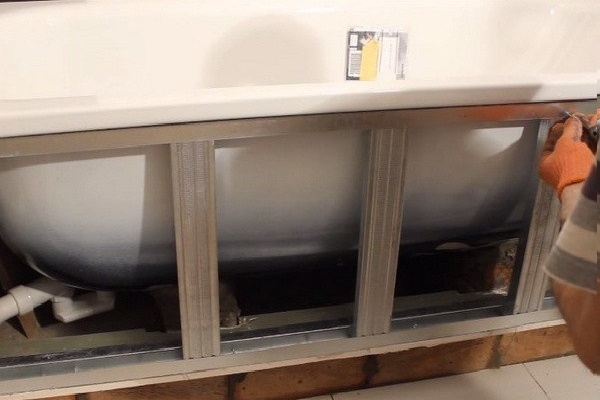
- Mount vertical profiles, maintaining an equidistant distance of 60 cm.
- In the lateral emphasis and places where they plan to place a box or equip a shelf, make an additional rack.
The projection of the frame to the floor is performed using a plumb line.

When planning a line for installing the frame, keep in mind that the finish also has a certain thickness. So, planning to veneer the screen with ceramic tiles, it is necessary to “drown” the frame to the depth of the finish layer.
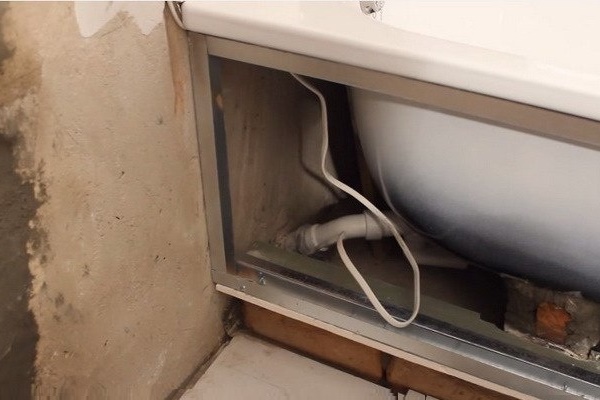
It is much more convenient to wash the bowl of the bathtub or wash the laundry in it, if there is a foot recess on the outside. To provide a recess for the legs, the frame can be deepened under the front edge of the bowl by 10-15 cm. The width of such a recess should be about 30-35 cm.
The starting profile laid along the line is screwed onto the screws, fixing both to the floor and to the adjacent walls. Around the middle of the height of the side posts, horizontal bridges are attached. They will give rigidity to the structure.

To create a tight junction with the floor and prevent the penetration of moisture, the lower edge of the laid profile is glued with sealant. In order not to damage the bowl with aggressive fittings, it is advisable to blow out the upper profile with foam.
If it is planned to install sliding doors, a guide profile is mounted on the upper and lower side of the frame. Its length must strictly correspond to the width of the opening. The profile is fixed so that there is no gap between the side wall and the rail.
Stage 3 - production of functional shelves
Built-in shelves can be built from chipboard panels left over from disassembled cabinets, the same drywall sheets or plywood.
To determine their location and calculate the size will help a sketch or drawing.

The width of the side shelves should correspond to the size of the niche formed between the wall of the room and the outer surface of the bottom of the bowl, minus the thickness of the bounding sections. When calculating, it is necessary to take into account the width of the metal profiles of the frame, which is at least 50 mm with a depth of 27 mm.
The dimensions of the frame and the filling of the structure are determined by the dimensions of the niche. But, the more even the walls of the opening, the easier it is to equip the built-in wardrobe.

Along the front wall from the floor to the side of the bowl, a series of low modules of one or two shelves can be arranged. When determining the number of shelves, be guided by the fact that the distance between them is sufficient for placement of high containers and bottles.
Having cut out the necessary fragments from the chipboard, proceed to the assembly of the structure. Connect the shelves of the cabinet in an open way. For this, the upper and lower panels are fixed with screws to the sidewalls. Before drilling the holes for the screws, it is advisable to perform a preliminary marking.

The option of installing shelves can be any. They can be fixed on furniture corners, laid on dowels or made removable by placing them on support rails. The back side of the structure can be left open, or cut it out of a thin sheet of MDF or plywood.
Stage 4 - drawer installation
The width of the drawer should be a couple of centimeters narrower than the internal width of the bounding sections. Otherwise, the retractable structure simply will not enter the housing.
For the manufacture of a drawer, guides will be required. Their length is selected based on the thickness of the walls of the box.
On sale there are two types of systems:
- samboxes - simple roller guides;
- tandemboxes - Advanced systems with a self-winder.
The simplest design of the drawer is when the side walls are inserted between the front and rear. Thanks to this solution, you can make the accessories invisible, and in addition there is no need to process the ends.

The dimensions of the bottom should be 1-2 mm smaller than the dimensions of the box box. Such an assembled design will be devoid of protruding ends.

The bottom of the box, most often made of fiberboard, is stuffed with nails of 20 mm in size and "reinforced" with 16x4 mm screws. When connecting parts, it is important to make sure that the diagonals are the same.
The roller system is mounted on the bottom edge: first thin on the drawer itself, and then thick on the bounding sections.

By installing and securing the guides, the system is put in its intended place.
Stage 5 - Installation of Lockable Sashes
Doors do last. They are cut from MDF sheets according to the size of the body. When planning to install hinged doors, you need to purchase two sangs in advance for the upper and lower parts.

Having established the "cup" of the loop, screw the screws. To attach the sash to the structure itself, the door is installed so that it does not extend beyond the edges of the hole made under it. Using the adjusting screws adjust the correct position.
When mounting the hinged sashes, it is necessary to achieve a result so that the edges of the sash and the ends of the wall coincide. The gaps should be the same along the entire contour.
Some models use magnets to fix the flaps. The wizard’s task is to unscrew the sash screw and adjust the location of the door so that the magnets coincide.
Covering the screen panels
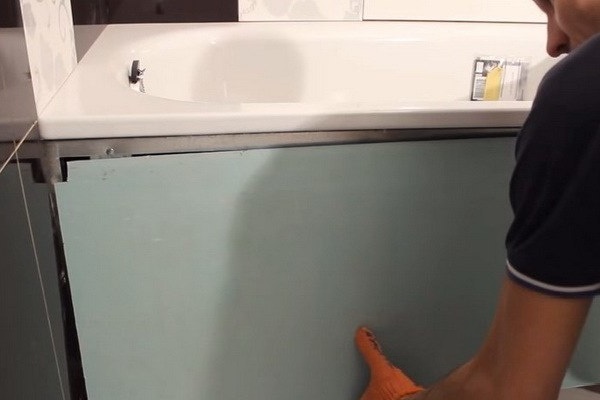
The cutting of plastic or MDF panels is carried out using a grinder or a construction knife. The blanks are cut according to the height of the screen. Plastic panels are attached to the bars of the frame on the "liquid nails".

When gluing pieces of panels to the upper profile, do not forget to leave enough space for the subsequent installation of the plastic baseboard. It is fixed on self-tapping screws designed to work with metal products, or glued with "liquid nails". The glue is applied by slightly pushing the wall back, and then sliding it into place.
To refine the joints, under the planks adjacent to the walls they also slip a plastic baseboard.
When working with drywall sheets, workpieces in height are made a couple of centimeters shorter. They are fixed, departing from the floor and the upper edge of the bowl one centimeter.

The blanks are fixed to the frame, "planting" them on the screws every 15-20 cm.
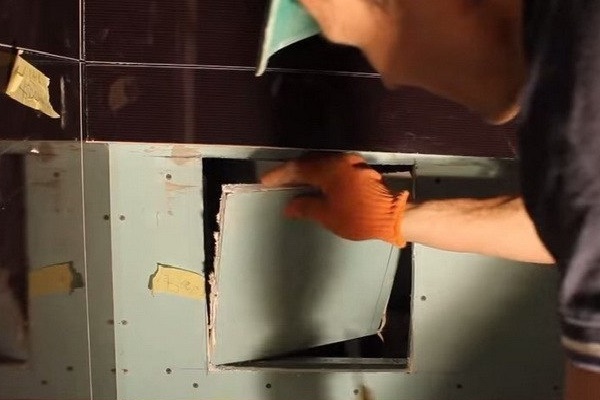
From the cut blanks of the panels, the surface of the screen is gathered. In the place where the technological hole is provided, a hole is cut.

Presented for sale plumbing hatches made of moisture resistant gypsum fiber sheet or aluminum. They are many times stronger than plastic analogues, and therefore are able to last several times longer.
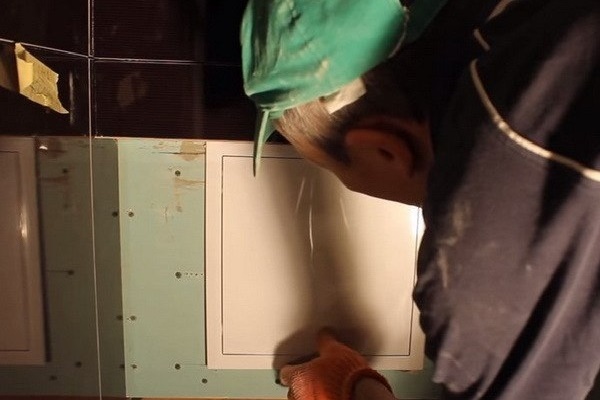
A worthy alternative to stationary structures are removable panels that are conveniently attached to the front wall of the screen with magnets.

As a result, it will be possible to decorate it with a grill, veneered with artificial stone or mirrors. Thanks to this, the hatch will harmoniously merge with the wall, becoming invisible.
Conclusions and useful video on the topic
We make a screen for a bath with a niche for the legs:
How to assemble a drawer:
A bath screen with shelves is a practical solution. In terms of spaciousness, it is not inferior to built-in cabinets, but it does not occupy space in the bathroom at all.
Still have questions, discovered inaccuracies or have valuable information to help supplement our material? Please leave your suggestions, ask questions in the block located at the bottom of the article.
 How to make a mirror screen for a bath: step by step instructions
  How to make a screen for a bathtub from a tile: methods of self-arrangement
 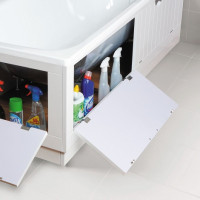 How to make a screen under the bath yourself: analysis of the nuances of installation
 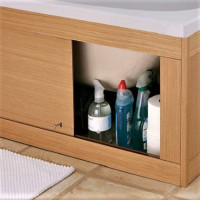 Sliding screen for the bath: step-by-step instructions for assembling the factory design + tips for craftsmen
 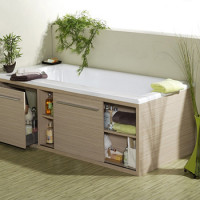 Bathroom Screens: Types, How to Choose the Right One, Which is Better and Why
  Home Acrylic Bath Care: Useful Tips
  How much does it cost to connect gas to a private house: the price of organizing gas supply
  The best washing machines with dryer: model rating and customer tips
  What is the color temperature of light and the nuances of choosing the temperature of the lamps to suit your needs
  Replacement of a geyser in an apartment: replacement paperwork + basic norms and requirements
He himself faced the same problem in his country house, it was necessary to make small places for storing household chemicals under the bathroom. I did not think long - I just laid the tile in the center on the basis of drywall, and made small doors on the sides. I think that it turned out pretty well for the summer residence, but it was possible to come up with and build something better. In general, the main thing is to start, since you can always redo it)
Can I install solid structures that close tight if I do not have plastic pipes, but there are no signs of corrosion on them? And from what material, except plastic, is it best to make structures? Please tell us in more detail the pros and cons of drywall and plexiglass, which is more practical, what are the prices of these materials?
I categorically do not recommend mounting bathroom screens in such a way that you will not have quick access to communications.In the event of a breakdown that may occur, you will have to destroy all contraction.
If solid structures provide access to communications, then mount in this way. Also, remember that ventilation holes may be needed. They are needed to ensure normal air circulation in the duct, which is formed after mounting the screen. If there is no normal air circulation, fungus or mold may start.
Regarding materials. Drywall in this regard is the best option in terms of price / quality. The only thing that may require waterproofing of this material. For example, using a special waterproof coating Ceresit CP 30 Aquablock.
If you use plexiglass, then this design "will fly a pretty penny", but from a design point of view it will look much better.
Hello. As for GKLV, its advantages are not only in cost. From drywall, you can bend and create almost any design. In particular, it makes a beautiful screen with niche shelves that can be made of any configuration, even with original triangles or classic squares / rectangles.
Another GKLV screen can be covered with tiles / mosaics, painted in almost any color, glued to it with an inexpensive false panel, such as those used on kitchen aprons with a plot, ornament, and so on.
Yes, isolation will need to be taken care of, but overall, this is great material. In my bathroom, an ingenious decorative fireplace is made of it. On either side of it are functional shelves, and in the fireplace itself are romantic candle lights.
When screen constructions, it is necessary to provide access to communications. The screen creates a confined space with high humidity. So there is a high probability of corrosion.