Ceiling outlet under the chandelier: instructions for installing the outlet on the ceiling

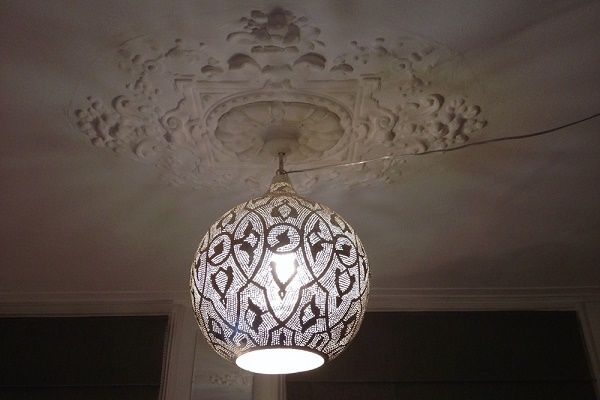
One of the most spectacular ways to decorate a chandelier at the connection point is a ceiling socket, which allows you to create a fabulous ceiling lighting fixture. She perfectly hides electric wires, mounting clips and hooks. But you do not know which model to choose, how to install and fix it?
We will help you understand these issues. Based on our recommendations, the best ceiling socket for a chandelier will be with you. The article discusses the popular models implemented by the modern market.
We suggest that you familiarize yourself with step-by-step instructions for installing and fixing sockets of various materials with visual photos of each step. We will also tell you what installation features should be taken into account when connecting. The article is equipped with video tips for choice, the intricacies of decor and installation on their own.
The content of the article:
Ceiling Outlet Options
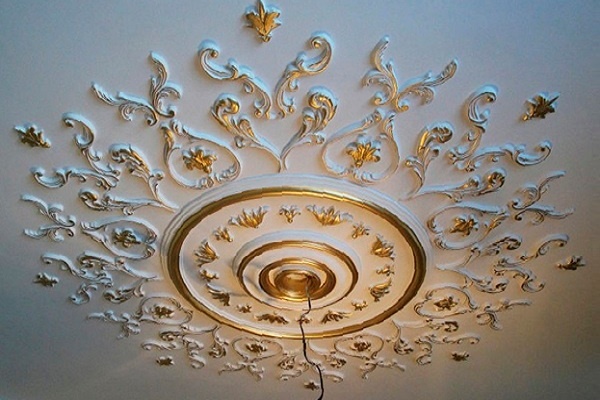
The ceiling socket is a monolithic or fixed to the substrate prefabricated structure, which closes the unsightly place of attachment of the chandelier to the surface and the connection point of the electrical wires leading to it.
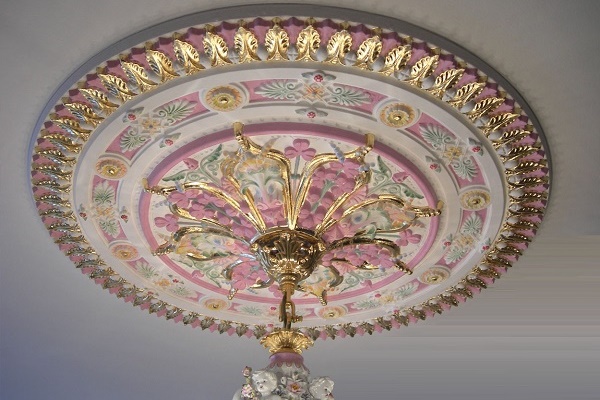
The concept of "outlet" is borrowed from the French. At the dawn of their appearance, ceiling models looked like symmetrical stylized flowers or wreaths of greenery with leaves diverging diametrically from the center.
Today, the choice of options for textures and color design is much wider. It can be heraldic ornaments, geometric patterns, abstract compositions with an unassuming drawing that perfectly fit into modern style decisions.
Their shape can be very diverse:
- round;
- oval;
- square;
- polygonal;
- with curved edges.
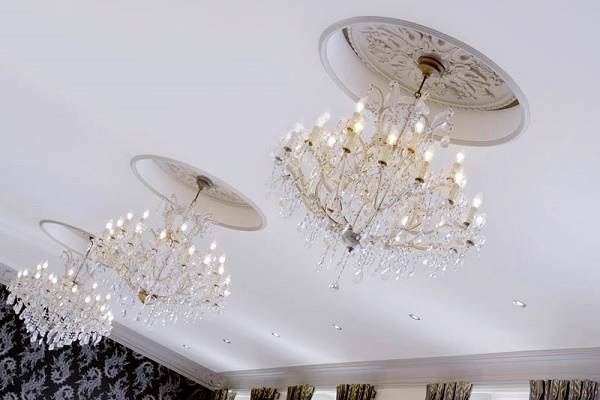
If in earlier times such functional decorative elements were used exclusively for decorating ceilings, today they are often used to decorate side lighting.

Using several small outlets of different sizes, but with a similar repeating pattern, it is convenient to make original installations.
The main types of connection points
Stylized sockets can combine perfectly with cornices, borders and fillets, acting as a worthy addition to the interior, or to take on the role of a bright accent of decor.
No. 1 - classification of products by type of material
The first models of ceiling outlets were made mainly of gypsum, less often of wood. On centuries-old traditions, the production of modern gypsum products is also built. The only difference is that special modifying additives are used to improve the ductility of the material.

Sockets made of gypsum are famous for their excellent technical characteristics. They are "indifferent" to the effects of the environment and do not require serious care. Synthetic products are equally popular: polyurethane and foam sockets on the ceiling.
The synthetic polymer is resistant to deformation under the influence of temperature changes, so that the sockets made from it can be installed in unheated and humid rooms.
The main advantage of polymeric materials is lightness, which greatly simplifies the installation process. But they do not have such a clear picture detailing as gypsum models.

The only drawback of polymer products is their short service life. Five years later, they begin to turn yellow. The defect can be eliminated only by applying a new coat of paint, or by completely replacing the element that has lost its presentability.
A separate niche in the market is occupied by products having the texture of a noble stone, for example, marble.
Models made of natural material are used to implement traditional architectural forms that were inherent in royal castles and palaces in a modern interior.
No. 2 - division into types according to the installation method
Depending on the installation method, they emit:
- Overhead sockets for masking electric points are products with a smooth base on which decorative elements are located.
- Mortise Models represent patterns laid out on a substrate, which, upon completion of installation, are perceived together with the ceiling surface as a single unit.
Mortise models before overhead counterparts benefit in that due to the invisibility of the joints they look like a natural extension of the ceiling.
No. 3 - for decorative design
Depending on the decoration, there are two types of ceiling sockets:
- Profile models with a smooth surface. They are made on the basis of a stretched profile and are a shape that includes several flat miscellaneous geometric shapes inscribed in each other.
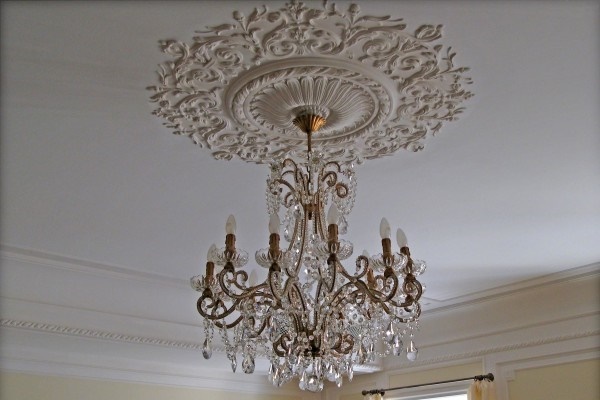
- Sockets with stucco and embossed shapes. In models of this type, individual parts and decorative elements adorn the smooth base of the product.
By installing an electric point decorated with many elements, you can construct a three-dimensional picture or lace ceiling under the chandelier. A beautifully decorated stucco molding easily conceals all the errors and imperfections in the design and layout of the room.

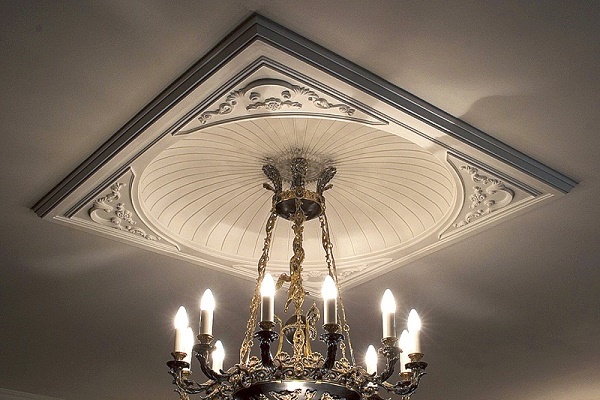
Often found on sale and dome type sockets. They have a concave shape. But such models are mounted only in suspended structures, thereby creating the illusion of vast space and improving the acoustics of the room.
Concave ceiling rosettes in the form of a square, rhombus or rectangle look interesting. Such designs are called caissons. They are mounted as a cassette ceiling.

Model selection criteria
Choose the outlet on the ceiling in accordance with the dimensions of the lighting device. Ideally, the boundaries of artificial stucco should not extend beyond the projection of the chandelier. The choice of a functional element of decor depends on the area of the room and the height of its ceilings. So, for rooms with an area of 15 squares and above, it is worth choosing models with a diameter of 40 cm.
But even when choosing small stucco moldings of small sizes, it is worth giving preference to products with a clear detailed drawing. Detailing the ornament will create the desired effect and draw attention to a small but expressive element of decor in a small area.

In addition, the outlet should be in harmony with the rest of the decor elements used in the design of the walls and ceiling.
The choice is determined by the ultimate goal of the created room style:
- Wooden sockets perfect for decorating living rooms and hallways in houses made of timber or log house. They will harmoniously combine with a wooden staircase and other elements of the interior decoration made of the same natural material.
- Styrofoam and polystyrene sockets Suitable for interior decoration in modern styles, for example, hi-tech, modern or art deco. They are very paintable, easily taking on the luster of all applied coating layers.
- Plaster and marble chips rosettes will look spectacular in rooms with high ceilings. They often appear as a kind of symbol of luxury and wealth, emphasizing the exclusivity of the design.
Products used for decorating the ceiling are selected from the same type of material, remembering that, for example: gypsum stucco molding against the background of the same foam baguettes looks tasteless.

Connection Point Installation Technology
Plaster ceiling sockets do not require the installation of an additional mounting system. The main thing is to ensure the reliability of fixation.
To install the ceiling outlet under the chandelier, you need to prepare:
- plastic choppers;
- couplings;
- drill bit;
- self-tapping screws;
- a screwdriver;
- pliers;
- gypsum mortar;
- small spatula;
- insulating tape;
- container for mixing the solution.
A metal hook or standard mounting bracket is required to suspend the light from the ceiling.

When carrying out work, you will also need a stable stepladder or table that can support the weight of an adult. Do not use stools mounted on top of each other as a stand. This can be a health hazard.
Stage # 1 - preparatory work
Before starting installation, it is necessary to de-energize the room by turning off circuit breaker corresponding lighting and power branches in the distribution panel. To make sure there is no voltage in the network, you need to touch the screwdriver-indicator to the output ends of the wires. It should not glow.
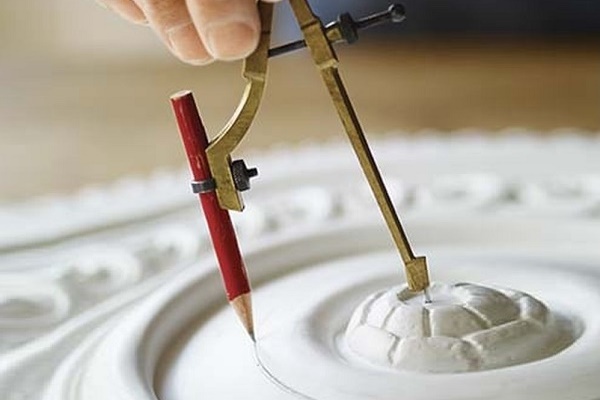
After that, by attaching the outlet itself to the surface, the ceiling is marked.

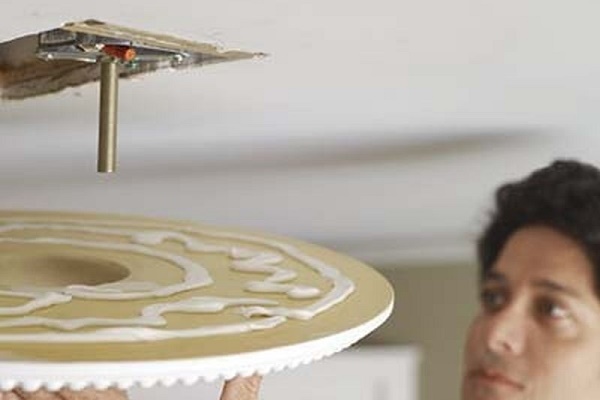
To install the hook in the intended place, first use a drill bit to make a hole with a depth of 7-8 cm. A plastic chopper is buried in it so that it fits snugly against the walls, and then a metal hook is screwed.

To attach the mounting strip, it is first applied to the installation site so that it does not interfere with the wiring, and mark the points of the holes for the dowels.
When planning to suspend a massive chandelier, we recommend using a cross-shaped mounting plate. It has a larger coverage area and a larger number of holes for fixing to the ceiling.

A correctly fixed mounting plate will guarantee the reliability of the mounting of the installed lighting fixture.
Stage # 2 - electrical cable routing
For mounting internal wiring a groove is made in the ceiling surface using a chamfer or ordinary chisel. The electric wire is placed in a special casing, which will subsequently be closed during the finishing work.
If necessary, increase the wire, use heat-shrink tapes or special couplings.
The connection of the wires is performed in one of the ways:
- Using couplings. The wires emerging from the ceiling are inserted into the couplings and fixed with bolts.
- By twisting the wires between themselves. But it is worth considering that such a twist oxidizes over time, as a result, sooner or later it will start to warm up.
When connecting the ends of the electric cable, it is important to comply with their correspondence - connect the same type of wire in pairs.
Identify cable accessory will help polymer insulation color. The phase wire is usually hidden in red or brown insulation, the neutral wire in blue or blue, and the ground wire in a yellow-green sheath.

Some novice masters connect electrical wires between themselves by bending their ends into hooks. But in order to obtain a strong connection and create normal contact, the bare ends of the electrical cable must be twisted or soldered.
After installation is complete, bare wire sections are necessarily insulated with high-quality insulating tape.
How to connect a ceiling light to a two-gang switch is described in detail in one of popular articles our site.
Stage # 3 - fixing the gypsum base
To fix the base from the wrong side, a gypsum solution is applied to it. It is easiest to evenly distribute the solution over the surface with a spatula.

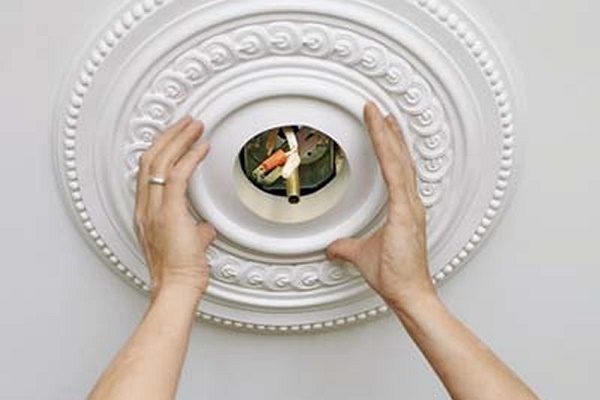
The base with the applied solution is pressed to the surface and fixed in this position for several minutes until it acquires the desired strength. For fixing, you can use a backup. To minimize damage to decorative relief elements, soft rags are placed under the support.
If it is necessary to suspend a massive product, for additional fixation use self-tapping screws 10 cm long. They are screwed at 6-10 points at an equidistant distance. When screwing in the screws, they try to deepen the cap so that subsequently it is easy to mask it with gypsum mortar.
Features of the installation of mortise sockets
To fix the mortise socket, the base of the product is applied to the surface and marks are made along the contour with a pencil.

All potholes and cracks formed during the felling process, it will not be difficult to seal gypsum mortar. To fix the gypsum elements on a reinforced concrete base, use screws supplemented with wire winding.
To fix heavy structures, fastening systems are used, referred to as nags. The place for installation of the nags should be smooth, devoid of relief ornaments.
The work is performed in the following sequence:
- For mounting fasteners, through holes are drilled in the socket, and grooves 15 mm deep are made in the front of the product.
- Screws are screwed through the holes made.
- Pieces of galvanized wire are screwed to the hats of the screws so that the "mustache" diverges in different directions.
- The installed structure is covered with a layer of gypsum mortar.
- The "mustache" diverging in two directions is brought into the holes and fixed. Excess wire is cut off. The grooves are covered with gypsum solution.
The number of such nags is determined based on the weight of the outlet and the design features of the ceiling itself.

To avoid corrosion, it is advisable to coat the cut ends of the wire with a layer of varnish. The gaps between the installed outlet or ceiling base are filled with gypsum mortar. Furrows formed after solidification of gypsum can be easily eliminated by sanding them with sandpaper.
Fixing polyurethane products
Ceiling rosettes made of polyurethane foam are fixed to the base with glue. For work, they use "liquid nails" or a special glue created for stucco molding from polyurethane foam.
The ceiling itself at the installation location of the outlet is covered with a primer layer of deep penetration. It is quite easy to work with polyurethane foam products. Soft material is easy to cut and comfortable to fix on the surface.

The diameter of the hole is made small so that the fastening system is completely closed by a cap. The stucco molding is carried out after the primer has completely dried. To do this, polymer glue is applied on the reverse side of the base with a uniform layer.
Stucco molding, with a hook and an electric wire drawn through the hole, is applied to the ceiling. To ensure adhesion at the time of glue hardening, the stucco should be pressed as tightly as possible to the surface. The excess glue that protrudes around the edges should be immediately removed with a brush moistened with water or a cotton towel.
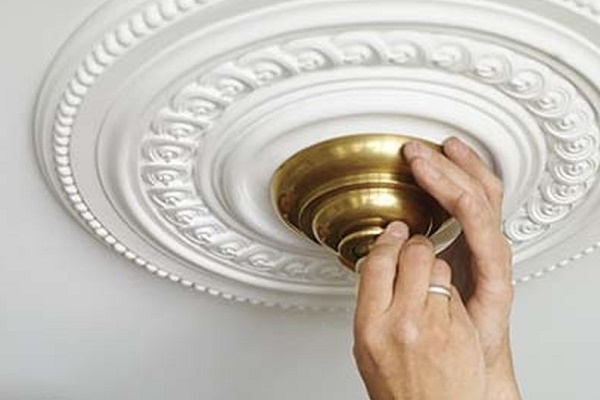
After the glue hardens, the chandelier is suspended on a mounting plate or hook. The wires are connected in one of the above ways.
Strength Testing
Before hanging the chandelier, it is necessary to check the quality of the fastening of both the hook and the ceiling socket itself. For this, a load is hung on gypsum moldings, the weight of which is gradually being increased.
The design must support a load whose mass is approximately equal to the weight of the installed lighting fixture.
If during a 10-minute test, as the load weight increases, the structure does not move and does not move away from the ceiling, then the mount is solid.
Conclusions and useful video on the topic
Video # 1. Stages of installing plaster moldings:
Video # 2. Plaster cast socket:
Video # 3. Design options for ceiling outlets:
The installation technology of prefabricated ceiling sockets, including several connection points, is no different from the usual installation. Difficulty can arise only when stripping seams to maintain a single plane of the decor elements assembled in the composition.
We are waiting for your stories about how you installed the ceiling socket yourself. Perhaps you had questions while reading the article or want to comment on the information we provided? Please leave comments in the feedback box below.
 How to connect a chandelier to a two-gang switch: step-by-step instruction
 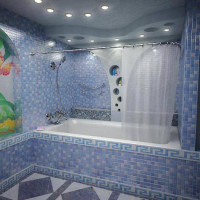 Lamps in the bathroom on the ceiling: types, placement principles, installation nuances
  Assembly and installation of the chandelier: detailed instructions for installing and connecting with your own hands
 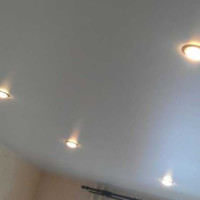 Installation of spotlights in the ceiling: installation instruction + expert advice
 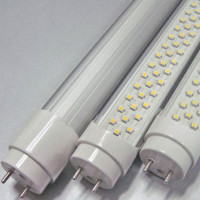 Replacing fluorescent lamps with LEDs: the reasons for the replacement, which are better, replacement instructions
  How to disassemble a light bulb: instructions for parsing various types of lamps
  How much does it cost to connect gas to a private house: the price of organizing gas supply
  The best washing machines with dryer: model rating and customer tips
  What is the color temperature of light and the nuances of choosing the temperature of the lamps to suit your needs
  Replacement of a geyser in an apartment: replacement paperwork + basic norms and requirements
With the guys here all spring and all June they went on apartment renovations. I’ll tell you that these types of sockets, with various forms, especially with artificial stucco molding and additional decorations, have been met only once. And then in a person’s apartment with a very mixed taste. From a 3-room apartment I tried to make the Hermitage for a salary, i.e. It’s clear what the quality of execution and “decor” are. However, he noticed at the same time that very, very many people began to use LED simple lamps and, oddly enough, LED strips for lighting apartments, especially young people. Even a year ago, I had not noticed such a trend.
And how to pull out this very hook? He’s in my hole in the ceiling. Down does not climb out, as shown in the picture. The chandelier is light, stupidly hanging on it, not closing the hole. A terrible sight. Each time you wipe or touch the chandelier, it sways and the light flashes. I try not to breathe on her at all. I would not want to drill anything, the ceiling after repair. The option for liquid nails is appropriate? What other mounting method is there?
Good afternoon, Nikolai. Such hooks usually have lateral folding diverging elements. When the hole is drilled, the elements fold and do not interfere with the passage of the suspension device. Then they are laid out by the action of a screwdriver.
Some hooks are suspended on the transverse axis, which is previously laid on the hole on the inside of the hole. The first option is more practical.
Some chandeliers are equipped with patch strips with fasteners. There is no need to drill / hollow the ceiling under them, but there will still be a hole passing through the wires. Screenshots of the suspension options attached.
This, of course, is all very beautiful and looks incredibly expensive. But I suffered with this for quite some time. Since the work is very laborious, it requires at least a little preparation and experience in this part of the finish. When they installed it all in the living room, I had to ask the help of the master. But everything turned out so luxuriously that in the room I wanted such a chandelier. I already did everything myself, it turned out great)